Ricoh Priport HQ7000 Network Guide - Page 39
NDS mode, File Server Name, NDS Tree, NDS Context, Next >, Queue Volume, Finish
 |
View all Ricoh Priport HQ7000 manuals
Add to My Manuals
Save this manual to your list of manuals |
Page 39 highlights
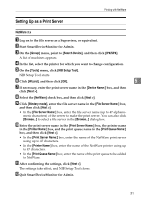
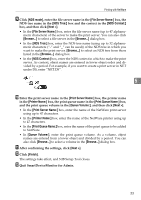
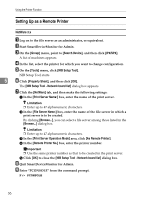
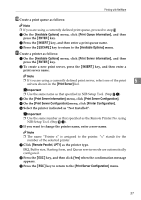
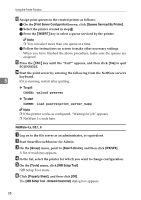
Printing with NetWare I Click [NDS mode], enter the file server name in the [File Server Name:] box, the NDS tree name in the [NDS Tree:] box and the context in the [NDS Context:] box, and then click [Next >]. • In the [File Server Name:] box, enter the file server name (up to 47 alphanu- meric characters) of the server to make the print server. You can also click [Browse...] to select a file server in the [Browse...] dialog box. • In the [NDS Tree:] box, enter the NDS tree name (using up to 32 alphanumeric characters ("-" and "_" can be used)) of the NDS tree in which you want to make the print server. [Browse...] to select an NDS tree from those listed in the [Browse...] dialog box. • In the [NDS Context:] box, enter the NDS context in which to make the print server. As context, object names are entered in lower object order and divided by a period. For example, if you want to create a print server in NET under DS, enter "NET.DS". 5 J Enter the print server name in the [Print Server Name:] box, the printer name in the [Printer Name:] box, the print queue name in the [Print Queue Name:] box, and the print queue volume in the [Queue Volume:], and then click [Next >]. • In the [Print Server Name:] box, enter the name of the NetWare print server using up to 47 characters. • In the [Printer Name:] box, enter the name of the NetWare printer using up to 47 characters. • In the [Print Queue Name:] box, enter the name of the print queue to be added to NetWare. • In [Queue Volume:], enter the print queue volume. As a volume, object names are entered from a lower object and divided by a period. You can also click [Browse...] to select a volume in the [Browse...] dialog box. K After confirming the settings, click [Next >]. L Click [Finish]. The settings take effect, and NIB Setup Tool closes. M Quit SmartDeviceMonitor for Admin. 33
-
 1
1 -
2
-
3
-
4
-
5
-
6
-
7
-
8
-
9
-
10
-
11
-
12
-
13
-
14
-
15
-
16
-
17
-
18
-
19
-
20
-
21
-
22
-
23
-
24
-
25
-
26
-
27
-
28
-
29
-
30
-
31
-
32
-
33
-
 34
34 -
 35
35 -
 36
36 -
 37
37 -
 38
38 -
 39
39 -
 40
40 -
 41
41 -
 42
42 -
 43
43 -
 44
44 -
45
-
46
-
47
-
48
-
49
-
50
-
51
-
52
-
53
-
54
-
55
-
56
-
57
-
58
-
59
-
60
-
61
-
62
-
63
-
64
-
65
-
66
-
67
-
68
-
69
-
70
-
71
-
72
-
73
-
74
-
75
-
76
-
77
-
78
-
79
-
80
-
81
-
82
-
83
-
84
-
85
-
86
-
87
-
88
-
89
-
90
-
91
-
92
-
93
-
94
-
95
-
96
-
97
-
98
-
99
-
100
-
101
-
102
-
103
-
104
-
105
-
106
-
107
-
108
-
109
-
110
-
111
-
112
-
113
-
114
-
115
-
116
-
117
-
118
-
119
-
120
-
121
-
122
-
123
-
124
-
125
-
126
-
127
-
128
-
129
-
130
 |
 |
