Samsung GT-N8013 User Manual Ver.1.0 (English(north America)) - Page 76
Multiscreen, Adding Additional Email Accounts, Wi-Fi, Previous, Activate, Settings
 |
View all Samsung GT-N8013 manuals
Add to My Manuals
Save this manual to your list of manuals |
Page 76 highlights
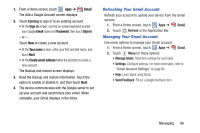
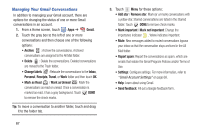
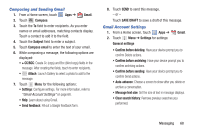
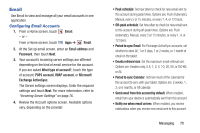
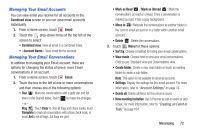
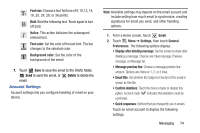
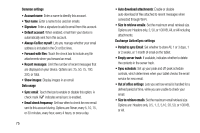
• Sync email: When enabled, email from your account is synchronized with your device's email. • Sync Contacts: When enabled, contacts from your account are synchronized with your device's Contacts. • Sync Calendar: When enabled, events from your account are synchronized with your device's Calendar. • Sync task: When enabled, tasks from your account are synchronized with your device's Calendar. • Automatically download attachments when connected to Wi-Fi: Enable or disable auto-download of files attached to recent messages when connected through Wi-Fi. 5. Touch Next to go to the next screen ortouch Previous to go to the Apps screen. Note: For Exchange ActiveSync accounts, the Activate device administrator? screen may appear. Read the information and touch Activate to continue. 6. Enter an account name for the email account just added, which is displayed on the email screen, and enter Your name, if required. 7. Touch Done. The device communicates with the appropriate server to set up your account and synchronize your email. When complete, your email appears in the Inbox for the account. Note: To configure email account settings at any time, use Menu ➔ Settings. Touch the account to display Account settings. Multiscreen Ⅲ Touch Multiscreen to split and share the screen with other apps. For more information, refer to "Multiscreen Viewing" on page 25. Adding Additional Email Accounts To add additional email accounts: 1. From a Home screen, touch Email. 2. Touch Menu ➔ Settings ➔ Add account. 3. Enter the Email address, Password, and so on. 71
-
 1
1 -
2
-
3
-
4
-
5
-
6
-
7
-
8
-
9
-
10
-
11
-
12
-
13
-
14
-
15
-
16
-
17
-
18
-
19
-
20
-
21
-
22
-
23
-
24
-
25
-
26
-
27
-
28
-
29
-
30
-
31
-
32
-
33
-
34
-
35
-
36
-
37
-
38
-
39
-
40
-
41
-
42
-
43
-
44
-
45
-
46
-
47
-
48
-
49
-
50
-
51
-
52
-
53
-
54
-
55
-
56
-
57
-
58
-
59
-
60
-
61
-
62
-
63
-
64
-
65
-
66
-
67
-
68
-
69
-
70
-
 71
71 -
 72
72 -
 73
73 -
 74
74 -
 75
75 -
 76
76 -
 77
77 -
 78
78 -
 79
79 -
 80
80 -
 81
81 -
82
-
83
-
84
-
85
-
86
-
87
-
88
-
89
-
90
-
91
-
92
-
93
-
94
-
95
-
96
-
97
-
98
-
99
-
100
-
101
-
102
-
103
-
104
-
105
-
106
-
107
-
108
-
109
-
110
-
111
-
112
-
113
-
114
-
115
-
116
-
117
-
118
-
119
-
120
-
121
-
122
-
123
-
124
-
125
-
126
-
127
-
128
-
129
-
130
-
131
-
132
-
133
-
134
-
135
-
136
-
137
-
138
-
139
-
140
-
141
-
142
-
143
-
144
-
145
-
146
-
147
-
148
-
149
-
150
-
151
-
152
-
153
-
154
-
155
-
156
-
157
-
158
-
159
-
160
-
161
-
162
-
163
-
164
-
165
-
166
-
167
-
168
-
169
-
170
-
171
-
172
-
173
-
174
-
175
-
176
-
177
-
178
-
179
-
180
-
181
-
182
-
183
-
184
-
185
-
186
-
187
-
188
-
189
-
190
-
191
-
192
-
193
-
194
-
195
-
196
-
197
-
198
-
199
-
200
-
201
-
202
-
203
-
204
-
205
-
206
-
207
-
208
-
209
-
210
-
211
-
212
-
213
-
214
-
215
-
216
-
217
-
218
-
219
-
220
-
221
-
222
-
223
-
224
-
225
-
226
-
227
-
228
-
229
-
230
-
231
-
232
-
233
-
234
-
235
-
236
-
237
-
238
-
239
-
240
-
241
-
242
-
243
-
244
-
245
-
246
-
247
-
248
-
249
 |
 |
