Sony HDR HC9 Operating Guide - Page 44
SHARPNESS, SHUTTR SPEED, CAMERA SET menu Continued - shutter speed
 |
UPC - 027242727717
View all Sony HDR HC9 manuals
Add to My Manuals
Save this manual to your list of manuals |
Page 44 highlights
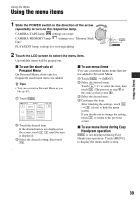
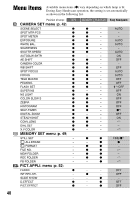
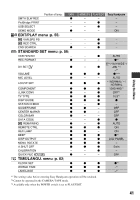
CAMERA SET menu (Continued) B AUTO The white balance is adjusted automatically. OUTDOOR ( ) The white balance is appropriately adjusted for the following recording conditions: - Outdoors - Night views, neon signs and fireworks - Sunrise or sunset - Under daylight fluorescent lamps INDOOR (n) The white balance is appropriately adjusted for the following recording conditions: - Indoors - At party scenes or studios where the lighting conditions change quickly - Under video lamps in a studio, or under sodium lamps or incandescent-like color lamps ONE PUSH ( ) The white balance will be adjusted according to the ambient light. 1 Touch [ONE PUSH]. 2 Frame a white object such as a piece of paper, to fill the screen under the same lighting conditions as you will shoot the subject. 3 Touch [ ]. flashes quickly. When the white balance has been adjusted and stored in the memory, the indicator stops flashing. b Notes • Set [WHITE BAL.] to [AUTO] or adjust the color in [ONE PUSH] under white or cool white fluorescent lamps. • When you select [ONE PUSH], keep framing white objects while is flashing quickly. • flashes slowly if [ONE PUSH] could not be set. • When [ONE PUSH] was selected, if keeps flashing after touching , set [WHITE BAL.] to [AUTO]. • If you set [WHITE BAL.], [SCENE SELECT] returns to [AUTO]. 44 z Tips • If you have changed the battery pack while [AUTO] was selected, or taken your camcorder outdoors after inside use (or vice versa), select [AUTO] and aim your camcorder at a nearby white object for about 10 seconds for better color balance adjustment. • When the white balance has been set with [ONE PUSH], if you change the [SCENE SELECT] settings, or bring your camcorder outdoors from inside the house, or vice versa, you need to redo the [ONE PUSH] procedure to readjust the white balance. SHARPNESS You can adjust the sharpness of the image outline with / . appears when the sharpness is anything other than the default setting. Soften Sharpen SHUTTR SPEED You can manually adjust and fix the shutter speed for your convenience. Depending on the shutter speed, you can make the subject look still, or emphasize movement of the subject. B AUTO Select to adjust the shutter speed automatically. MANUAL( ) Adjust the shutter speed using / . You can select a shutter speed between 1/4 and 1/10000 second when the POWER switch is set to CAMERA-TAPE, and between 1/4 and 1/500 second when the POWER switch is set to CAMERAMEMORY. Slower 125, 180, 250 Faster
-
 1
1 -
2
-
3
-
4
-
5
-
6
-
7
-
8
-
9
-
10
-
11
-
12
-
13
-
14
-
15
-
16
-
17
-
18
-
19
-
20
-
21
-
22
-
23
-
24
-
25
-
26
-
27
-
28
-
29
-
30
-
31
-
32
-
33
-
34
-
35
-
36
-
37
-
38
-
 39
39 -
 40
40 -
 41
41 -
 42
42 -
 43
43 -
 44
44 -
 45
45 -
 46
46 -
 47
47 -
 48
48 -
 49
49 -
50
-
51
-
52
-
53
-
54
-
55
-
56
-
57
-
58
-
59
-
60
-
61
-
62
-
63
-
64
-
65
-
66
-
67
-
68
-
69
-
70
-
71
-
72
-
73
-
74
-
75
-
76
-
77
-
78
-
79
-
80
-
81
-
82
-
83
-
84
-
85
-
86
-
87
-
88
-
89
-
90
-
91
-
92
-
93
-
94
-
95
-
96
-
97
-
98
-
99
-
100
-
101
-
102
-
103
-
104
-
105
-
106
-
107
-
108
-
109
-
110
-
111
-
112
-
113
-
114
-
115
-
116
-
117
-
118
-
119
-
120
-
121
-
122
-
123
-
124
-
125
-
126
-
127
-
128
 |
 |