Sony HDR HC9 Operating Guide - Page 65
Dubbing to another device, Jacks on your camcorder, Using an i.LINK cable supplied
 |
UPC - 027242727717
View all Sony HDR HC9 manuals
Add to My Manuals
Save this manual to your list of manuals |
Page 65 highlights
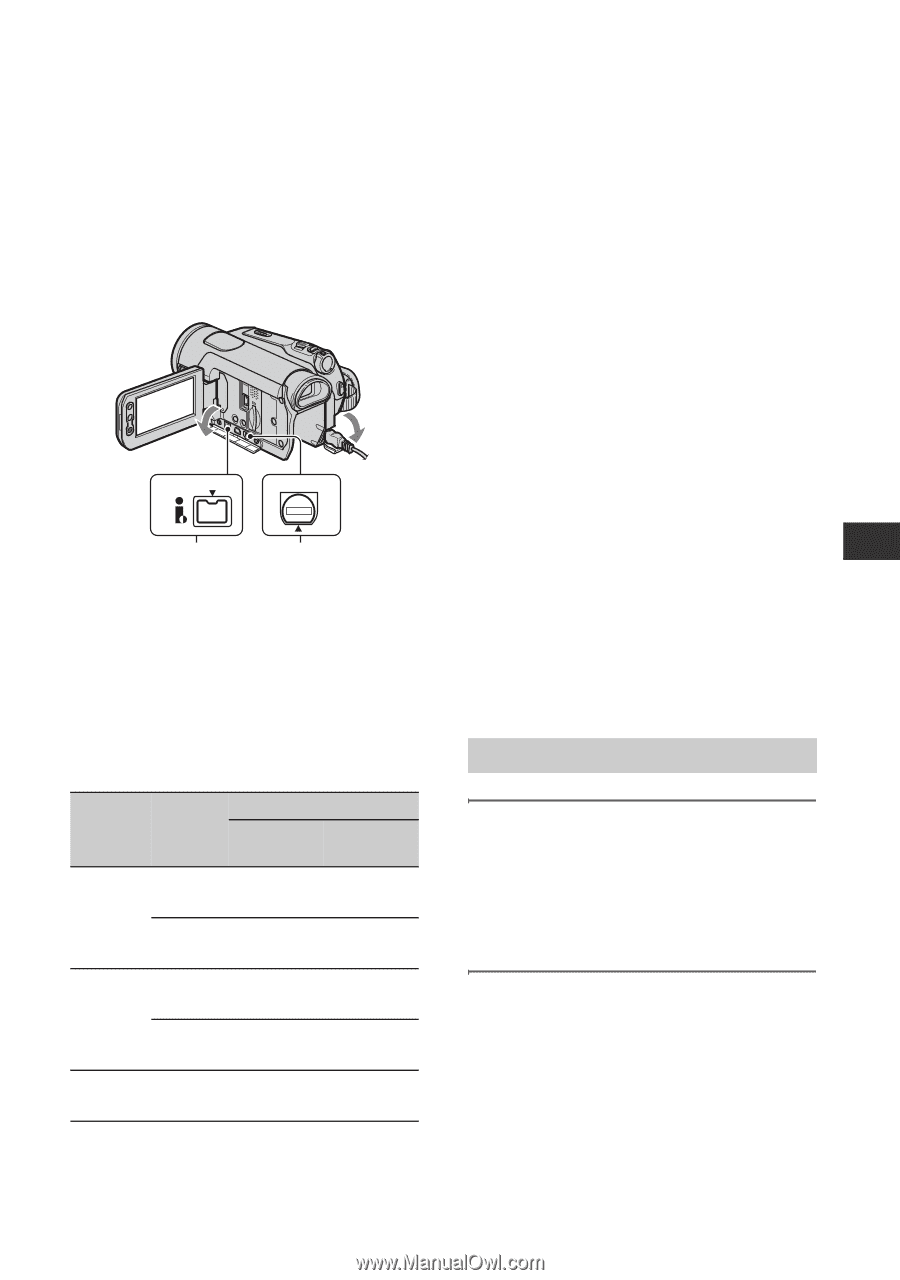
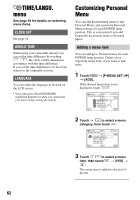
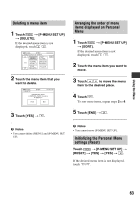
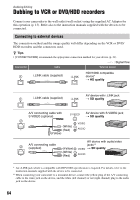
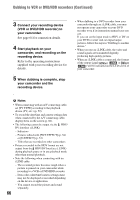
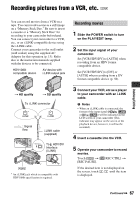
b Notes • You cannot dub pictures using the HDMI cable. • Pictures recorded in the DV format are dubbed as SD (standard definition) images, regardless of the connection. Jacks on your camcorder Open the jack cover and connect the cable. HDV/DV A/V OUT 1 2 Using an i.LINK cable (supplied) Select the required settings from the table below and make the menu settings. b Notes • Disconnect the i.LINK cable before changing these menu settings, otherwise the VCR or DVD/HDD recorders may not correctly identify the video signal. Menu setting Recorded Dubbing format format [VCR HDV/ [i.LINK DV] CONV] HDV only Mixed HDV and DV DV only HDV*1 DV HDV*1 DV DV [AUTO] or HDV [OFF] [AUTO] [ON HDV t DV] [AUTO] or HDV*2 [OFF] [AUTO]*3 [ON HDV t DV] [AUTO] or DV - *1 The VCR or DVD/HDD recorders need to be compliant with HDV1080i specification. *2 Parts recorded in DV format cannot be dubbed. *3 Parts recorded in both DV and HDV format can be dubbed. b Notes • When [VCR HDV/DV] is set to [AUTO], and the signal switches between HDV and DV formats, the picture and sound are interrupted temporarily. • When the player and the recorder are both HDV1080i compatible devices such as HDRHC9 and are connected with the i.LINK cable, after pausing or stopping and then resuming the recording, the images will be unstable or rough at that point. • Set [DISP OUTPUT] to [LCD PANEL] (default setting) when connecting with an A/V connecting cable (p. 61). When connecting with the A/V connecting cable with an S VIDEO (optional) Connect with S VIDEO jack instead of the video plug (yellow). This connection produces pictures more faithfully. The audio will not be output when you connect with the S VIDEO cable alone. Dubbing to another device 1 Prepare your camcorder for playback. Insert the recorded cassette. Slide the POWER switch to turn on the PLAY/EDIT lamp. 2 When dubbing to the VCR, insert a cassette for recording. When dubbing to the DVD recorder, insert a DVD for recording. If your recording device has an input selector, set it to the appropriate input (such as video input1 and video input2). Continued , 65 Dubbing/Editing
-
 1
1 -
2
-
3
-
4
-
5
-
6
-
7
-
8
-
9
-
10
-
11
-
12
-
13
-
14
-
15
-
16
-
17
-
18
-
19
-
20
-
21
-
22
-
23
-
24
-
25
-
26
-
27
-
28
-
29
-
30
-
31
-
32
-
33
-
34
-
35
-
36
-
37
-
38
-
39
-
40
-
41
-
42
-
43
-
44
-
45
-
46
-
47
-
48
-
49
-
50
-
51
-
52
-
53
-
54
-
55
-
56
-
57
-
58
-
59
-
 60
60 -
 61
61 -
 62
62 -
 63
63 -
 64
64 -
 65
65 -
 66
66 -
 67
67 -
 68
68 -
 69
69 -
 70
70 -
71
-
72
-
73
-
74
-
75
-
76
-
77
-
78
-
79
-
80
-
81
-
82
-
83
-
84
-
85
-
86
-
87
-
88
-
89
-
90
-
91
-
92
-
93
-
94
-
95
-
96
-
97
-
98
-
99
-
100
-
101
-
102
-
103
-
104
-
105
-
106
-
107
-
108
-
109
-
110
-
111
-
112
-
113
-
114
-
115
-
116
-
117
-
118
-
119
-
120
-
121
-
122
-
123
-
124
-
125
-
126
-
127
-
128
 |
 |