Sony HDR HC9 Operating Guide - Page 67
Recording pictures from a VCR, etc
 |
UPC - 027242727717
View all Sony HDR HC9 manuals
Add to My Manuals
Save this manual to your list of manuals |
Page 67 highlights
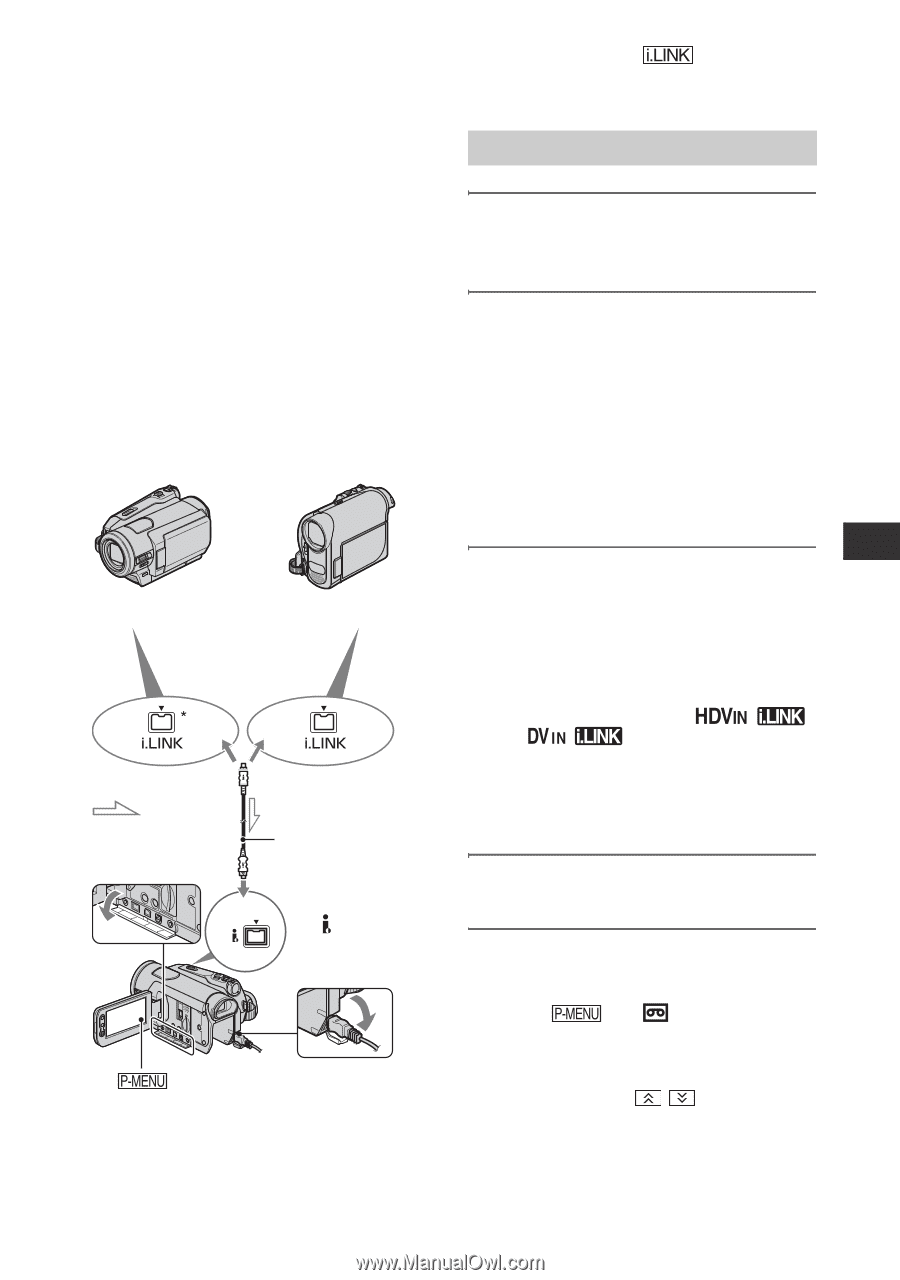
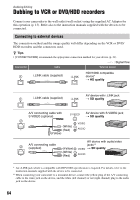
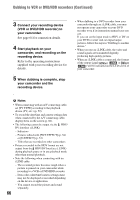
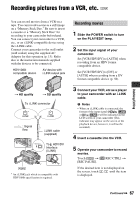
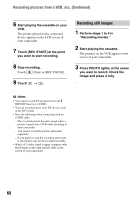
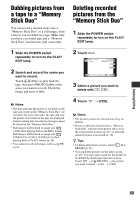
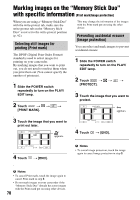
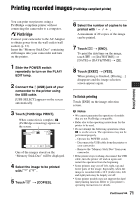
Dubbing/Editing Recording pictures from a VCR, etc. You can record movies from a VCR on a tape. You can record a scene as a still image on a "Memory Stick Duo." Be sure to insert a cassette or a "Memory Stick Duo" for recording in your camcorder beforehand. You can connect your camcorder to a VCR, etc., or an i.LINK-compatible device using the i.LINK cable. Connect your camcorder to the wall outlet (wall socket) using the supplied AC Adaptor for this operation (p. 13). Refer also to the instruction manuals supplied with the devices to be connected. HDV1080i compatible device AV device with i.LINK output jack t HD quality t SD quality To i.LINK connector : Signal flow i.LINK cable (supplied) HDV/DV To HDV/DV Interface (i.LINK) * An i.LINK jack which is compatible with HDV1080i specification is required. Recording movies 1 Slide the POWER switch to turn on the PLAY/EDIT lamp. 2 Set the input signal of your camcorder. Set [VCR HDV/DV] to [AUTO] when recording from an HDV format compatible device. Set [VCR HDV/DV] to [DV] or [AUTO] when recording from a DV format compatible device (p. 56). 3 Connect your VCR, etc as a player to your camcorder with an i.LINK cable. b Notes • When an i.LINK cable is connected, the format of the input signal ( or ) will be indicated on the LCD screen of your camcorder (This indicator may appear on the screen of the playback device, however, it will not be recorded). 4 Insert a cassette into the VCR. 5 Operate your camcorder to record movies. Touch t [ REC CTRL] t [REC PAUSE]. If the desired item is not displayed on the screen, touch / until the item is displayed. Continued , 67
-
 1
1 -
2
-
3
-
4
-
5
-
6
-
7
-
8
-
9
-
10
-
11
-
12
-
13
-
14
-
15
-
16
-
17
-
18
-
19
-
20
-
21
-
22
-
23
-
24
-
25
-
26
-
27
-
28
-
29
-
30
-
31
-
32
-
33
-
34
-
35
-
36
-
37
-
38
-
39
-
40
-
41
-
42
-
43
-
44
-
45
-
46
-
47
-
48
-
49
-
50
-
51
-
52
-
53
-
54
-
55
-
56
-
57
-
58
-
59
-
60
-
61
-
 62
62 -
 63
63 -
 64
64 -
 65
65 -
 66
66 -
 67
67 -
 68
68 -
 69
69 -
 70
70 -
 71
71 -
 72
72 -
73
-
74
-
75
-
76
-
77
-
78
-
79
-
80
-
81
-
82
-
83
-
84
-
85
-
86
-
87
-
88
-
89
-
90
-
91
-
92
-
93
-
94
-
95
-
96
-
97
-
98
-
99
-
100
-
101
-
102
-
103
-
104
-
105
-
106
-
107
-
108
-
109
-
110
-
111
-
112
-
113
-
114
-
115
-
116
-
117
-
118
-
119
-
120
-
121
-
122
-
123
-
124
-
125
-
126
-
127
-
128
 |
 |