Toshiba Satellite 1800-S254 User Guide - Page 163
seated, the eject button for that slot pops out., There are two eject buttons
 |
View all Toshiba Satellite 1800-S254 manuals
Add to My Manuals
Save this manual to your list of manuals |
Page 163 highlights
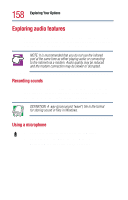
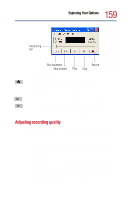
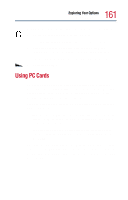
163 Exploring Your Options Using PC Cards 3 Align the card connectors with an available PC Card slot and carefully slide the card into the slot until it locks into place. NOTE: If you have a Type III card, insert the connector into the lower slot. If you have a Type I or Type II card, you can insert it into either the upper or the lower slot. There are two eject buttons, one per slot. When the PC Card is seated, the eject button for that slot pops out. Locking the PC Card in place CAUTION: To avoid damaging the PC Card or the computer, do not force the card into the PC Card slot. 4 Slide the PC Card lock to the right.
-
 1
1 -
2
-
3
-
4
-
5
-
6
-
7
-
8
-
9
-
10
-
11
-
12
-
13
-
14
-
15
-
16
-
17
-
18
-
19
-
20
-
21
-
22
-
23
-
24
-
25
-
26
-
27
-
28
-
29
-
30
-
31
-
32
-
33
-
34
-
35
-
36
-
37
-
38
-
39
-
40
-
41
-
42
-
43
-
44
-
45
-
46
-
47
-
48
-
49
-
50
-
51
-
52
-
53
-
54
-
55
-
56
-
57
-
58
-
59
-
60
-
61
-
62
-
63
-
64
-
65
-
66
-
67
-
68
-
69
-
70
-
71
-
72
-
73
-
74
-
75
-
76
-
77
-
78
-
79
-
80
-
81
-
82
-
83
-
84
-
85
-
86
-
87
-
88
-
89
-
90
-
91
-
92
-
93
-
94
-
95
-
96
-
97
-
98
-
99
-
100
-
101
-
102
-
103
-
104
-
105
-
106
-
107
-
108
-
109
-
110
-
111
-
112
-
113
-
114
-
115
-
116
-
117
-
118
-
119
-
120
-
121
-
122
-
123
-
124
-
125
-
126
-
127
-
128
-
129
-
130
-
131
-
132
-
133
-
134
-
135
-
136
-
137
-
138
-
139
-
140
-
141
-
142
-
143
-
144
-
145
-
146
-
147
-
148
-
149
-
150
-
151
-
152
-
153
-
154
-
155
-
156
-
157
-
 158
158 -
 159
159 -
 160
160 -
 161
161 -
 162
162 -
 163
163 -
 164
164 -
 165
165 -
 166
166 -
 167
167 -
 168
168 -
169
-
170
-
171
-
172
-
173
-
174
-
175
-
176
-
177
-
178
-
179
-
180
-
181
-
182
-
183
-
184
-
185
-
186
-
187
-
188
-
189
-
190
-
191
-
192
-
193
-
194
-
195
-
196
-
197
-
198
-
199
-
200
-
201
-
202
-
203
-
204
-
205
-
206
-
207
-
208
-
209
-
210
-
211
-
212
-
213
-
214
-
215
-
216
-
217
-
218
-
219
-
220
-
221
-
222
-
223
-
224
-
225
-
226
-
227
-
228
-
229
-
230
-
231
-
232
-
233
-
234
-
235
-
236
-
237
-
238
-
239
-
240
-
241
-
242
-
243
-
244
-
245
-
246
-
247
-
248
-
249
-
250
-
251
-
252
-
253
-
254
-
255
-
256
-
257
-
258
-
259
-
260
-
261
 |
 |
163
Exploring Your Options
Using PC Cards
3
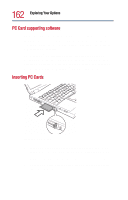
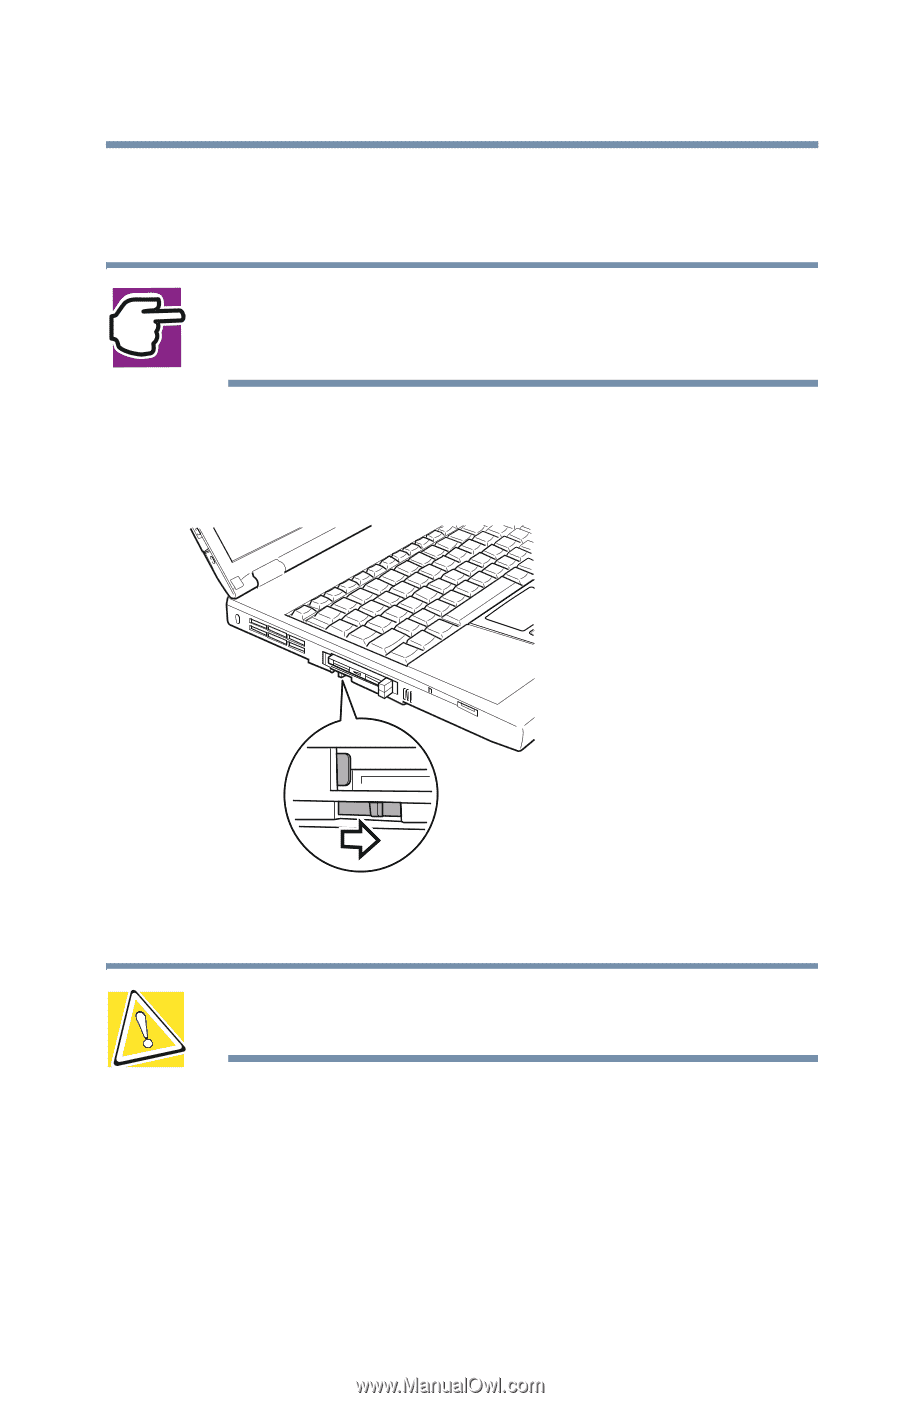
Align the card connectors with an available PC Card slot and
carefully slide the card into the slot until it locks into place.
NOTE: If you have a Type III card, insert the connector into
the lower slot. If you have a Type I or Type II card, you can
insert it into either the upper or the lower slot.
There are two eject buttons, one per slot. When the PC Card is
seated, the eject button for that slot pops out.
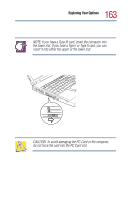
Locking the PC Card in place
CAUTION: To avoid damaging the PC Card or the computer,
do not force the card into the PC Card slot.
4
Slide the PC Card lock to the right.