Western Digital My Cloud PR4100 User Manual - Page 20
Accessing Content, Start > Computer > Network > My Cloud device
 |
View all Western Digital My Cloud PR4100 manuals
Add to My Manuals
Save this manual to your list of manuals |
Page 20 highlights
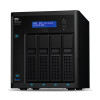
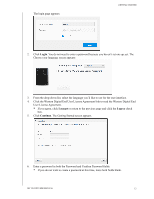
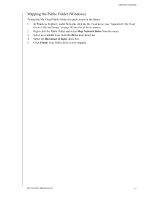
GETTING STARTED Accessing Content The My Cloud device's Public folder contains Shared Music, Shared Pictures, and Shared Videos subfolders. The existing content of the subfolders are files that you dragged and dropped or files that have been backed up from your computer or an attached USB drive. Note: Any of the folders can hold any file type. Once you've physically connected your My Cloud device (see "Preparing your My Cloud Device for Use" on page 9), use the following steps to access the contents of your device. If your operating systems is... Then... Windows 8 / Windows 8.1 / Windows 1. On the Start page, type Computer. 10./W/1 2. Click Computer. 3. In the left pane, click Network. 4. Double-click the My Cloud device (see "Appendix D: My Cloud Device URLs and Names" on page 103 for a list of device names) and locate the device's Public folder. 5. Double-click the Public folder to display the Shared Music, Shared Pictures, and Shared Videos subfolders. You can now drag and drop files into (and from) the shared media folders using Windows Explorer. Windows 7 1. Click or Start > Computer > Network > My Cloud device (see "Appendix D: My Cloud Device URLs and Names" on page 103 for a list of device names) and, if required, enter your share credentials. The device's Public and private folders (shares) appear. 2. Double-click the Public folder to display the Shared Music, Shared Pictures, and Shared Videos subfolders. You can now drag and drop files into (and from) the shared media folders using Windows Explorer. Mac OS X (El Capitan, Yosemite, Mavericks, Mountain Lion) 1. In a Finder window, click the My Cloud device (see "Appendix D: My Cloud Device URLs and Names" on page 103 for a list of device names) under the shared items in the side bar. 2. If presented with an authorization page, enter your Username and password or select Guest and click Connect to display the Public share. 3. Double-click the Public folder to display the subfolders: Shared Music, Shared Pictures, and Shared Videos. You can now drag and drop files into the shared folders using Finder. 4. If you want to create a shared drive icon permanently on your desktop, create an alias. There are two ways to do this: Note: Before creating an alias, click Finder > Preferences > General and make sure Connected Servers is checked. - Click the item you wish to alias (e.g., Shared Music), hold down the mouse button, hold down the Cmd and Option keys simultaneously, then drag the item to where you'd like to make an alias. Instead of moving the original item, this action creates an alias at the new location. - OR - - Right-click the item you want to alias (e.g., Shared Music) and click File > Make Alias. MY CLOUD USER MANUAL 14
-
 1
1 -
2
-
3
-
4
-
5
-
6
-
7
-
8
-
9
-
10
-
11
-
12
-
13
-
14
-
 15
15 -
 16
16 -
 17
17 -
 18
18 -
 19
19 -
 20
20 -
 21
21 -
 22
22 -
 23
23 -
 24
24 -
 25
25 -
26
-
27
-
28
-
29
-
30
-
31
-
32
-
33
-
34
-
35
-
36
-
37
-
38
-
39
-
40
-
41
-
42
-
43
-
44
-
45
-
46
-
47
-
48
-
49
-
50
-
51
-
52
-
53
-
54
-
55
-
56
-
57
-
58
-
59
-
60
-
61
-
62
-
63
-
64
-
65
-
66
-
67
-
68
-
69
-
70
-
71
-
72
-
73
-
74
-
75
-
76
-
77
-
78
-
79
-
80
-
81
-
82
-
83
-
84
-
85
-
86
-
87
-
88
-
89
-
90
-
91
-
92
-
93
-
94
-
95
-
96
-
97
-
98
-
99
-
100
-
101
-
102
-
103
-
104
-
105
-
106
-
107
-
108
-
109
-
110
-
111
-
112
-
113
-
114
-
115
-
116
-
117
-
118
-
119
-
120
-
121
 |
 |
