Western Digital My Cloud PR4100 User Manual - Page 61
Disk Status, Switch to <Storage, Mode>, Next., Con the remaining disk, space as Spanning
 |
View all Western Digital My Cloud PR4100 manuals
Add to My Manuals
Save this manual to your list of manuals |
Page 61 highlights
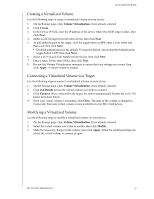
MANAGING STORAGE RAID 1 RAID 5 RAID 10 Two instantaneous copies of the data are recorded on separate hard drives so if one of them fails, other(s) continue to read/write data until the faulty hard drive is replaced. Offers superior performance and protection by striping data across 3 or more drives and dedicating a quarter of each drive to fault tolerance. If one of the drives fails, the other(s) continue to read/write data until the faulty hard drive is replaced. This option is only available on 4-bay My Cloud devices. RAID protocol in which data is written in stripes across primary disks that have been mirrored to the secondary disks. If one of the drives fails, the other(s) continue to read/write data until the faulty hard drive is replaced. This option is only available on 4-bay My Cloud devices. 6. Review and select the Storage option you'd like to use, select the Switch to check box, then click Next. A drive self-test is performed. 7. Review the warning at the top of the screen. 8. Once the test is complete, Review the status of your volumes and click Next. 9. If the Volume slider displays, select the amount of space you'd like to dedicate to the selected RAID mode. If you choose not to use the entire volume for your RAID selection, you can configure the remaining disk space as Spanning by selecting the Configure the remaining disk space as Spanning check box. 10. Click Next to continue. 11. If you'd like to automatically rebuild the RAID configuration once the disk is recognized, click the Auto Rebuild toggle button to ON, then click Next. Note: This screen does not display for JBOD, Spanning, and RAID 0 modes. 12. If you'd like to encrypt a volume, click the Locked icon, then click Next. 13. Review the summary of your selections, and click Next. 14. Review the warning screen and click Finish. The requested hard drive changes begin. Do not turn off your My Cloud device while these changes are in progress. 15. When the process is complete, click Finish again. Disk Status The Disk Status screen identifies the health of the disk drives as well as the status and information on each drive used in your My Cloud device. MY CLOUD USER MANUAL 55
-
 1
1 -
2
-
3
-
4
-
5
-
6
-
7
-
8
-
9
-
10
-
11
-
12
-
13
-
14
-
15
-
16
-
17
-
18
-
19
-
20
-
21
-
22
-
23
-
24
-
25
-
26
-
27
-
28
-
29
-
30
-
31
-
32
-
33
-
34
-
35
-
36
-
37
-
38
-
39
-
40
-
41
-
42
-
43
-
44
-
45
-
46
-
47
-
48
-
49
-
50
-
51
-
52
-
53
-
54
-
55
-
 56
56 -
 57
57 -
 58
58 -
 59
59 -
 60
60 -
 61
61 -
 62
62 -
 63
63 -
 64
64 -
 65
65 -
 66
66 -
67
-
68
-
69
-
70
-
71
-
72
-
73
-
74
-
75
-
76
-
77
-
78
-
79
-
80
-
81
-
82
-
83
-
84
-
85
-
86
-
87
-
88
-
89
-
90
-
91
-
92
-
93
-
94
-
95
-
96
-
97
-
98
-
99
-
100
-
101
-
102
-
103
-
104
-
105
-
106
-
107
-
108
-
109
-
110
-
111
-
112
-
113
-
114
-
115
-
116
-
117
-
118
-
119
-
120
-
121
 |
 |
