Western Digital My Cloud PR4100 User Manual - Page 77
Cloud Access, Con Manual
 |
View all Western Digital My Cloud PR4100 manuals
Add to My Manuals
Save this manual to your list of manuals |
Page 77 highlights
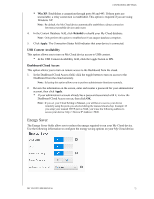
CONFIGURING SETTINGS Time Zone NTP Service Primary Server Date & Time Time Format Date Format From the drop-down list, select the time zone where your device is located. Enable or disable the Network Time Protocol (NTP) service, which automatically synchronizes your device to update the time and date. Change the primary server used for your NTP service. • To change the primary server used for your NTP service, click Configure, • Click Add User NTP and enter the URL address of the new primary server. • Click Save. Displays the device date and time. This information is synchronized to the NTP server by default. From the drop-down list, select 12 (12-hour clock) or 24 (24hour clock). From the drop-down list, select the date format you'd like to use to display the date on your device. 2. Click Save for each change you make. Cloud Access Use the following steps to turn cloud access on or off for all users (i.e., control whether computers and mobile devices can access the content on the My Cloud device). Note: This action turns on/off cloud access for the entire My Cloud device. To turn on access for an individual user, see "Configuring Cloud Access for a User" on page 40. 1. Scroll down to the Cloud Access area of the General screen. 2. In the Cloud Service field, ensure that the toggle button is set to ON. The Connection Status changes to Connected (). 3. Click Configure to change the type of connection you use for your cloud access. On the Cloud Access Connection Options screen, there are three access options: Auto: Auto uses UPnP (Universal Plug and Play) to attempt to open ports on your router. If successful, a direct connection is established between your device and your apps. Manual: Establishes a connection through the two selected ports. If either port is unavailable, a relay connection is established. A manual router configuration is required for this option. For more information, refer to your router manufacturer's guidelines. MY CLOUD USER MANUAL 71
-
 1
1 -
2
-
3
-
4
-
5
-
6
-
7
-
8
-
9
-
10
-
11
-
12
-
13
-
14
-
15
-
16
-
17
-
18
-
19
-
20
-
21
-
22
-
23
-
24
-
25
-
26
-
27
-
28
-
29
-
30
-
31
-
32
-
33
-
34
-
35
-
36
-
37
-
38
-
39
-
40
-
41
-
42
-
43
-
44
-
45
-
46
-
47
-
48
-
49
-
50
-
51
-
52
-
53
-
54
-
55
-
56
-
57
-
58
-
59
-
60
-
61
-
62
-
63
-
64
-
65
-
66
-
67
-
68
-
69
-
70
-
71
-
 72
72 -
 73
73 -
 74
74 -
 75
75 -
 76
76 -
 77
77 -
 78
78 -
 79
79 -
 80
80 -
 81
81 -
 82
82 -
83
-
84
-
85
-
86
-
87
-
88
-
89
-
90
-
91
-
92
-
93
-
94
-
95
-
96
-
97
-
98
-
99
-
100
-
101
-
102
-
103
-
104
-
105
-
106
-
107
-
108
-
109
-
110
-
111
-
112
-
113
-
114
-
115
-
116
-
117
-
118
-
119
-
120
-
121
 |
 |
