ZyXEL ARMOR G1 User Guide
ZyXEL ARMOR G1 Manual
 |
View all ZyXEL ARMOR G1 manuals
Add to My Manuals
Save this manual to your list of manuals |
ZyXEL ARMOR G1 manual content summary:
- ZyXEL ARMOR G1 | User Guide - Page 1
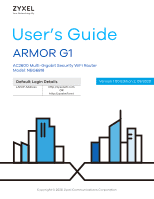
User's Guide ARMOR G1 AC2600 Multi-Gigabit Security WiFi Router Model: NBG6818 Default Login Details LAN IP Address http://zyxelwifi.com OR http://zyxelwifi.net Version 1.00 Edition 2, 08/2020 Copyright © 2020 Zyxel Communications Corporation - ZyXEL ARMOR G1 | User Guide - Page 2
or your computer operating system. Every effort has been made to ensure that the information in this manual is accurate. Related Documentation • Quick Start Guide The Quick Start Guide shows how to connect the NBG6818 and access the Web Configurator wizards. It contains information on setting - ZyXEL ARMOR G1 | User Guide - Page 3
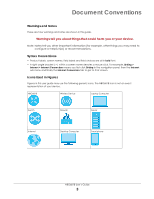
then the Internet sub menu and finally the Internet Connection tab to get to that screen. Icons Used in Figures Figures in this user guide may use the following generic icons. The NBG6818 icon is not an exact representation of your device. NBG6818 Wireless Device Laptop Computer Switch Firewall - ZyXEL ARMOR G1 | User Guide - Page 4
User's Guide ...10 Introduction ...11 Wizard ...17 The Web Configurator ...27 NBG6818 Modes ...34 Standard Mode ...36 ...38 Bridge Mode ...39 Tutorials ...42 Technical Reference ...55 Applications ...56 WAN ...77 Wireless LAN ...102 LAN ...113 Security ...123 System ...130 Troubleshooting ...141 - ZyXEL ARMOR G1 | User Guide - Page 5
Table of Contents Table of Contents Document Conventions ...3 Contents Overview ...4 Table of Contents ...5 Part I: User's Guide 10 Chapter 1 Introduction ...11 1.1 Overview ...11 1.2 Applications ...11 1.3 Ways to Manage the NBG6818 ...12 1.4 Good Habits for Managing the NBG6818 12 1.5 Resetting - ZyXEL ARMOR G1 | User Guide - Page 6
...56 8.1.3 Before You Begin ...57 8.2 Parental Control ...57 8.2.1 Device Screen ...57 8.3 OpenVPN Server/Client ...61 8.3.1 OpenVPN Server Screen ...61 8.3.2 OpenVPN Account Screen 63 NBG6818 User's Guide 6 - ZyXEL ARMOR G1 | User Guide - Page 7
10.4 MAC Filter Screen ...108 10.4.1 Add MAC Address Screen 109 10.5 WPS Screen ...110 10.6 Scheduling Screen ...112 Chapter 11 LAN ...113 NBG6818 User's Guide 7 - ZyXEL ARMOR G1 | User Guide - Page 8
Operating Mode Screen ...137 13.8 Logs Screen ...139 Chapter 14 Troubleshooting...141 14.1 Overview ...141 14.2 Power, Hardware Connections, Problems ...146 Appendix A Customer Support ...147 Appendix B Setting Up Your Computer's IP Address 153 Appendix C Common Services ...172 NBG6818 User's Guide - ZyXEL ARMOR G1 | User Guide - Page 9
Table of Contents Appendix D Legal Information ...175 Index ...181 NBG6818 User's Guide 9 - ZyXEL ARMOR G1 | User Guide - Page 10
PART I User's Guide 10 - ZyXEL ARMOR G1 | User Guide - Page 11
main features and applications of the NBG6818, also called ARMOR G1. The NBG6818 extends the range of your existing wired function both 2.4GHz and 5GHz networks at the same time. A range of services such as a firewall and content filtering are also available for secure Internet computing 's Guide 11 - ZyXEL ARMOR G1 | User Guide - Page 12
router for Internet access. Figure 3 Internet Access Application: Ethernet WAN 1.3 Ways to Manage the NBG6818 Use the following method to manage the NBG6818. • Web Configurator. This is recommended for everyday management of the NBG6818 using a (supported) web browser. • Zyxel ARMOR User's Guide 12 - ZyXEL ARMOR G1 | User Guide - Page 13
wireless network with strong security, without having to configure security settings manually. Each WPS connection works between two devices. Both devices must support WPS (check each device's documentation to make sure). Depending on on using WPS, see Section 7.2 on page 42. NBG6818 User's Guide 13 - ZyXEL ARMOR G1 | User Guide - Page 14
process. The NBG6818 is receiving power and ready for use. The NBG6818 detects and error while self-testing, or there is a device malfunction. NBG6818 User's Guide 14 - ZyXEL ARMOR G1 | User Guide - Page 15
, use a screwdriver to insert the screws into the wall. Do not insert the screws all the way in - leave a gap of about 0.5 cm. NBG6818 User's Guide 15 - ZyXEL ARMOR G1 | User Guide - Page 16
on the back of the NBG6818 with the screws on the wall. Hang the NBG6818 on the screws. Figure 7 Wall Mounting- Rubber Feet NBG6818 User's Guide 16 - ZyXEL ARMOR G1 | User Guide - Page 17
CHAPTER 2 Wizard 2.1 Overview In this chapter, you will learn how to: • Go through NBG6818 (ARMOR G1) wizard steps • Configure basic settings for your WiFi • Create a myZyxel Cloud account. 2.2 Accessing the the status of your Internet connection the first time you log in. NBG6818 User's Guide 17 - ZyXEL ARMOR G1 | User Guide - Page 18
need to connect to the Internet to access your NBG6818. See Section 14.4 on page 143 if you cannot connect to the Internet. NBG6818 User's Guide 18 - ZyXEL ARMOR G1 | User Guide - Page 19
Chapter 2 Wizard 3 Enter 1-128 single-byte printable ASCII characters but not "''^$& as your 2.4G/5G WiFi Name and WiFi Password. Select the check box Keep 2.4G & 5G name the same if you want to use the same name for your 2.4G and 5G WiFi. NBG6818 User's Guide 19 - ZyXEL ARMOR G1 | User Guide - Page 20
Chapter 2 Wizard 4 Wait a moment for your WiFi settings to be applied to your NBG6818. NBG6818 User's Guide 20 - ZyXEL ARMOR G1 | User Guide - Page 21
for the NBG6818 to check if your device is updated with the latest firmware. If not, your NBG6818 will automatically update the firmware. NBG6818 User's Guide 21 - ZyXEL ARMOR G1 | User Guide - Page 22
Chapter 2 Wizard 7 You need to create a myZyxel Cloud account to log into the NBG6818. Click Next to go to the next step in the wizard. 8 A pop up message shows. Click OK to be redirected to the registration website of myZyxel Cloud. NBG6818 User's Guide 22 - ZyXEL ARMOR G1 | User Guide - Page 23
Chapter 2 Wizard 9 Enter your Email and Password if you already have a myZyxel Cloud account. If not, you can create one by clicking Sign Up. You can also click the Facbook or Google icon to create an account with your Facebook or Google account. NBG6818 User's Guide 23 - ZyXEL ARMOR G1 | User Guide - Page 24
Chapter 2 Wizard 10 The legal page shows after you log in. Select the check box I understand and agree the Zyxel Cloud Terms of Use and then click Confirm. NBG6818 User's Guide 24 - ZyXEL ARMOR G1 | User Guide - Page 25
. You will be directed back to the NBG6818 web configurator. 12 Wait a moment for your NBG6818 to link to your myZyxel Cloud account. NBG6818 User's Guide 25 - ZyXEL ARMOR G1 | User Guide - Page 26
you log in. Note: You can change your local password in System > General Settings. See Section 13.4 on page 133 for more information. NBG6818 User's Guide 26 - ZyXEL ARMOR G1 | User Guide - Page 27
system setup and management via Internet browser. Use a browser that supports HTML5, such Mozilla Firefox, or Google Chrome. The recommended screen Make sure your NBG6818 hardware is properly connected (refer to the Quick Start Guide). 2 Launch your web browser. 3 If the NBG6818 is in Standard Mode - ZyXEL ARMOR G1 | User Guide - Page 28
, and how many wireless clients are currently connected to your device, as well as their upstream/ downstream data rates. Figure 8 Overview (Standard Mode) NBG6818 User's Guide 28 - ZyXEL ARMOR G1 | User Guide - Page 29
NBG6818. See Chapter 5 on page 36 for more information on Standard Mode. See Chapter 6 on page 39 for more information on Bridge Mode. NBG6818 User's Guide 29 - ZyXEL ARMOR G1 | User Guide - Page 30
's LED Use this screen to check the speed of the connection between your NBG6818 and the broadband modem/router. Use this screen to view a summary of previously run speed tests. Use this screen to: OpenVPN about clients that are connected to the NBG6818 OpenVPN server NBG6818 User's Guide 30 - ZyXEL ARMOR G1 | User Guide - Page 31
Use this screen to enable NAT. Use this screen to configure servers behind the NBG6818 and forward incoming service requests to the servers on your local network. Use this screen to change your NBG6818's port triggering rules. Use this screen to configure IPv6 firewall rules. NBG6818 User's Guide 31 - ZyXEL ARMOR G1 | User Guide - Page 32
factory default. Operating Mode Use this screen to select whether your device acts as a router, or a bridge. Logs Use this screen to view the list of activities recorded by your NBG6818 and the broadband modem/router. Use this screen to view a summary of previously run speed tests. NBG6818 User - ZyXEL ARMOR G1 | User Guide - Page 33
, reboot the NBG6818 without turning the power off or reset the NBG6818 to factory default. Use this screen to select whether your device acts as a router, or a bridge. Use this screen to view the list of activities recorded by your NBG6818. NBG6818 User - ZyXEL ARMOR G1 | User Guide - Page 34
allowing network devices to connect to the NBG6818 wirelessly. Go to Section 6.4 on page 41 to view the Status screen in this mode. NBG6818 User's Guide 34 - ZyXEL ARMOR G1 | User Guide - Page 35
mode carefully to avoid having to change it later. When changing to another mode, the IP address of the NBG6818 changes. The running applications and services of the network devices connected to the NBG6818 may be interrupted. NBG6818 User - ZyXEL ARMOR G1 | User Guide - Page 36
5 Standard Mode CHAPTER 5 Standard Mode 5.1 Overview The NBG6818 is set to standard (router) mode by default. Routers are used to connect the local network to another network (for example, the Internet Status Screen Click Settings > System > Status to open the status screen. NBG6818 User's Guide 36 - ZyXEL ARMOR G1 | User Guide - Page 37
Information MAC Address This shows the WAN Ethernet adapter MAC Address of your device. IP Address This shows the WAN port's IP address. NBG6818 User's Guide 37 - ZyXEL ARMOR G1 | User Guide - Page 38
shows the LAN port's DHCP role - Enable or Disable. IPv6 Address This shows the current IPv6 address of the NBG6818 in the LAN. NBG6818 User's Guide 38 - ZyXEL ARMOR G1 | User Guide - Page 39
6 Bridge Mode 6.1 Overview Use your NBG6818 as a bridge if you already have a router or gateway on your network. In this mode your NBG6818 bridges a wired network (LAN) into the Web Configurator if you haven't already. See the Quick start Guide for instructions on how to do this. NBG6818 User - ZyXEL ARMOR G1 | User Guide - Page 40
computer's IP address, open a web browser such as Internet Explorer and type "192.168.123.2" as the web address in your web browser. NBG6818 User's Guide 40 - ZyXEL ARMOR G1 | User Guide - Page 41
shows the LAN port's DHCP role - Enable or Disable. IPv6 Address This shows the current IPv6 address of the NBG6818 in the LAN. NBG6818 User's Guide 41 - ZyXEL ARMOR G1 | User Guide - Page 42
the NBG6818 Web Configurator, you can check the speed of the connection between your NBG6818 and the broadband modem/router. 1 Click the Navigation Panel icon on the top-left corner ( ), and click Diagnose to open the Click TEST AGAIN to update the information in this screen. NBG6818 User's Guide 42 - ZyXEL ARMOR G1 | User Guide - Page 43
click Settings to open the WiFi screen. Use each tab in the WiFi menu to configure each of the WiFi networks' security settings. NBG6818 User's Guide 43 - ZyXEL ARMOR G1 | User Guide - Page 44
5G networks. Select Keep 2.4G & 5G name the same, so they both use the same WiFi Name. Click Apply to save your changes. NBG6818 User's Guide 44 - ZyXEL ARMOR G1 | User Guide - Page 45
you are using bridge mode. 1 Click the Navigation Panel icon on the top-left corner ( ), and click Settings to open the WiFi screen. NBG6818 User's Guide 45 - ZyXEL ARMOR G1 | User Guide - Page 46
to a Profile Profiling clients allows you to easily block/allow Internet access or set a schedule for all client devices in the same profile. NBG6818 User's Guide 46 - ZyXEL ARMOR G1 | User Guide - Page 47
top-left corner ( ).Select Parental Control, and click the Profile tab. Use the Profile screen to display the profiles created in the NBG6818. NBG6818 User's Guide 47 - ZyXEL ARMOR G1 | User Guide - Page 48
Chapter 7 Tutorials 2 Click Enable to activate this profile's Internet schedule. Click the Edit icon ( ) to modify a profile's Internet schedule. 3 Click the start time cell and drag down to the end time to set up your schedule. NBG6818 User's Guide 48 - ZyXEL ARMOR G1 | User Guide - Page 49
Chapter 7 Tutorials 7.7 Pause or Resume Internet Access on a Profile You may want to manually block a profile of client devices from accessing the Internet immediately and resume it later. Note: tab. Use the Profile screen to display the profiles created in the NBG6818. NBG6818 User's Guide 49 - ZyXEL ARMOR G1 | User Guide - Page 50
off the NBG6818's LED (Light) 1 In the Overview screen, find the LED field and drag the button of the slider to the left. NBG6818 User's Guide 50 - ZyXEL ARMOR G1 | User Guide - Page 51
tab. Select the operating mode and select APPLY to save your changes. Changing the NBG6818's operating mode may take up to two minutes. NBG6818 User's Guide 51 - ZyXEL ARMOR G1 | User Guide - Page 52
Navigation Panel icon on the top-left corner ( Internet, and click the NAT & Port Forwarding tab. ). From the Settings drop-down list, select NBG6818 User's Guide 52 - ZyXEL ARMOR G1 | User Guide - Page 53
Port Forwarding field. 3 Click Add Rule to create a port forwarding rule. Add a service name, a port number or a range of ports to define the service to be forwarded, specify the transport layer protocol used for the service, and the IP address of a device on your local network that will receive the - ZyXEL ARMOR G1 | User Guide - Page 54
Chapter 7 Tutorials NBG6818 User's Guide 54 - ZyXEL ARMOR G1 | User Guide - Page 55
PART II Technical Reference 55 - ZyXEL ARMOR G1 | User Guide - Page 56
systems such as Windows or Linux have different file systems. The file-sharing feature on your NBG6818 supports New Technology File System (NTFS), File Allocation Table (FAT) and FAT32 file systems. The NBG6818 access the USB file storage devices connected to the NBG6818. CIFS NBG6818 User's Guide 56 - ZyXEL ARMOR G1 | User Guide - Page 57
Chapter 8 Applications protocol is supported on Microsoft Windows, Linux Samba Note: If your USB device cannot be detected by the NBG6818, see the troubleshooting for suggestions. 8.2 Parental Control Parental Control allows you to block specific URLs. You following screen. NBG6818 User's Guide 57 - ZyXEL ARMOR G1 | User Guide - Page 58
this screen to configure basic settings for the device. Click the Action icon ( ), and then the Edit icon ( ) to show the following screen. NBG6818 User's Guide 58 - ZyXEL ARMOR G1 | User Guide - Page 59
Profile Screen Use this screen to configure a restricted access schedule. Click the Action icon ( ), then Add New Profile to show the following screen. NBG6818 User's Guide 59 - ZyXEL ARMOR G1 | User Guide - Page 60
wireless LAN scheduling. Apply Click Apply to save your changes back to the NBG6818. Back Click Back to exist the screen without saving. NBG6818 User's Guide 60 - ZyXEL ARMOR G1 | User Guide - Page 61
an OpenVPN server account. Click the Navigation Panel icon on the top-left corner ( ).Select OpenVPN Server, and click the OpenVPN Server tab. NBG6818 User's Guide 61 - ZyXEL ARMOR G1 | User Guide - Page 62
. Configuration Status Select Enable to activate your OpenVPN Server account. Protocol Select the protocol you want to apply to your OpenVPN Server account. NBG6818 User's Guide 62 - ZyXEL ARMOR G1 | User Guide - Page 63
time of writing, up to 16 OpenVPN clients can connect to the NBG6818 OpenVPN server at the same time. Figure 26 OpenVPN Account NBG6818 User's Guide 63 - ZyXEL ARMOR G1 | User Guide - Page 64
ASCII characters, but ^$& are not allowed. Client Access Allowed Select the interface(s) through which the clients are allowed to connect to your account. NBG6818 User's Guide 64 - ZyXEL ARMOR G1 | User Guide - Page 65
to an OpenVPN Server account. Connected IP This field displays the IP address of the OpenVPN Server account your NBG6818 is connected to. NBG6818 User's Guide 65 - ZyXEL ARMOR G1 | User Guide - Page 66
you get from your NBG6818's OpenVPN Server. Select the interface(s) that are allowed by the OpenVPN Server account you want to connect to. NBG6818 User's Guide 66 - ZyXEL ARMOR G1 | User Guide - Page 67
the NBG6818 using Windows Explorer or by browsing to your work group. Name Specify the name to identify the NBG6818 in a work group. NBG6818 User's Guide 67 - ZyXEL ARMOR G1 | User Guide - Page 68
SAMBA Account Screen Use this screen to configure settings for a SAMBA account. Click USB Application > SAMBA > Add Rule to show the following screen. NBG6818 User's Guide 68 - ZyXEL ARMOR G1 | User Guide - Page 69
to set up file sharing via the NBG6818 using FTP and create user accounts. Click USB Application > FTP to show the following screen. NBG6818 User's Guide 69 - ZyXEL ARMOR G1 | User Guide - Page 70
port number for FTP if needed, however you must use the same port number in order to use that service for file sharing. Before you can share files you need a user account. Configure the following fields to set USB Application > FTP > Add Rule to show the following screen. NBG6818 User's Guide 70 - ZyXEL ARMOR G1 | User Guide - Page 71
the NBG6818. Click Cancel to exist the screen without saving. 8.4.3 USB Media Sharing Screen Use this screen to configure settings for media sharing. NBG6818 User's Guide 71 - ZyXEL ARMOR G1 | User Guide - Page 72
. Figure 35 Media Server Overview Click USB Application > USB Media Sharing to show the following screen. Figure 36 USB Application > USB Media Sharing NBG6818 User's Guide 72 - ZyXEL ARMOR G1 | User Guide - Page 73
Using Windows Explorer You can use Windows Explorer to access the file storage devices connected to the NBG6818. Note: The examples in this User's Guide show you how to use Microsoft's Windows 7 to browse your shared files. Refer to your operating system's documentation for how to browse your file - ZyXEL ARMOR G1 | User Guide - Page 74
rules for file sharing. (See more information at Section 8.4.2 on page 69.) Click Apply to save the changes. Figure 38 Add FTP Account NBG6818 User's Guide 74 - ZyXEL ARMOR G1 | User Guide - Page 75
Username and Password, and the port number 21, and then click Quickconnect. A screen asking for password authentication appears. File Sharing via Windows Explorer NBG6818 User's Guide 75 - ZyXEL ARMOR G1 | User Guide - Page 76
Chapter 8 Applications 5 Once you log in the USB device displays in the usb1 folder. NBG6818 User's Guide 76 - ZyXEL ARMOR G1 | User Guide - Page 77
change your NBG6818's DDNS settings (Section 9.8 on page 95). • Use the UPnP screen to enable UPnP on your NBG6818 (Section 9.9 on page 96). NBG6818 User's Guide 77 - ZyXEL ARMOR G1 | User Guide - Page 78
need to use the same encapsulation method used by your ISP (Internet Service Provider). If your ISP offers a dial-up Internet connection using PPPoE when you sign up. If your ISP gives you DNS server addresses, manually enter them in the DNS server fields. 2 If your ISP dynamically assigns Guide 78 - ZyXEL ARMOR G1 | User Guide - Page 79
varies depending on the encapsulation method you select. Click Settings > Internet > Internet Connection. 9.4.1 IPoE Encapsulation This screen displays when you select IPoE encapsulation. NBG6818 User's Guide 79 - ZyXEL ARMOR G1 | User Guide - Page 80
screen. Table 22 Network > WAN > Internet Connection: IPoE Encapsulation LABEL DESCRIPTION Internet Connection Internet Service Provider Type IPv4 / IPv6 You must choose the IPoE option when the WAN port is used you a fixed IP address. This is the default selection. NBG6818 User's Guide 80 - ZyXEL ARMOR G1 | User Guide - Page 81
whose MAC you are cloning. Set WAN MAC Address Select this option to have the WAN interface use a manually specified MAC address. Enter the MAC address in the fields. LAN & WAN Subnet Conflict Automatically change the LAN when you select IPv4 Only in the IPv4/IPv6 field. NBG6818 User's Guide 81 - ZyXEL ARMOR G1 | User Guide - Page 82
NBG6818 use the IPv6 DNS server addresses you configure manually. Select None if you do not want to afresh. 9.4.2 PPPoE Encapsulation The NBG6818 supports PPPoE (Point-to-Point Protocol over dial-up connection using PPPoE. For the service provider, PPPoE offers an access and authentication Guide 82 - ZyXEL ARMOR G1 | User Guide - Page 83
screen. Table 23 Network > WAN > Internet Connection: PPPoE Encapsulation LABEL DESCRIPTION Internet Connection Internet Service Provider Type Select PPPoE if you connect to your Internet via dial-up. IPv4 / IPv6 Select Type the user name given to you by your ISP. NBG6818 User's Guide 83 - ZyXEL ARMOR G1 | User Guide - Page 84
NBG6818 can receive and process. Service Name Enter the PPPoE service name specified in the ISP account address from a computer on your LAN or manually entering a MAC address. Factory Default Select NBG6818 use the IPv6 DNS server addresses you configure manually. Select None if you do not want to - ZyXEL ARMOR G1 | User Guide - Page 85
configuring this screen afresh. 9.4.3 PPTP Encapsulation This screen displays when you select PPTP encapsulation. Figure 44 Settings > Internet > Internet Connection: PPTP (IPv4 Only) NBG6818 User's Guide 85 - ZyXEL ARMOR G1 | User Guide - Page 86
> Internet Connection: PPTP Encapsulation LABEL DESCRIPTION Internet Connection Internet Service Provider Type PPTP Username Password PPTP Encryption Type Select PPTP if have the WAN interface use a manually specified MAC address. Enter the MAC address in the fields. LAN & WAN Subnet Conflict - ZyXEL ARMOR G1 | User Guide - Page 87
80 and FTP on port 21. In some cases, such as for unknown services or where one server can support more than one service (for example both FTP and web service), it might be better to specify a range of port numbers. You NAT network appears as a single host on the Internet. NBG6818 User's Guide 87 - ZyXEL ARMOR G1 | User Guide - Page 88
your NBG6818's port forwarding settings. Click Settings > Internet > NAT & Port Forwarding to show the following screen. Figure 46 Settings > Internet > NAT & Port Forwarding NBG6818 User's Guide 88 - ZyXEL ARMOR G1 | User Guide - Page 89
specify a server manually. In addition to the servers for specified services, NAT supports a default server. service. External Port This is the port number used to connect to this service using the router's port forwarding settings to forward incoming service requests to the servers on your local - ZyXEL ARMOR G1 | User Guide - Page 90
automatically. This shows the port number used to connect to this service using the router's external IP address on the WAN. Device List Internal Port If you select User-Define in the Service Name field, enter the port number(s) manually. Select the internal IP address of the virtual server. This - ZyXEL ARMOR G1 | User Guide - Page 91
audio, data and video conferencing. • FTP - File Transfer Protocol - an Internet file transfer service. • SNMP - Simple Network Management Protocol - An application-layer protocol that can be used goes through the NBG6818's NAT. Figure 48 Settings > Internet > Passthrough NBG6818 User's Guide 91 - ZyXEL ARMOR G1 | User Guide - Page 92
9.7 Port Trigger Screen Some services use a dedicated range of problem is that port forwarding only forwards a service to a single LAN IP address. In order to use the same service on a different LAN computer, you have to manually that service closes, another computer on the LAN can use the service in - ZyXEL ARMOR G1 | User Guide - Page 93
. Table 28 Expert Mode > WAN > NAT > Port Trigger LABEL DESCRIPTION Port Trigger Rules (Max Limit: 32) No. This is the rule index number. NBG6818 User's Guide 93 - ZyXEL ARMOR G1 | User Guide - Page 94
service. The ARMOR ARMOR Z1 to record the IP address of the LAN computer that sent the traffic to a server on the WAN. End Port Type a port number or the starting port number in a range of port numbers. Type a port number or the ending port number in a range of port numbers. NBG6818 User's Guide - ZyXEL ARMOR G1 | User Guide - Page 95
LABEL DESCRIPTION Dynamic DNS Setup Dynamic DNS Select Enable to use dynamic DNS. Select Disable to turn this feature off. Service Provider Select the name of your Dynamic DNS service provider. Host Name Enter a host names in the field provided. You can specify up to two host names in the - ZyXEL ARMOR G1 | User Guide - Page 96
UPnP entry. This is the transport layer protocol used for the service. InPort is a port that a LAN computer uses when it requests a particular service. This port is only applicable to the local network. OutPort This field displays the port number of the UPnP entry. NBG6818 User's Guide 96 - ZyXEL ARMOR G1 | User Guide - Page 97
your computer and the NBG6818. 1 Click the start icon, Control Panel and then the Network and Sharing Center. 2 Click Change Advanced Sharing Settings. NBG6818 User's Guide 97 - ZyXEL ARMOR G1 | User Guide - Page 98
Chapter 9 WAN 3 Select Turn on network discovery and click Save Changes. Network discovery allows your computer to find other computers and devices on the network and other computers on the network to find your computer. This makes it easier to share files and printers. NBG6818 User's Guide 98 - ZyXEL ARMOR G1 | User Guide - Page 99
to the LAN port of the NBG6818. Turn on your computer and the NBG6818. 1 Click the start icon, Settings and then Network & Internet. NBG6818 User's Guide 99 - ZyXEL ARMOR G1 | User Guide - Page 100
Chapter 9 WAN 2 Click Network and Sharing Center. 3 Click Change advanced sharing settings. NBG6818 User's Guide 100 - ZyXEL ARMOR G1 | User Guide - Page 101
devices on the network and other computers on the network to find your computer. This makes it easier to share files and printers NBG6818 User's Guide 101 - ZyXEL ARMOR G1 | User Guide - Page 102
10.1 Overview This chapter discusses how to configure the wireless network settings in your NBG6818. The NBG6818 can service both 2.4GHz and 5GHz networks at the same time. You can have different wireless setup and settings on their MAC address (Section 10.4 on page 108). NBG6818 User's Guide 102 - ZyXEL ARMOR G1 | User Guide - Page 103
with strong security without having to configure security settings manually (Section 10.5 on page 110). • Use the same wireless network must use the same Service Set Identifier (SSID). The SSID is for each wireless client, see the appropriate User's Guide or other documentation. You can use the MAC - ZyXEL ARMOR G1 | User Guide - Page 104
This is called user authentication. However, every wireless client in the wireless network has to support IEEE 802.1x to do this. For wireless networks, there are two typical places to store WLAN network are independent networks. Note: Only Standard Mode supports guest WLAN. NBG6818 User's Guide 104 - ZyXEL ARMOR G1 | User Guide - Page 105
WPS allows you to set up a wireless network with strong security without having to configure security settings manually. Depending on the devices in your network, you can either press a button (on the device a secure wireless network using WPS in Section 7.2 on page 42. NBG6818 User's Guide 105 - ZyXEL ARMOR G1 | User Guide - Page 106
match the NBG6818's new settings. Click Settings > WiFi > Main WiFi to show the following screen. Figure 57 Settings > WiFi > Main WiFi (Standard Mode) NBG6818 User's Guide 106 - ZyXEL ARMOR G1 | User Guide - Page 107
4GHz and/or 5GHz wireless LAN. Select Disable to turn it off. The Service Set Identity (SSID) identifies the wireless LAN with which a wireless client is : Region 2.4G/5G Bandwidth 2.4G/5G Channel Apply Cancel • Manual: Manually enter the same password on the Zyxel Device and the client. Guide 107 - ZyXEL ARMOR G1 | User Guide - Page 108
to one of the NBG6818's BSSs. The SSID (Service Set IDentifier) identifies the Service Set with which a wireless device is associated. Password wireless client utility. The password has two uses. Apply Cancel • Manual: Manually enter the same password on the Zyxel Device and the client. Guide 108 - ZyXEL ARMOR G1 | User Guide - Page 109
the MAC address you want to add to the MAC address list. Click Settings > WiFi > MAC Filter > Add to show the following screen. NBG6818 User's Guide 109 - ZyXEL ARMOR G1 | User Guide - Page 110
of the wireless station. If you select User-Defined, enter the MAC address(es) manually. MAC Address Enter a MAC address manually in this field if you select User-Defined in the Type field. Apply Click Apply to the wireless network using the first SSID on the NBG6818. NBG6818 User's Guide 110 - ZyXEL ARMOR G1 | User Guide - Page 111
by the network. Click Apply to save your changes back to the NBG6818. Click Cancel to reload the previous configuration for this screen. NBG6818 User's Guide 111 - ZyXEL ARMOR G1 | User Guide - Page 112
scheduling. Apply Click Apply to save your changes back to the NBG6818. Cancel Click Cancel to reload the previous configuration for this screen. NBG6818 User's Guide 112 - ZyXEL ARMOR G1 | User Guide - Page 113
are two separate IP networks: one inside the LAN network and the other outside the WAN network as shown in the following figure. NBG6818 User's Guide 113 - ZyXEL ARMOR G1 | User Guide - Page 114
this screen to change the IP address for your NBG6818 in Standard Mode. Click Settings > LAN > LAN IP to show the following screen. NBG6818 User's Guide 114 - ZyXEL ARMOR G1 | User Guide - Page 115
Chapter 11 LAN Figure 66 Settings > LAN > LAN IP (Standard Mode) NBG6818 User's Guide 115 - ZyXEL ARMOR G1 | User Guide - Page 116
ISP instructs you to do otherwise. When configured as a server, the NBG6818 provides TCP/IP configuration for the clients. If not, DHCP service is disabled and you must have another DHCP server on your LAN, or else the computers must be manually configured. When set - ZyXEL ARMOR G1 | User Guide - Page 117
computer on your LAN, or the MAC address you manually configured. This field displays the LAN IP address of a computer on your LAN, or the LAN address you manually configured. Click the icons under Actions to delete Note: This is not available if you are using bridge mode. NBG6818 User's Guide 117 - ZyXEL ARMOR G1 | User Guide - Page 118
. This field displays the MAC address of a computer on your LAN. If you select UserDefined in the Device List field, enter the MAC address(es) manually. This field displays the IP address of a computer on your LAN. If you select UserDefined in the Device List field, enter the IP address(es - ZyXEL ARMOR G1 | User Guide - Page 119
the screen below, you will need to log into the NBG6818 again using the new IP address. Figure 70 Settings > LAN > LAN IP NBG6818 User's Guide 119 - ZyXEL ARMOR G1 | User Guide - Page 120
the LAN. Click Settings > LAN > IPv6 LAN to show the following screen. Note: This is not available if you are using bridge mode. NBG6818 User's Guide 120 - ZyXEL ARMOR G1 | User Guide - Page 121
IPv6 stateless auto-configuration on this interface. The interface will get an IPv6 address from an IPv6 router and the DHCP server. The IP address information gets through DHCPv6. IPv6 Address range (Start) Select range of IP addresses that this address object represents. NBG6818 User's Guide 121 - ZyXEL ARMOR G1 | User Guide - Page 122
object represents. Enter the IPv6 lifetime in the LAN. Select this option to manually enter an IPv6 address if you want to use a static IP address. RA period Minimum RA period Enter the minimum time in seconds between router advertisement messages. Apply Click Apply to save your changes back to - ZyXEL ARMOR G1 | User Guide - Page 123
12.3 on page 127). 12.1.2 What You Need To Know The following terms and concepts may help as you read through this chapter. NBG6818 User's Guide 123 - ZyXEL ARMOR G1 | User Guide - Page 124
a modem to the port. 3 Limit who can access your router. 4 Don't enable any local service (such as NTP) that you don't use. Any enabled service could present a potential security risk. A determined hacker might be > Firewall > IPv4 Firewall to show the following screen. NBG6818 User's Guide 124 - ZyXEL ARMOR G1 | User Guide - Page 125
to silently discard the packets which meet the firewall rules. The others are accepted. Firewall Rule No. Service Name MAC address Select Accept to allow the passage of the packets which meet the firewall rules. address of the computer for which the firewall rule applies. NBG6818 User's Guide 125 - ZyXEL ARMOR G1 | User Guide - Page 126
Address This is the IP address of the computer to which traffic for the application or service is entering. Source IP Address This is the IP address of the computer from which traffic for the following screen. Figure 74 Settings > Firewall > IPv4 Firewall > Add Rule NBG6818 User's Guide 126 - ZyXEL ARMOR G1 | User Guide - Page 127
rule applies. Enter the IP address of the computer to which traffic for the application or service is entering. Source IP Address The NBG6818 applies the firewall rule to traffic initiating from this the following screen. Figure 75 Settings > Firewall > IPv6 Firewall NBG6818 User's Guide 127 - ZyXEL ARMOR G1 | User Guide - Page 128
silently discard the packets which meet the firewall rules. The others are accepted. Firewall Rule No. Service Name MAC Address Dest IP Address Source IP Address Dest Port Range Source Port Range Protocol Actions > IPv6 Firewall > Add Rule to open the following screen. NBG6818 User's Guide 128 - ZyXEL ARMOR G1 | User Guide - Page 129
firewall rule applies. Enter the IP address of the computer to which traffic for the application or service is entering. Source IP Address The NBG6818 applies the firewall rule to traffic initiating from this computer. . Click Cancel to exist this screen without saving. NBG6818 User's Guide 129 - ZyXEL ARMOR G1 | User Guide - Page 130
Section 13.6 on page 136). • Use the Operating Mode screen select whether you want the NBG6818 to act as a router or a bridge (Section 13.7 on page 137). • Use the Logs screen to see the system logs recorded by . Click Settings > System > Status to show the following screen. NBG6818 User's Guide 130 - ZyXEL ARMOR G1 | User Guide - Page 131
Chapter 13 System Figure 77 Settings > System > Status (Standard Mode) NBG6818 User's Guide 131 - ZyXEL ARMOR G1 | User Guide - Page 132
Address of your device. IP Address This shows the NBG6818's LAN IP address. IP Subnet Mask This shows the NBG6818's LAN subnet mask. NBG6818 User's Guide 132 - ZyXEL ARMOR G1 | User Guide - Page 133
the management session timeout period. Click Settings > System > General Setting to show the following screen. Figure 79 Settings > System > General Setting (Standard Mode) NBG6818 User's Guide 133 - ZyXEL ARMOR G1 | User Guide - Page 134
password again in this field. Apply Click Apply to save your changes back to the NBG6818. Cancel Click Cancel to discard all changes. NBG6818 User's Guide 134 - ZyXEL ARMOR G1 | User Guide - Page 135
or media server. To use this feature, the remote hardware (such as the network adapter on a computer) must support Wake On LAN using the "Magic Packet" method. You need to know the MAC address of the remote client . Figure 81 Settings > System > Remote Access (Standard Mode) NBG6818 User's Guide 135 - ZyXEL ARMOR G1 | User Guide - Page 136
computer may access the NBG6818 using this service. Remote Assistance Enable Remote Assistant Select Enable to allow customer support to help you solve the problems you encounter with your NBG6818 remotely. Wake screen to upgrade firmware, restart or reset your NBG6818. NBG6818 User's Guide 136 - ZyXEL ARMOR G1 | User Guide - Page 137
Mode Screen Use this screen to select how you want to use your NBG6818. The Operating Mode function lets you configure your NBG6818 as a router or bridge. You can choose between Standard Mode, and Bridge Mode depending on your network topology and the features you require from your device. The - ZyXEL ARMOR G1 | User Guide - Page 138
local network with another network, such as the Internet. The router has two IP addresses, the LAN IP address and the WAN the same subnet. To connect to the Internet, another device, such as a router, is required. Figure 85 Bridge Mode Click Settings > System > Operating Mode to show the following - ZyXEL ARMOR G1 | User Guide - Page 139
and another network such as the Internet. This mode offers services such as a firewall or bandwidth management. Bridge Mode You is no WAN port. • The DHCP server on your device is disabled. • Router functions (such as NAT, bandwidth management, remote management, firewall and so on) are Guide 139 - ZyXEL ARMOR G1 | User Guide - Page 140
Chapter 13 System Click Apply to save your settings. Click Cancel to discard all changes. Click Settings > System > Logs to show the following screen. Figure 87 Settings > System > Logs NBG6818 User's Guide 140 - ZyXEL ARMOR G1 | User Guide - Page 141
14 Troubleshooting 14.1 Overview This chapter offers some suggestions to solve problems you might encounter. The potential problems are Section 1.7 on page 14. • Check the hardware connections. See the Quick Start Guide. • Inspect your cables for damage. Contact the vendor to replace any damaged - ZyXEL ARMOR G1 | User Guide - Page 142
and have forgotten it, see the troubleshooting suggestions for I don't know the IP as expected. See the Quick Start Guide. • Make sure your Internet browser . (If you know that there are routers between your computer and the NBG6818, skip problem continues, contact the network administrator or vendor, or - ZyXEL ARMOR G1 | User Guide - Page 143
Troubleshooting Advanced Suggestions • Try to access the NBG6818 using another service WAN port is connected to a broadband modem or router with Internet access. Your computer and the NBG6818 follow the directions in the Quick Start Guide again. • If the problem continues, contact your ISP. I cannot - ZyXEL ARMOR G1 | User Guide - Page 144
Chapter 14 Troubleshooting • If the problem continues, contact your ISP. The Internet connection is slow or intermittent. • There might be a lot of traffic on the directions above again. 14.6 Wireless Connections I cannot access the NBG6818 or ping any computer from the WLAN. NBG6818 User's Guide 144 - ZyXEL ARMOR G1 | User Guide - Page 145
Troubleshooting • Make sure the wireless LAN is enabled on the NBG6818. • Make sure the wireless adapter on your computer is working properly. • Make sure the wireless adapter installed on your computer is IEEE 802.11 compatible and supports User's Guide for more instructions on how to change problem - ZyXEL ARMOR G1 | User Guide - Page 146
Chapter 14 Troubleshooting 14.7 USB Device Problems I cannot access or see it again with your computer. • If the problem persists, contact your vendor. What kind of USB devices do the NBG6818 support? • It is strongly recommended to use do not support 3G/4G USB dongles. NBG6818 User's Guide 146 - ZyXEL ARMOR G1 | User Guide - Page 147
APPENDIX A Customer Support In the event of problems that cannot be solved by using this manual, you should contact your vendor. If you cannot contact your vendor, then contact a Zyxel • https://www.zyxel.com/in/en/ Kazakhstan • Zyxel Kazakhstan • https://www.zyxel.kz NBG6818 User's Guide 147 - ZyXEL ARMOR G1 | User Guide - Page 148
Appendix A Customer Support Korea • Zyxel Korea Corp. • http://www.zyxel.kr Malaysia • Zyxel Malaysia Sdn Bhd. • http://www.zyxel.com.my Pakistan • Zyxel Europe Belarus • Zyxel BY • https://www.zyxel.by Belgium • Zyxel Communications B.V. • https://www.zyxel.com/be/nl/ NBG6818 User's Guide 148 - ZyXEL ARMOR G1 | User Guide - Page 149
Appendix A Customer Support • https://www.zyxel.com/be/fr/ Bulgaria • Zyxel https://www.zyxel.com/bg/bg/ Czech Republic • Zyxel Communications Czech s.r.o • https • Zyxel Communications Italy • https://www.zyxel.com/it/it/ Latvia • Zyxel Latvia • https://www.zyxel.com/lv/lv/ NBG6818 User's Guide 149 - ZyXEL ARMOR G1 | User Guide - Page 150
Appendix A Customer Support Lithuania • Zyxel Lithuania • https://www.zyxel.com/lt/lt/ Netherlands • Zyxel Benelux • https://www.zyxel.com/nl/nl/ Norway • Zyxel • https://www.zyxel.com/se/sv/ Switzerland • Studerus AG • https://www.zyxel.ch/de • https://www.zyxel.ch/fr NBG6818 User's Guide 150 - ZyXEL ARMOR G1 | User Guide - Page 151
Appendix A Customer Support Turkey • Zyxel Turkey A.S. • https://www.zyxel.com/tr/tr/ UK • Zyxel Communications UK Ltd. • https://www.zyxel.com/uk/en/ Corporation • https://www.zyxel.com/co/es/ Middle East Israel • Zyxel Communications Corporation • http://il.zyxel.com/ NBG6818 User's Guide 151 - ZyXEL ARMOR G1 | User Guide - Page 152
Appendix A Customer Support Middle East • Zyxel Communications Corporation • https://www.zyxel.com/me/en/ North America USA • Zyxel Communications, Inc. - North America • https://www.zyxel.com/au/en/ Africa South Africa • Nology (Pty) Ltd. • https://www.zyxel.com/za/en/ NBG6818 User's Guide 152 - ZyXEL ARMOR G1 | User Guide - Page 153
specifications for more information about which operating systems are supported. This appendix shows you how to configure the components you need to use TCP/IP on your computer. If you manually assign IP information instead of using a dynamic IP, make sure that Control Panel. NBG6818 User's Guide 153 - ZyXEL ARMOR G1 | User Guide - Page 154
Appendix B Setting Up Your Computer's IP Address 2 In the Control Panel, click View network status and tasks under the Network and Internet category. 3 Click Change adapter settings. 4 Double click Local Area Connection and then select Properties. NBG6818 User's Guide 154 - ZyXEL ARMOR G1 | User Guide - Page 155
Appendix B Setting Up Your Computer's IP Address Note: During this procedure, click Continue whenever Windows displays a screen saying that it needs your permission to continue. 5 Select Internet Protocol Version 4 (TCP/IPv4) and then select Properties. NBG6818 User's Guide 155 - ZyXEL ARMOR G1 | User Guide - Page 156
> All Programs > Accessories > Command Prompt. 2 In the Command Prompt window, type "ipconfig" and then press [ENTER]. 3 The IP settings are displayed as follows. NBG6818 User's Guide 156 - ZyXEL ARMOR G1 | User Guide - Page 157
the Network icon. 3 When the Network preferences pane opens, select Built-in Ethernet from the network connection type list, and then click Configure. NBG6818 User's Guide 157 - ZyXEL ARMOR G1 | User Guide - Page 158
Using DHCP from the Configure IPv4 list in the TCP/IP tab. 5 For statically assigned settings, do the following: • From the Configure IPv4 list, select Manually. • In the IP Address field, type your IP address. • In the Subnet Mask field, type your subnet mask. • In the - ZyXEL ARMOR G1 | User Guide - Page 159
X: 10.5 and 10.6 The screens in this section are from Mac OS X 10.5 but can also apply to 10.6. 1 Click Apple > System Preferences. NBG6818 User's Guide 159 - ZyXEL ARMOR G1 | User Guide - Page 160
Appendix B Setting Up Your Computer's IP Address 2 In System Preferences, click the Network icon. 3 When the Network preferences pane opens, select Ethernet from the list of available connection types. NBG6818 User's Guide 160 - ZyXEL ARMOR G1 | User Guide - Page 161
IP Address 4 From the Configure list, select Using DHCP for dynamically assigned settings. 5 For statically assigned settings, do the following: • From the Configure list, select Manually. • In the IP Address field, enter your IP address. • In the Subnet Mask field, enter your subnet mask. • In the - ZyXEL ARMOR G1 | User Guide - Page 162
clicking Applications > Utilities > Network Utilities, and then selecting the appropriate Network interface from the Info tab. Figure 89 Mac OS X 10.5: Network Utility NBG6818 User's Guide 162 - ZyXEL ARMOR G1 | User Guide - Page 163
unless you first enter your admin password. 3 In the Authenticate window, enter your admin account name and password then click the Authenticate button. NBG6818 User's Guide 163 - ZyXEL ARMOR G1 | User Guide - Page 164
Appendix B Setting Up Your Computer's IP Address 4 In the Network Settings window, select the connection that you want to configure, then click Properties. 5 The Properties dialog box opens. NBG6818 User's Guide 164 - ZyXEL ARMOR G1 | User Guide - Page 165
, and then selecting the appropriate Network device from the Devices tab. The Interface Statistics column shows data if your connection is working properly. NBG6818 User's Guide 165 - ZyXEL ARMOR G1 | User Guide - Page 166
as the root administrator. Follow the steps below to configure your computer IP address in the KDE: 1 Click K Menu > Computer > Administrator Settings (YaST). NBG6818 User's Guide 166 - ZyXEL ARMOR G1 | User Guide - Page 167
Appendix B Setting Up Your Computer's IP Address 2 When the Run as Root - KDE su dialog opens, enter the admin password and click OK. 3 When the YaST Control Center window opens, select Network Devices and then click the Network Card icon. NBG6818 User's Guide 167 - ZyXEL ARMOR G1 | User Guide - Page 168
Appendix B Setting Up Your Computer's IP Address 4 When the Network Settings window opens, click the Overview tab, select the appropriate connection Name from the list, and then click the Configure button. 5 When the Network Card Setup window opens, click the Address tab NBG6818 User's Guide 168 - ZyXEL ARMOR G1 | User Guide - Page 169
server IP address(es), click the Hostname/DNS tab in Network Settings and then enter the DNS server information in the fields provided. NBG6818 User's Guide 169 - ZyXEL ARMOR G1 | User Guide - Page 170
10.3: KNetwork Manager When the Connection Status - KNetwork Manager window opens, click the Statistics tab to see if your connection is working properly. NBG6818 User's Guide 170 - ZyXEL ARMOR G1 | User Guide - Page 171
Appendix B Setting Up Your Computer's IP Address Figure 93 openSUSE: Connection Status - KNetwork Manager NBG6818 User's Guide 171 - ZyXEL ARMOR G1 | User Guide - Page 172
numbers. ESP (IPSEC_TUNNEL) User-Defined 50 The IPSEC ESP (Encapsulation Security Protocol) tunneling protocol uses this service. FINGER TCP 79 Finger is a UNIX or Internet related command that can be used to find a secured http session often used in e- commerce. NBG6818 User's Guide 172 - ZyXEL ARMOR G1 | User Guide - Page 173
secure transfer of data over public networks. This is the data channel. Remote Command Service. A streaming audio service that enables real time sound over the web. Remote Execution Daemon. Remote Login. Remote systems and network servers. Secure Shell Remote Login Program. NBG6818 User's Guide 173 - ZyXEL ARMOR G1 | User Guide - Page 174
Table 50 Commonly Used Services (continued) NAME PROTOCOL PORT(S) STRM WORKS UDP 1558 SYSLOG UDP 514 TACACS UDP 49 TELNET TCP 23 but uses the UDP (User Datagram Protocol) rather than TCP (Transmission Control Protocol). Another videoconferencing solution. NBG6818 User's Guide 174 - ZyXEL ARMOR G1 | User Guide - Page 175
, magnetic, optical, chemical, photocopying, manual, or otherwise, without the prior written if not installed and used according to the instructions, may cause harmful interference to radio communications for relevant user's manual mention that this device can be installed into the external - ZyXEL ARMOR G1 | User Guide - Page 176
érieur d'une distance supérieure à 300 mètres doivent être notifiées à l'Institut Belge des services Postaux et des Télécommunications (IBPT). Visitez http://www.ibpt.be pour de plus amples détails. Por Elektronisko sakaru direkcijas. Vairâk informâcijas: http://www.esd.lv. NBG6818 User's Guide 176 - ZyXEL ARMOR G1 | User Guide - Page 177
example, do not place the device in an enclosed space such as a box or on a very soft surface such as a bed or sofa. NBG6818 User's Guide 177 - ZyXEL ARMOR G1 | User Guide - Page 178
no one will step on them or stumble over them. • Always disconnect all cables from this device before servicing or disassembling. • Do not remove the plug and connect it to a power outlet by itself; always attach hälsa genom att göra dig av med den på ett återvinningsställe. NBG6818 User's Guide 178 - ZyXEL ARMOR G1 | User Guide - Page 179
damage. The meaning of these symbols are described below. It is important that you read these descriptions thoroughly and fully understand the contents. NBG6818 User's Guide 179 - ZyXEL ARMOR G1 | User Guide - Page 180
indirect or consequential damages of any kind to the purchaser. To obtain the services of this warranty, contact your vendor. You may also refer to the warranty find it there, contact your vendor or Zyxel Technical Support at [email protected]. To obtain the source code covered under those Licenses - ZyXEL ARMOR G1 | User Guide - Page 181
Repeater 11 C certifications 177 viewing 180 channel 103 contact information customer support 147 copyright 175 customer support 147 D DDNS service providers 127, 129 DHCP server 114 Digital Living Network Alliance 56 LAN screen 106 Guest WLAN 104 Guest WLAN Bandwidth 105 NBG6818 User's Guide 181 - ZyXEL ARMOR G1 | User Guide - Page 182
file play 72 mode 11 Q Quality of Service (QoS) 110 R RADIUS server 104 Reset button 13 Reset the device 13 Router Mode status screen 36 S Samba 57 Scheduling 112 security policy and ALG 91 Service Set 107 Service Set IDentification 107 Service Set IDentity. See SSID. NBG6818 User's Guide 182 - ZyXEL ARMOR G1 | User Guide - Page 183
Index overview 103 type 103 wireless security 145 Wireless tutorial 42 WLAN button 13 work group 56 name 56 Windows 56 WPS 12 NBG6818 User's Guide 183
-
 1
1 -
 2
2 -
 3
3 -
 4
4 -
 5
5 -
 6
6 -
 7
7 -
8
-
9
-
10
-
11
-
12
-
13
-
14
-
15
-
16
-
17
-
18
-
19
-
20
-
21
-
22
-
23
-
24
-
25
-
26
-
27
-
28
-
29
-
30
-
31
-
32
-
33
-
34
-
35
-
36
-
37
-
38
-
39
-
40
-
41
-
42
-
43
-
44
-
45
-
46
-
47
-
48
-
49
-
50
-
51
-
52
-
53
-
54
-
55
-
56
-
57
-
58
-
59
-
60
-
61
-
62
-
63
-
64
-
65
-
66
-
67
-
68
-
69
-
70
-
71
-
72
-
73
-
74
-
75
-
76
-
77
-
78
-
79
-
80
-
81
-
82
-
83
-
84
-
85
-
86
-
87
-
88
-
89
-
90
-
91
-
92
-
93
-
94
-
95
-
96
-
97
-
98
-
99
-
100
-
101
-
102
-
103
-
104
-
105
-
106
-
107
-
108
-
109
-
110
-
111
-
112
-
113
-
114
-
115
-
116
-
117
-
118
-
119
-
120
-
121
-
122
-
123
-
124
-
125
-
126
-
127
-
128
-
129
-
130
-
131
-
132
-
133
-
134
-
135
-
136
-
137
-
138
-
139
-
140
-
141
-
142
-
143
-
144
-
145
-
146
-
147
-
148
-
149
-
150
-
151
-
152
-
153
-
154
-
155
-
156
-
157
-
158
-
159
-
160
-
161
-
162
-
163
-
164
-
165
-
166
-
167
-
168
-
169
-
170
-
171
-
172
-
173
-
174
-
175
-
176
-
177
-
178
-
179
-
180
-
181
-
182
-
183
 |
 |

Default Login Details
User’s Guide
ARMOR G1
AC2600 Multi-Gigabit Security WiFi Router
Model: NBG6818
Copyright © 2020 Zyxel Communications Corporation
LAN IP Address
http://zyxelwifi.com
OR
http://zyxelwifi.net
Version 1.00 Edition 2, 08/2020