ZyXEL ARMOR G1 User Guide - Page 90
WAN, NBG6818 User's Guide, Add Port Forwarding Rule
 |
View all ZyXEL ARMOR G1 manuals
Add to My Manuals
Save this manual to your list of manuals |
Page 90 highlights
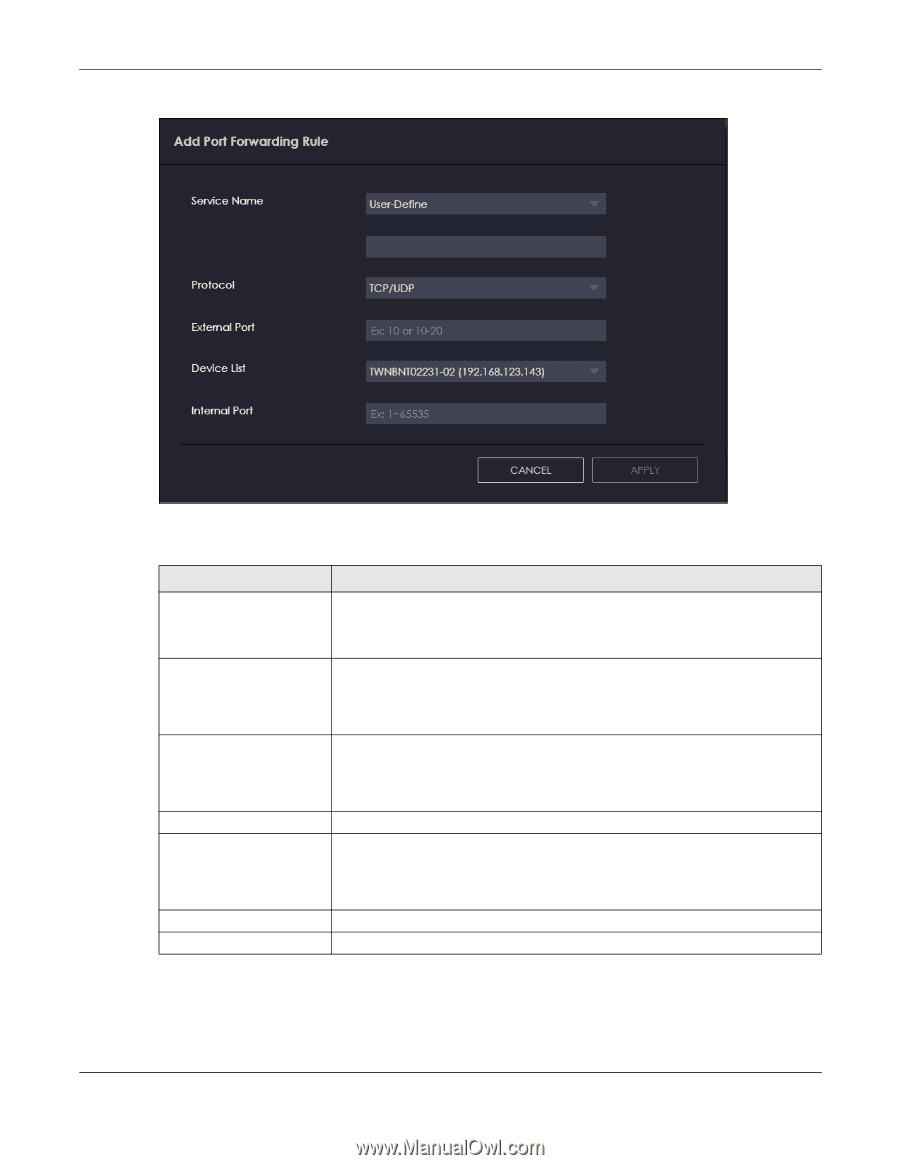
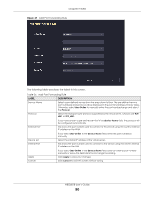
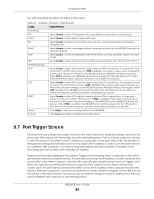
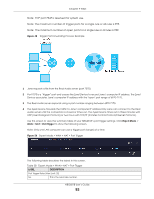
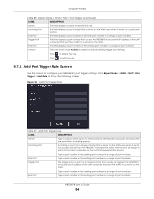
Chapter 9 WAN Figure 47 Add Port Forwarding Rule The following table describes the labels in this screen. Table 26 Add Port Forwarding Rule LABEL DESCRIPTION Service Name Protocol Select a pre-defined service from the drop-down list box. The pre-defined service port number(s) and protocol will be displayed in the port forwarding summary table. Otherwise, select User-Define to manually enter the port number/range and select the Protocol. Select the transport layer protocol supported by this virtual server. Choices are TCP, UDP, or TCP_UDP. External Port If you have chosen a pre-defined service in the Service Name field, the protocol will be configured automatically. This shows the port number used to connect to this service using the router's external IP address on the WAN. Device List Internal Port If you select User-Define in the Service Name field, enter the port number(s) manually. Select the internal IP address of the virtual server. This shows the port number used to connect to this service using the server's internal IP address on the LAN. Apply Cancel If you select User-Define in the Service Name field, enter an internal port number manually or leave the field blank for port range forwarding. Click Apply to save your changes. Click Cancel to exist this screen without saving. NBG6818 User's Guide 90
-
 1
1 -
2
-
3
-
4
-
5
-
6
-
7
-
8
-
9
-
10
-
11
-
12
-
13
-
14
-
15
-
16
-
17
-
18
-
19
-
20
-
21
-
22
-
23
-
24
-
25
-
26
-
27
-
28
-
29
-
30
-
31
-
32
-
33
-
34
-
35
-
36
-
37
-
38
-
39
-
40
-
41
-
42
-
43
-
44
-
45
-
46
-
47
-
48
-
49
-
50
-
51
-
52
-
53
-
54
-
55
-
56
-
57
-
58
-
59
-
60
-
61
-
62
-
63
-
64
-
65
-
66
-
67
-
68
-
69
-
70
-
71
-
72
-
73
-
74
-
75
-
76
-
77
-
78
-
79
-
80
-
81
-
82
-
83
-
84
-
 85
85 -
 86
86 -
 87
87 -
 88
88 -
 89
89 -
 90
90 -
 91
91 -
 92
92 -
 93
93 -
 94
94 -
 95
95 -
96
-
97
-
98
-
99
-
100
-
101
-
102
-
103
-
104
-
105
-
106
-
107
-
108
-
109
-
110
-
111
-
112
-
113
-
114
-
115
-
116
-
117
-
118
-
119
-
120
-
121
-
122
-
123
-
124
-
125
-
126
-
127
-
128
-
129
-
130
-
131
-
132
-
133
-
134
-
135
-
136
-
137
-
138
-
139
-
140
-
141
-
142
-
143
-
144
-
145
-
146
-
147
-
148
-
149
-
150
-
151
-
152
-
153
-
154
-
155
-
156
-
157
-
158
-
159
-
160
-
161
-
162
-
163
-
164
-
165
-
166
-
167
-
168
-
169
-
170
-
171
-
172
-
173
-
174
-
175
-
176
-
177
-
178
-
179
-
180
-
181
-
182
-
183
 |
 |