Blackberry Pearl 8100 User Guide - Page 86
MMS message attachments, Message settings
 |
UPC - 890552608270
View all Blackberry Pearl 8100 manuals
Add to My Manuals
Save this manual to your list of manuals |
Page 86 highlights
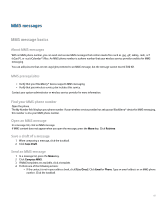
3. Click a folder. MMS message attachments Attach a media file to an MMS message 1. When composing an MMS message, press the Menu key. 2. Click Attach Picture or Attach Audio. 3. Click a picture or audio file. Attach a contact or appointment to an MMS message You can only send nonrecurring appointments in MMS messages. If you attach a meeting, the attendees are removed. 1. When composing an MMS message, press the Menu key. 2. Perform one of the following actions: • To attach a contact, click Attach Contact. Click a contact. • To attach an appointment, click Attach Appointment. Highlight an appointment. Press the Menu key. Click Continue. Save a picture from an MMS message 1. In an MMS message, click a picture. 2. Click Save Picture. Add an appointment to your calendar from an MMS message 1. In an MMS message, click a vCalendar® attachment. 2. Click View Appointment. 3. Press the Menu key. 4. Click Add To Calendar. Add a contact to your address book from an MMS message 1. In an MMS message, click a vCard® attachment. 2. Click View Attachment. 3. Press the Menu key. 4. Click Add Contact. Message settings Request delivery or read notification for an MMS message 1. When composing an MMS message, press the Menu key. 2. Click Options. 3. Perform any of the following actions: • To receive notification when the message is delivered to the recipient, set the Confirm Delivery field to Yes. • To receive notification when the recipient opens the message, set the Confirm Read field to Yes. 84
-
 1
1 -
2
-
3
-
4
-
5
-
6
-
7
-
8
-
9
-
10
-
11
-
12
-
13
-
14
-
15
-
16
-
17
-
18
-
19
-
20
-
21
-
22
-
23
-
24
-
25
-
26
-
27
-
28
-
29
-
30
-
31
-
32
-
33
-
34
-
35
-
36
-
37
-
38
-
39
-
40
-
41
-
42
-
43
-
44
-
45
-
46
-
47
-
48
-
49
-
50
-
51
-
52
-
53
-
54
-
55
-
56
-
57
-
58
-
59
-
60
-
61
-
62
-
63
-
64
-
65
-
66
-
67
-
68
-
69
-
70
-
71
-
72
-
73
-
74
-
75
-
76
-
77
-
78
-
79
-
80
-
 81
81 -
 82
82 -
 83
83 -
 84
84 -
 85
85 -
 86
86 -
 87
87 -
 88
88 -
 89
89 -
 90
90 -
 91
91 -
92
-
93
-
94
-
95
-
96
-
97
-
98
-
99
-
100
-
101
-
102
-
103
-
104
-
105
-
106
-
107
-
108
-
109
-
110
-
111
-
112
-
113
-
114
-
115
-
116
-
117
-
118
-
119
-
120
-
121
-
122
-
123
-
124
-
125
-
126
-
127
-
128
-
129
-
130
-
131
-
132
-
133
-
134
-
135
-
136
-
137
-
138
-
139
-
140
-
141
-
142
-
143
-
144
-
145
-
146
-
147
-
148
-
149
-
150
-
151
-
152
-
153
-
154
-
155
-
156
-
157
-
158
-
159
-
160
-
161
-
162
-
163
-
164
-
165
-
166
-
167
-
168
-
169
-
170
-
171
-
172
-
173
-
174
-
175
-
176
-
177
-
178
-
179
-
180
-
181
-
182
-
183
-
184
-
185
-
186
-
187
-
188
-
189
-
190
-
191
-
192
-
193
-
194
-
195
-
196
-
197
-
198
-
199
-
200
-
201
-
202
-
203
-
204
-
205
-
206
-
207
-
208
-
209
-
210
-
211
-
212
-
213
-
214
-
215
-
216
-
217
-
218
-
219
-
220
-
221
-
222
-
223
-
224
-
225
-
226
-
227
-
228
-
229
-
230
-
231
-
232
-
233
-
234
-
235
-
236
-
237
-
238
-
239
-
240
-
241
-
242
 |
 |
