Brother International HE-800A Instruction Manual - English - Page 111
Needle breakage
 |
View all Brother International HE-800A manuals
Add to My Manuals
Save this manual to your list of manuals |
Page 111 highlights
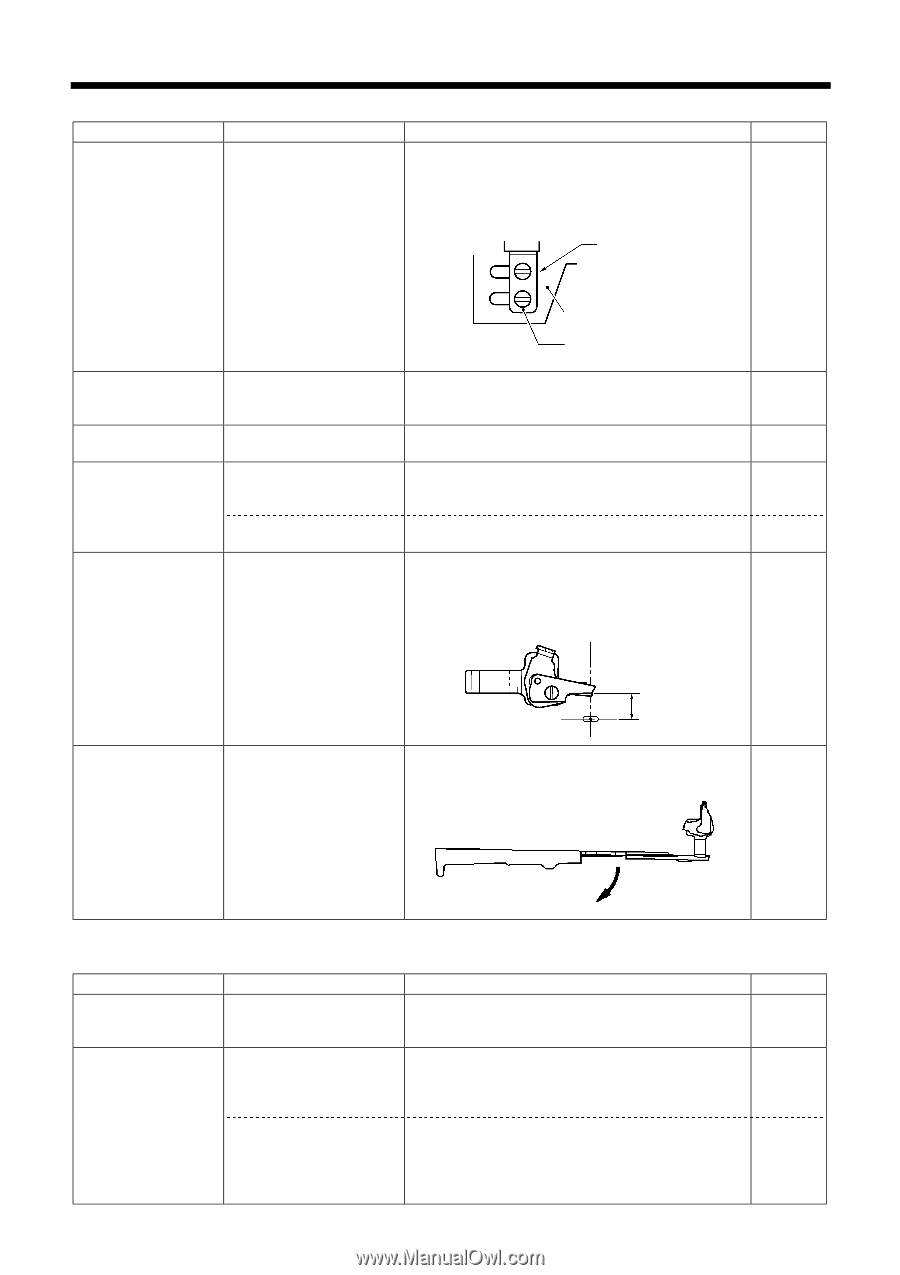
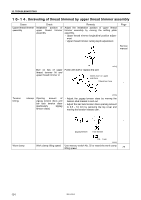
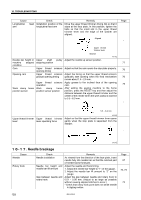
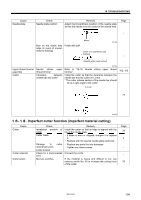
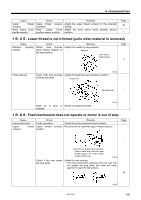
16. TROUBLESHOOTING Cause Longitudinal arm Check Remedy feed Installation position of the Move the upper thread trimmer driving link so that it longitudinal feed arm stops at the face plate. In this position, tighten the bolts so that the small slot in the upper thread trimmer lever and the edge of the washer are aligned. Aligned Page - Upper thread trimmer lever Washer 4011Q Needle bar height in Upper shaft pulley Adjust the needle up sensor position. machine stopped stopping position 77 condition Cam Upper thread scissors Adjust so that the cam opens the stop plate properly. opening timing 76 Opening cam Upper thread scissors Adjust the timing so that the upper thread scissors gradual opening timing gradually start opening when the feed mechanism 76 moves about 1.5 - 2.5 mm. Upper thread scissors Apply grease to the inclined face of the opening operation cam. 76 Work clamp home Work clamp home After setting the sewing machine to the home position sensor position sensor position position, press the RESET key and then adjust the distance between the upper thread trimmer and the center of the needle when the work clamp is lowered to 5.5 - 6.0 mm. - 5.5 - 6.0 mm Upper thread trimmer lever Upper thread trimmer lever operating force 4012Q Adjust so that the upper thread trimmer lever opens gently when the stop plate is separated from the stopper. - 4013Q Needle breakage Cause Needle Rotary hook Check Needle installation Needle bar height and needle bar lift amount Gap between needle and rotary hook Remedy As viewed from the direction of the face plate, insert needle fully into needle bar so that the notched part of needle faces frontward. Adjust the needle and hook timing. 1. Adjust the needle bar height to "1" on the gauge. 2. Adjust the needle bar lift amount to "2" on the gauge. Adjust the gap between needle and rotary hook to 0.01 - 0.08 mm. (Adjust to as large as possible without causing skipped stitches to occur.) * Check that rotary hook point does not strike needle in zigzag motion. Page 57 72, 73 73 103 HE-800A
-
 1
1 -
2
-
3
-
4
-
5
-
6
-
7
-
8
-
9
-
10
-
11
-
12
-
13
-
14
-
15
-
16
-
17
-
18
-
19
-
20
-
21
-
22
-
23
-
24
-
25
-
26
-
27
-
28
-
29
-
30
-
31
-
32
-
33
-
34
-
35
-
36
-
37
-
38
-
39
-
40
-
41
-
42
-
43
-
44
-
45
-
46
-
47
-
48
-
49
-
50
-
51
-
52
-
53
-
54
-
55
-
56
-
57
-
58
-
59
-
60
-
61
-
62
-
63
-
64
-
65
-
66
-
67
-
68
-
69
-
70
-
71
-
72
-
73
-
74
-
75
-
76
-
77
-
78
-
79
-
80
-
81
-
82
-
83
-
84
-
85
-
86
-
87
-
88
-
89
-
90
-
91
-
92
-
93
-
94
-
95
-
96
-
97
-
98
-
99
-
100
-
101
-
102
-
103
-
104
-
105
-
 106
106 -
 107
107 -
 108
108 -
 109
109 -
 110
110 -
 111
111 -
 112
112 -
 113
113 -
 114
114 -
 115
115 -
 116
116 -
117
-
118
 |
 |