Brother International HE-800A Instruction Manual - English - Page 27
Installing the V-belt
 |
View all Brother International HE-800A manuals
Add to My Manuals
Save this manual to your list of manuals |
Page 27 highlights
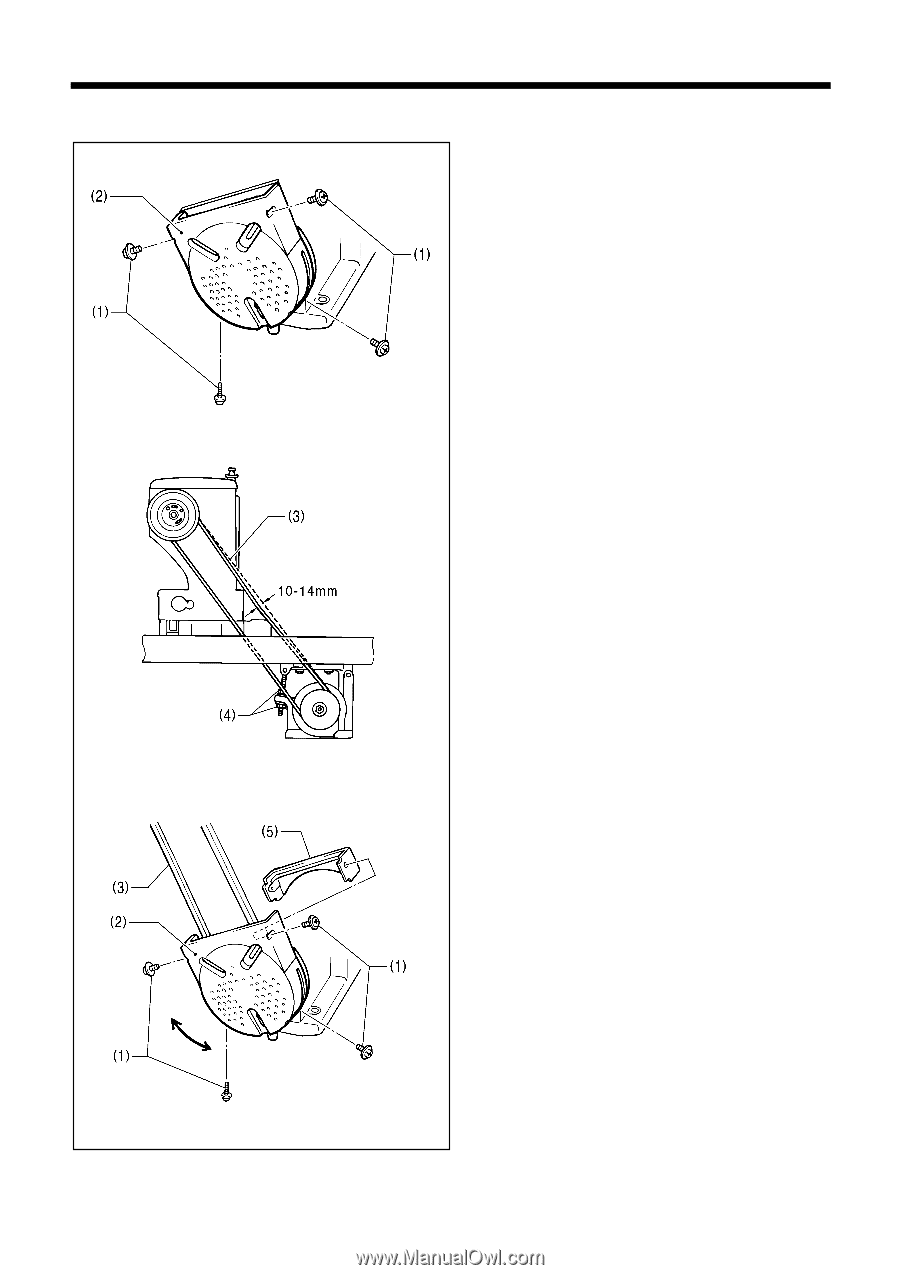
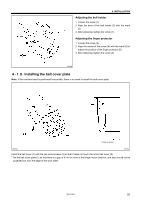
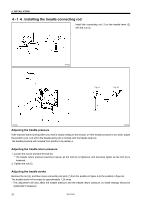
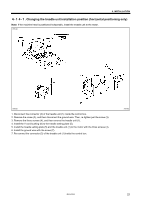
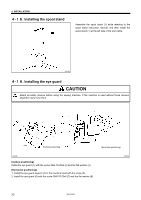
4. INSTALLATION 4-12. Installing the V-belt 3882Q 1. Remove the four screws (1), and then remove the motor belt cover (2). 3883Q 2. Gently tilt back the machine head, and then place the V-belt (3) into the V grooves in the machine head pulley and the motor pulley. 3. Turn the two nuts (4) to adjust so that there is 10 14 mm of deflection in the V-belt (3) when it is pressed at the midway point with a force of 5 N. Note: If the V-belt tension is too loose, or if the V-belt is stretched, the following problems could occur. a. The stopping position may shift, b. The needle bar may drift when the machine stops, c. An extra stitch may be sewing when the machine stops, d. An abnormal noise may be heard due to V-belt slipping, and e. The V-belt may become too loose and contact with the cover. If any such problems occur, adjust by following the procedure described above. 4. Secure the motor belt cover (2) and the auxiliary motor belt cover (5) with the four screws (1) as shown in the illustration so that they do not touch the V-belt (3). 3884Q 19 HE-800A
-
 1
1 -
2
-
3
-
4
-
5
-
6
-
7
-
8
-
9
-
10
-
11
-
12
-
13
-
14
-
15
-
16
-
17
-
18
-
19
-
20
-
21
-
 22
22 -
 23
23 -
 24
24 -
 25
25 -
 26
26 -
 27
27 -
 28
28 -
 29
29 -
 30
30 -
 31
31 -
 32
32 -
33
-
34
-
35
-
36
-
37
-
38
-
39
-
40
-
41
-
42
-
43
-
44
-
45
-
46
-
47
-
48
-
49
-
50
-
51
-
52
-
53
-
54
-
55
-
56
-
57
-
58
-
59
-
60
-
61
-
62
-
63
-
64
-
65
-
66
-
67
-
68
-
69
-
70
-
71
-
72
-
73
-
74
-
75
-
76
-
77
-
78
-
79
-
80
-
81
-
82
-
83
-
84
-
85
-
86
-
87
-
88
-
89
-
90
-
91
-
92
-
93
-
94
-
95
-
96
-
97
-
98
-
99
-
100
-
101
-
102
-
103
-
104
-
105
-
106
-
107
-
108
-
109
-
110
-
111
-
112
-
113
-
114
-
115
-
116
-
117
-
118
 |
 |