Canon FAXPHONE L90 Reference Guide FAXPHONE L90 - Page 84
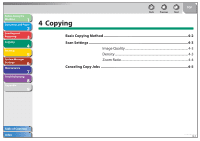
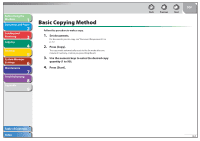
Image Quality, Density, Press [Copy].
 |
UPC - 013803082029
View all Canon FAXPHONE L90 manuals
Add to My Manuals
Save this manual to your list of manuals |
Page 84 highlights
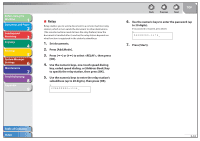
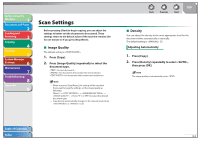
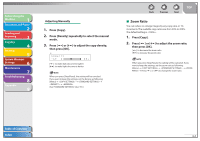
Before Using the Machine 1 Document and Paper 2 Sending and Receiving 3 Copying 4 Printing 5 System Manager Settings 6 Maintenance 7 Troubleshooting 8 Appendix 9 Scan Settings Before pressing [Start] to begin copying, you can adjust the settings to better suit the document to be scanned. These settings return to the default values if the machine remains idle for one minute or if you press [Stop/Reset]. ˙ Image Quality The default setting is . 1. Press [Copy]. 2. Press [Image Quality] repeatedly to select the document type. : for text documents : for documents that contain fine text or photos : for documents that contain text and photos - When you press [Stop/Reset], the setting will be canceled. If you want to keep the settings, set the image quality as following: [Menu] → → → → Press [ ] or [ ] to select the desired document type. - Copy density automatically changes to the manual mode when or is set. Back Previous Next TOP ˙ Density You can adjust the density to the most appropriate level for the document either automatically or manually. The default setting is (5). Adjusting Automatically 1. Press [Copy]. 2. Press [Density] repeatedly to select , then press [OK]. The image quality is automatically set to . Table of Contents Index 4-3
-
 1
1 -
2
-
3
-
4
-
5
-
6
-
7
-
8
-
9
-
10
-
11
-
12
-
13
-
14
-
15
-
16
-
17
-
18
-
19
-
20
-
21
-
22
-
23
-
24
-
25
-
26
-
27
-
28
-
29
-
30
-
31
-
32
-
33
-
34
-
35
-
36
-
37
-
38
-
39
-
40
-
41
-
42
-
43
-
44
-
45
-
46
-
47
-
48
-
49
-
50
-
51
-
52
-
53
-
54
-
55
-
56
-
57
-
58
-
59
-
60
-
61
-
62
-
63
-
64
-
65
-
66
-
67
-
68
-
69
-
70
-
71
-
72
-
73
-
74
-
75
-
76
-
77
-
78
-
 79
79 -
 80
80 -
 81
81 -
 82
82 -
 83
83 -
 84
84 -
 85
85 -
 86
86 -
 87
87 -
 88
88 -
 89
89 -
90
-
91
-
92
-
93
-
94
-
95
-
96
-
97
-
98
-
99
-
100
-
101
-
102
-
103
-
104
-
105
-
106
-
107
-
108
-
109
-
110
-
111
-
112
-
113
-
114
-
115
-
116
-
117
-
118
-
119
-
120
-
121
-
122
-
123
-
124
-
125
-
126
-
127
-
128
-
129
-
130
-
131
-
132
-
133
-
134
-
135
-
136
-
137
-
138
-
139
-
140
-
141
-
142
-
143
-
144
-
145
-
146
-
147
-
148
-
149
-
150
-
151
-
152
-
153
-
154
-
155
-
156
-
157
-
158
-
159
-
160
-
161
-
162
-
163
-
164
-
165
-
166
-
167
-
168
-
169
-
170
-
171
-
172
-
173
-
174
-
175
-
176
-
177
-
178
-
179
-
180
-
181
-
182
-
183
-
184
-
185
-
186
-
187
-
188
-
189
-
190
-
191
-
192
-
193
 |
 |