Canon MultiPASS F80 MultiPASS F80 Comprehensive Guide - Page 118
Machine settings, Printing a list to check the current settings, Accessing the machine settings
 |
View all Canon MultiPASS F80 manuals
Add to My Manuals
Save this manual to your list of manuals |
Page 118 highlights
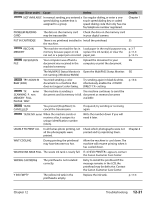
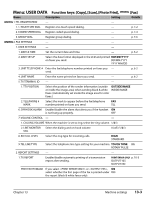
Chapter 13 Machine settings Printing a list to check the current settings Before changing any settings, you can print the USER'S DATA LIST to check the current settings of your machine. For details, see p. 10-5. Accessing the machine settings Follow this procedure to change a setting: 1 Refer to the lists on the following pages to find the setting you want to change. 2 If there is a reference for the setting q, refer to that page or Example: guide for details. If not, at the top e w of the list, note under which function key w and menu e the setting is located. 3 Press [Copy], [Scan], [Photo Print], or Fax Model [Fax] depending under which function key w the setting is located. Menu: SPECIAL COPY Function key: [Copy] For details on how to access the settings below, see p. Name Description Setting 1. 2 on 1 2. BORDERLESS COPY Copies two pages on one page (letter- or A4-size only). - Copies without any borders (letter, A4-, or 4" × 6"-size - only). 3. IMAGE REPEAT Prints multiple copies of an image on a single sheet. - AUTO Automatically selects the number of repetitions. - MANUAL Manually select the number or repetitions. VERTICAL Select the number of vertical repetitions. 1/2/3/4 HORIZONTAL Select the number of horizontal repetitions. 1/2/3/4 4. MIRROR IMAGE Prints a mirror image of the original. - 5. ENTIRE IMAGE Prints the original image to fit the selected paper size. - 4 Press [Menu]. q Details p. 5-4 p. 5-5 p. 5-6 p. 5-8 p. 5-9 5 Use [2] or [3] to select the menu e under which the setting is located. 6 Press [Set]. • You have now accessed the settings in the list. 7 Use [2] or [3] to select the setting you want. 8 Press [Set]. 9 Follow these guidelines to scroll through and register settings: • Use [2] or [3] to scroll through settings. • To register a setting or access sub-settings, press [Set]. • To return to a previous level, press [Menu]. 10 When you have finished, press [Stop/Reset]. Chapter 13 Machine settings 13-1
-
 1
1 -
2
-
3
-
4
-
5
-
6
-
7
-
8
-
9
-
10
-
11
-
12
-
13
-
14
-
15
-
16
-
17
-
18
-
19
-
20
-
21
-
22
-
23
-
24
-
25
-
26
-
27
-
28
-
29
-
30
-
31
-
32
-
33
-
34
-
35
-
36
-
37
-
38
-
39
-
40
-
41
-
42
-
43
-
44
-
45
-
46
-
47
-
48
-
49
-
50
-
51
-
52
-
53
-
54
-
55
-
56
-
57
-
58
-
59
-
60
-
61
-
62
-
63
-
64
-
65
-
66
-
67
-
68
-
69
-
70
-
71
-
72
-
73
-
74
-
75
-
76
-
77
-
78
-
79
-
80
-
81
-
82
-
83
-
84
-
85
-
86
-
87
-
88
-
89
-
90
-
91
-
92
-
93
-
94
-
95
-
96
-
97
-
98
-
99
-
100
-
101
-
102
-
103
-
104
-
105
-
106
-
107
-
108
-
109
-
110
-
111
-
112
-
 113
113 -
 114
114 -
 115
115 -
 116
116 -
 117
117 -
 118
118 -
 119
119 -
 120
120 -
 121
121 -
 122
122 -
 123
123 -
124
-
125
-
126
-
127
-
128
-
129
-
130
-
131
-
132
-
133
-
134
 |
 |
