Dell 968w All In One Wireless Photo Printer User's Guide - Page 169
Changing Scan Settings
 |
View all Dell 968w All In One Wireless Photo Printer manuals
Add to My Manuals
Save this manual to your list of manuals |
Page 169 highlights
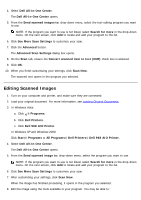
9. Click Scan Now. Changing Scan Settings Using the Operator Panel You can change the copy settings from the Scan Mode menu on the operator panel. For more information about settings, see Scan Mode. Using Your Computer 1. In Windows Vista: a. Click ® Programs. b. Click Dell Printers. c. Click Dell 968 AIO Printer. In Windows XP and Windows 2000: Click Start® Programs or All Programs® Dell Printers® Dell 968 AIO Printer. 2. Select Dell All-In-One Center. The Dell All-In-One Center opens. 3. From the Send scanned images to: drop down menu, select the program you want to use. NOTE: If the program you want to use is not listed, select Search for more in the drop-down menu. On the next screen, click Add to locate and add the program to the list. 4. Click See More Scan Settings to: Select what kind of document is being scanned. Select a scan quality. 5. Click the Advanced button to change options such as paper size and quality. 6. To make any changes, click the following tabs: Click this tab: Scan To: Choose a color depth. Select a scan resolution. Adjust the sensitivity of the auto-crop tool. Set the area to be scanned. Use the OCR program to convert scanned items to text. Indicate that you are scanning multiple items.
-
 1
1 -
2
-
3
-
4
-
5
-
6
-
7
-
8
-
9
-
10
-
11
-
12
-
13
-
14
-
15
-
16
-
17
-
18
-
19
-
20
-
21
-
22
-
23
-
24
-
25
-
26
-
27
-
28
-
29
-
30
-
31
-
32
-
33
-
34
-
35
-
36
-
37
-
38
-
39
-
40
-
41
-
42
-
43
-
44
-
45
-
46
-
47
-
48
-
49
-
50
-
51
-
52
-
53
-
54
-
55
-
56
-
57
-
58
-
59
-
60
-
61
-
62
-
63
-
64
-
65
-
66
-
67
-
68
-
69
-
70
-
71
-
72
-
73
-
74
-
75
-
76
-
77
-
78
-
79
-
80
-
81
-
82
-
83
-
84
-
85
-
86
-
87
-
88
-
89
-
90
-
91
-
92
-
93
-
94
-
95
-
96
-
97
-
98
-
99
-
100
-
101
-
102
-
103
-
104
-
105
-
106
-
107
-
108
-
109
-
110
-
111
-
112
-
113
-
114
-
115
-
116
-
117
-
118
-
119
-
120
-
121
-
122
-
123
-
124
-
125
-
126
-
127
-
128
-
129
-
130
-
131
-
132
-
133
-
134
-
135
-
136
-
137
-
138
-
139
-
140
-
141
-
142
-
143
-
144
-
145
-
146
-
147
-
148
-
149
-
150
-
151
-
152
-
153
-
154
-
155
-
156
-
157
-
158
-
159
-
160
-
161
-
162
-
163
-
 164
164 -
 165
165 -
 166
166 -
 167
167 -
 168
168 -
 169
169 -
 170
170 -
 171
171 -
 172
172 -
 173
173 -
 174
174 -
175
-
176
-
177
-
178
-
179
-
180
-
181
 |
 |
