Dell 968w All In One Wireless Photo Printer User's Guide - Page 96
Understanding the Automatic Paper Type Sensor
 |
View all Dell 968w All In One Wireless Photo Printer manuals
Add to My Manuals
Save this manual to your list of manuals |
Page 96 highlights
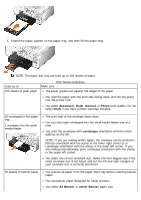
Settings, and then press the Select button . 4. From the Copy Default Settings menu, press the down Arrow button to scroll to Paper Handling, and then press the Select button . 5. From the Paper Handling menu, specify the size and type of paper loaded in both paper trays. 6. Press the up or down Arrow button Arrow button to select Auto. to scroll to Tray Linking, and then press the left or right 7. Press the Back button to save the settings and return to the previous menu. Enabling Tray Linking to Print Received Faxes 1. Load paper of the same type but of different sizes in both trays. 2. From the Main menu, press the up or down Arrow button press the Select button . to scroll to Setup, and then 3. From the Setup menu, press the up or down Arrow button Settings, and then press the Select button . to scroll to Change Fax Default 4. From the Fax Setup menu, press the up or down Arrow button and then press the Select button . to scroll to Fax Printing, 5. From the Fax Printing menu, press the down Arrow button to scroll to Paper Handling, and then press the Select button . 6. From the Paper Handling menu, specify the size and type of paper loaded in both paper trays. 7. Press the up or down Arrow button Arrow button to select Auto. to scroll to Tray Linking, and then press the left or right 8. Press the up or down Arrow button to scroll to Fax Source, and then press the left or right Arrow button to select the paper source. 9. Press the Back button to save the settings and return to the previous menu. NOTE: If you load media of the same type and size in both trays, the printer picks from the next tray once the paper source you specified for faxing is empty. Understanding the Automatic Paper Type Sensor Your printer has an automatic paper type sensor that detects the following paper types: Plain/heavyweight matte Transparency Photo/glossy If you load one of these paper types, the printer detects the paper type and automatically adjusts the Quality/Speed settings.
-
 1
1 -
2
-
3
-
4
-
5
-
6
-
7
-
8
-
9
-
10
-
11
-
12
-
13
-
14
-
15
-
16
-
17
-
18
-
19
-
20
-
21
-
22
-
23
-
24
-
25
-
26
-
27
-
28
-
29
-
30
-
31
-
32
-
33
-
34
-
35
-
36
-
37
-
38
-
39
-
40
-
41
-
42
-
43
-
44
-
45
-
46
-
47
-
48
-
49
-
50
-
51
-
52
-
53
-
54
-
55
-
56
-
57
-
58
-
59
-
60
-
61
-
62
-
63
-
64
-
65
-
66
-
67
-
68
-
69
-
70
-
71
-
72
-
73
-
74
-
75
-
76
-
77
-
78
-
79
-
80
-
81
-
82
-
83
-
84
-
85
-
86
-
87
-
88
-
89
-
90
-
 91
91 -
 92
92 -
 93
93 -
 94
94 -
 95
95 -
 96
96 -
 97
97 -
 98
98 -
 99
99 -
 100
100 -
 101
101 -
102
-
103
-
104
-
105
-
106
-
107
-
108
-
109
-
110
-
111
-
112
-
113
-
114
-
115
-
116
-
117
-
118
-
119
-
120
-
121
-
122
-
123
-
124
-
125
-
126
-
127
-
128
-
129
-
130
-
131
-
132
-
133
-
134
-
135
-
136
-
137
-
138
-
139
-
140
-
141
-
142
-
143
-
144
-
145
-
146
-
147
-
148
-
149
-
150
-
151
-
152
-
153
-
154
-
155
-
156
-
157
-
158
-
159
-
160
-
161
-
162
-
163
-
164
-
165
-
166
-
167
-
168
-
169
-
170
-
171
-
172
-
173
-
174
-
175
-
176
-
177
-
178
-
179
-
180
-
181
 |
 |
