Dell 968w All In One Wireless Photo Printer User's Guide - Page 74
Wireless Setup Menu, Network Setup, TCP/IP Menu, Network, Setup, Arrow, Time Server, Select, Set IP
 |
View all Dell 968w All In One Wireless Photo Printer manuals
Add to My Manuals
Save this manual to your list of manuals |
Page 74 highlights
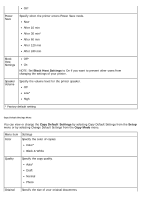
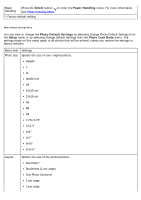
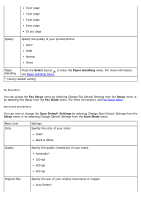
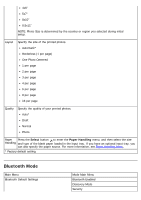
From the Network Time Menu, press the left or right Arrow button to enable or disable the Time Server, and then press the Back button to save the settings. NOTE: When Time Server is enabled, the wireless Ethernet card updates the printer's time once a day or every time the printer is powered on. Active Network Specify which network connection the adapter should use. Auto* Ethernet 10/100 Wireless 802.11b/g * Factory default setting Wireless Menu You can view or change the settings in the Wireless Setup Menu by selecting Wireless Menu from the Network Setup menu. Menu item Network Name Wireless Signal Quality * Factory default setting Settings Reflects the current SSID being used. NOTE: You cannot change the value of Network Name. Press the Select button to view the current signal quality. TCP/IP Menu You can view or change the settings in the TCP/IP Menu by selecting TCP/IP from the Network Setup menu. Menu item Enable DHCP Settings Specify whether or not your network automatically assigns IP settings. Yes* No NOTE: You cannot change or set an IP Address, IP Netmask, and IP Gateway if DHCP is enabled. Set IP Address Press the Select button to enter the Set IP Address menu. From the Set IP Address menu, use the keypad to enter an IP address. Press the right Arrow button to enter a set of numbers in the next field, or press the left Arrow button to erase an entry. Press the Back button to save the settings. NOTE: The IP address cannot be changed if DHCP is enabled. Set IP Press the Select button to enter the Set IP Netmask menu. Netmask
-
 1
1 -
2
-
3
-
4
-
5
-
6
-
7
-
8
-
9
-
10
-
11
-
12
-
13
-
14
-
15
-
16
-
17
-
18
-
19
-
20
-
21
-
22
-
23
-
24
-
25
-
26
-
27
-
28
-
29
-
30
-
31
-
32
-
33
-
34
-
35
-
36
-
37
-
38
-
39
-
40
-
41
-
42
-
43
-
44
-
45
-
46
-
47
-
48
-
49
-
50
-
51
-
52
-
53
-
54
-
55
-
56
-
57
-
58
-
59
-
60
-
61
-
62
-
63
-
64
-
65
-
66
-
67
-
68
-
 69
69 -
 70
70 -
 71
71 -
 72
72 -
 73
73 -
 74
74 -
 75
75 -
 76
76 -
 77
77 -
 78
78 -
 79
79 -
80
-
81
-
82
-
83
-
84
-
85
-
86
-
87
-
88
-
89
-
90
-
91
-
92
-
93
-
94
-
95
-
96
-
97
-
98
-
99
-
100
-
101
-
102
-
103
-
104
-
105
-
106
-
107
-
108
-
109
-
110
-
111
-
112
-
113
-
114
-
115
-
116
-
117
-
118
-
119
-
120
-
121
-
122
-
123
-
124
-
125
-
126
-
127
-
128
-
129
-
130
-
131
-
132
-
133
-
134
-
135
-
136
-
137
-
138
-
139
-
140
-
141
-
142
-
143
-
144
-
145
-
146
-
147
-
148
-
149
-
150
-
151
-
152
-
153
-
154
-
155
-
156
-
157
-
158
-
159
-
160
-
161
-
162
-
163
-
164
-
165
-
166
-
167
-
168
-
169
-
170
-
171
-
172
-
173
-
174
-
175
-
176
-
177
-
178
-
179
-
180
-
181
 |
 |
