Dell 968w All In One Wireless Photo Printer User's Guide - Page 24
Creating Fax Activity Report
 |
View all Dell 968w All In One Wireless Photo Printer manuals
Add to My Manuals
Save this manual to your list of manuals |
Page 24 highlights
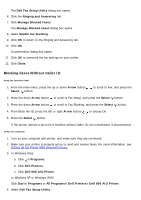
The Dell Fax Setup Wizard Query dialog box opens. 5. Click No. The Dell Fax Setup Utility dialog box opens. 6. Click the Ringing and Answering tab. 7. Click Manage Blocked Faxes. The Manage Blocked Faxes dialog box opens. 8. Select Always block faxes from senders missing a valid Caller ID. 9. Click OK to return to the Ringing and Answering tab. 10. Click OK. A confirmation dialog box opens. 11. Click OK to overwrite the fax settings on your printer. 12. Click Close. Creating Fax Activity Report Using the Operator Panel 1. From the main menu, press the up or down Arrow button the Select button . to scroll to Fax, and then press 2. Press the down Arrow button to scroll to Fax Setup, and then press the Select button . 3. Press the up or down Arrow button Select button . to scroll to History and Reports, and then press the 4. From the History and Reports menu, you can view or print your fax activity. Using the Computer 1. In Windows Vista: a. Click ® Programs. b. Click Dell Printers. c. Click Dell 968 AIO Printer. In Windows XP and Windows 2000: Click Start® Programs or All Programs® Dell Printers® Dell 968 AIO Printer. 2. Click Dell Fax Solutions.
-
 1
1 -
2
-
3
-
4
-
5
-
6
-
7
-
8
-
9
-
10
-
11
-
12
-
13
-
14
-
15
-
16
-
17
-
18
-
 19
19 -
 20
20 -
 21
21 -
 22
22 -
 23
23 -
 24
24 -
 25
25 -
 26
26 -
 27
27 -
 28
28 -
 29
29 -
30
-
31
-
32
-
33
-
34
-
35
-
36
-
37
-
38
-
39
-
40
-
41
-
42
-
43
-
44
-
45
-
46
-
47
-
48
-
49
-
50
-
51
-
52
-
53
-
54
-
55
-
56
-
57
-
58
-
59
-
60
-
61
-
62
-
63
-
64
-
65
-
66
-
67
-
68
-
69
-
70
-
71
-
72
-
73
-
74
-
75
-
76
-
77
-
78
-
79
-
80
-
81
-
82
-
83
-
84
-
85
-
86
-
87
-
88
-
89
-
90
-
91
-
92
-
93
-
94
-
95
-
96
-
97
-
98
-
99
-
100
-
101
-
102
-
103
-
104
-
105
-
106
-
107
-
108
-
109
-
110
-
111
-
112
-
113
-
114
-
115
-
116
-
117
-
118
-
119
-
120
-
121
-
122
-
123
-
124
-
125
-
126
-
127
-
128
-
129
-
130
-
131
-
132
-
133
-
134
-
135
-
136
-
137
-
138
-
139
-
140
-
141
-
142
-
143
-
144
-
145
-
146
-
147
-
148
-
149
-
150
-
151
-
152
-
153
-
154
-
155
-
156
-
157
-
158
-
159
-
160
-
161
-
162
-
163
-
164
-
165
-
166
-
167
-
168
-
169
-
170
-
171
-
172
-
173
-
174
-
175
-
176
-
177
-
178
-
179
-
180
-
181
 |
 |
