Dell 968w All In One Wireless Photo Printer User's Guide - Page 20
Using a Speed or Group Dial List
 |
View all Dell 968w All In One Wireless Photo Printer manuals
Add to My Manuals
Save this manual to your list of manuals |
Page 20 highlights
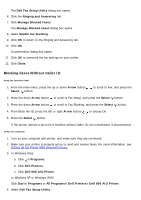
b. Click Dell Printers. c. Click Dell 968 AIO Printer. In Windows XP or Windows 2000: Click Start® Programs or All Programs® Dell Printers® Dell 968 AIO Printer. 4. Select Dell Fax Setup Utility. The Dell Fax Setup Wizard Query dialog box opens. 5. Click No. The Dell Fax Setup Utility dialog box opens. 6. Click the Speed Dial tab. 7. To add a new entry to your Speed Dial list, click on an available number from 1 to 89, and enter the fax number and name of your new contact. To add a new group entry to your Group Dial list, click on an available number from 90 to 99. A smaller group list appears below the main Speed Dial list. Enter the fax numbers and names of your new group entry. 8. To add contacts from your phonebook, click Select from phonebook. The Select from phonebook dialog box opens. a. Select a contact from your phonebook. b. If you want to add the contact to your list, click on an available number on the Speed or Group Dial Settings section. If you want to overwrite an existing entry on your list, click the entry you want to change. c. Click Add to or change list. d. After adding phonebook entries to your Speed or Group Dial list, click OK to return to the Speed Dial tab. 9. Click OK. A confirmation dialog box appears. 10. Click OK to overwrite the settings on your printer. 11. Click Close. Using a Speed or Group Dial List 1. From the main menu, press the up or down Arrow button the Select button . to scroll to Fax, and then press 2. Use the keypad to enter the two-digit speed dial number. 3. Press the Start button . NOTE: When you are entering numbers, if you only enter two numbers and an entry corresponds to this number, the printer assumes you are entering a speed dial entry. If the number you entered
-
 1
1 -
2
-
3
-
4
-
5
-
6
-
7
-
8
-
9
-
10
-
11
-
12
-
13
-
14
-
 15
15 -
 16
16 -
 17
17 -
 18
18 -
 19
19 -
 20
20 -
 21
21 -
 22
22 -
 23
23 -
 24
24 -
 25
25 -
26
-
27
-
28
-
29
-
30
-
31
-
32
-
33
-
34
-
35
-
36
-
37
-
38
-
39
-
40
-
41
-
42
-
43
-
44
-
45
-
46
-
47
-
48
-
49
-
50
-
51
-
52
-
53
-
54
-
55
-
56
-
57
-
58
-
59
-
60
-
61
-
62
-
63
-
64
-
65
-
66
-
67
-
68
-
69
-
70
-
71
-
72
-
73
-
74
-
75
-
76
-
77
-
78
-
79
-
80
-
81
-
82
-
83
-
84
-
85
-
86
-
87
-
88
-
89
-
90
-
91
-
92
-
93
-
94
-
95
-
96
-
97
-
98
-
99
-
100
-
101
-
102
-
103
-
104
-
105
-
106
-
107
-
108
-
109
-
110
-
111
-
112
-
113
-
114
-
115
-
116
-
117
-
118
-
119
-
120
-
121
-
122
-
123
-
124
-
125
-
126
-
127
-
128
-
129
-
130
-
131
-
132
-
133
-
134
-
135
-
136
-
137
-
138
-
139
-
140
-
141
-
142
-
143
-
144
-
145
-
146
-
147
-
148
-
149
-
150
-
151
-
152
-
153
-
154
-
155
-
156
-
157
-
158
-
159
-
160
-
161
-
162
-
163
-
164
-
165
-
166
-
167
-
168
-
169
-
170
-
171
-
172
-
173
-
174
-
175
-
176
-
177
-
178
-
179
-
180
-
181
 |
 |
