Fujitsu T4215 T4215 User's Guide - Page 106
Configuration Using, Intel Proset Software - windows 10
 |
View all Fujitsu T4215 manuals
Add to My Manuals
Save this manual to your list of manuals |
Page 106 highlights
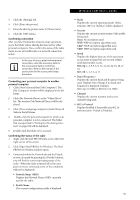
LifeBook T4200 Series Tablet PC - Appendix A the checkbox for the field [This is a computer to computer (ad hoc) network, wireless access points are not used.] must be checked. Access Point (Infrastructure) Networks: The SSID must be identical to the SSID of the access point(s) and the checkbox for the following field must be unchecked [This is a computer to computer (ad hoc) network wireless access points are not used.] Refer to the access point manual, or contact your network administrator 9. Configure Wireless Network Key parameters (Network Authentication and Encryption). a. Choose the Network Authentication method appropriate for your wireless LAN. Options include Open, Shared, WPA, and WPA-PSK. Ad Hoc Networks: Network Authentication settings must be identical for all computers in the Ad Hoc network. Access Point (Infrastructure Networks): Network Authentication setting must be configured to match the setting of the Access Point(s). Please contact your network administrator for this information. b. Choose the Encryption method appropriate for your wireless LAN. Options for Open or Shared Authentication are None or WEP. Options for WPA or WPA-PSK are WEP or TKIP. c. If using static WEP keys, clear the check mark from the [The key is provided for me automatically] check box. If using an authentication method that uses dynamic WEP (e.g., WPA, WPA-PSK, 802.1x/EAP), the check box should remain checked. Please contact your network administrator for the correct settings. d. Static WEP keys (if applicable) are entered in the [Network Key] box. Configuration of the [Network Key] is not required if the [The key is provided for me automatically] check box is checked. ■ Static WEP keys entered in ASCII code format will be either five characters (40-bit) or thirteen characters (104-bit) in length. Valid characters are 0 - 9, A - Z. ■ Static WEP keys entered in hexadecimal code format will be either ten characters (40-bit) or twenty-six characters (104-bit) in length. Valid characters are 0 - 9, A - F. Ad Hoc Networks: Assign the same net-work key to all the personal computers to be connected. 98 Access Point (Infrastructure) Networks: Assign the identical network key that is programmed into the access point. Please contact your network administrator for this information. e. If using static WEP keys, confirm the Network key by re-entering the same data in the [Confirm network key:] field. f. The Key index used must be identical to the transmit key used in the Access Point or other wireless device. This is only applicable when static WEP keys are used. Please contact your network administrator for this information. 10. Access Point (Infrastructure) Networks Only: If the wireless network you are establishing connectivity to implements an access control security mechanism, configuration of 802.1x parameters may be necessary. Please contact your network administrator for these settings. Configuration of these parameters is not applicable to home users. 11. Click [OK] to close the [Wireless Network] window which will cause the WLAN device to re-establish wireless network connectivity using the recently configured parameters. CONFIGURATION USING INTEL PROSET SOFTWARE This section explains the procedure to properly configure the WLAN device using the Intel PROSet Software. Pre-defined parameters will be required for this procedure. Please consult with your network administrator for these parameters: Network Name - Also known as the SSID Network Key (WEP) - Required if using static WEP keys. Authentication Type - Open, Shared, WPA, or WPAPSK Procedure 1. Activate the WLAN device using either the Wireless On/Off Switch or the Intel PROSet software. 2. Click the [Start] button first and then [Control Panel]. 3. If the Control Panel is in Category view, switch to Classic view by clicking "Switch to Classic View" which can be found in the left frame of the Control Panel window. 4. Double-click the icon [Intel PROSet] to execute the Intel PROSet Software. 5. From the General page, click the Networks tab.
-
 1
1 -
2
-
3
-
4
-
5
-
6
-
7
-
8
-
9
-
10
-
11
-
12
-
13
-
14
-
15
-
16
-
17
-
18
-
19
-
20
-
21
-
22
-
23
-
24
-
25
-
26
-
27
-
28
-
29
-
30
-
31
-
32
-
33
-
34
-
35
-
36
-
37
-
38
-
39
-
40
-
41
-
42
-
43
-
44
-
45
-
46
-
47
-
48
-
49
-
50
-
51
-
52
-
53
-
54
-
55
-
56
-
57
-
58
-
59
-
60
-
61
-
62
-
63
-
64
-
65
-
66
-
67
-
68
-
69
-
70
-
71
-
72
-
73
-
74
-
75
-
76
-
77
-
78
-
79
-
80
-
81
-
82
-
83
-
84
-
85
-
86
-
87
-
88
-
89
-
90
-
91
-
92
-
93
-
94
-
95
-
96
-
97
-
98
-
99
-
100
-
 101
101 -
 102
102 -
 103
103 -
 104
104 -
 105
105 -
 106
106 -
 107
107 -
 108
108 -
 109
109 -
 110
110 -
 111
111 -
112
-
113
-
114
-
115
-
116
-
117
-
118
-
119
-
120
-
121
-
122
-
123
-
124
-
125
-
126
-
127
-
128
-
129
-
130
-
131
-
132
-
133
-
134
-
135
-
136
 |
 |