HP Photosmart Plus All-in-One Printer - B209 User Guide - Page 79
Setup troubleshooting, The product will not turn on, Troubleshooting common setup issues
 |
View all HP Photosmart Plus All-in-One Printer - B209 manuals
Add to My Manuals
Save this manual to your list of manuals |
Page 79 highlights
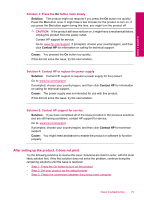
Solve a problem Setup troubleshooting This section contains setup troubleshooting information for the product. Many issues are caused when the product is connected to the computer using a USB cable before the product software is installed on the computer. If you connected the product to your computer before the software installation screen prompted you to do so, you must follow these steps: Troubleshooting common setup issues 1. Disconnect the USB cable from the computer. 2. Uninstall the software (if you have already installed it). For more information, see "Uninstall and reinstall the software" on page 81. 3. Restart your computer. 4. Turn off the product, wait one minute, then restart it. 5. Reinstall the HP Photosmart software. CAUTION: Do not connect the USB cable to the computer until prompted by the software installation screen. This section contains the following topics: • The product will not turn on • After setting up the product, it does not print • The wrong measurements are showing in menus on the display • The registration screen does not appear • Uninstall and reinstall the software The product will not turn on Try the following solutions if there are no light indications, no noise, and no movement from the product when you turn it on. • Solution 1: Check the power cord • Solution 2: Reset the product • Solution 3: Press the On button more slowly • Solution 4: Contact HP to replace the power supply • Solution 5: Contact HP support for service Setup troubleshooting 77
-
 1
1 -
2
-
3
-
4
-
5
-
6
-
7
-
8
-
9
-
10
-
11
-
12
-
13
-
14
-
15
-
16
-
17
-
18
-
19
-
20
-
21
-
22
-
23
-
24
-
25
-
26
-
27
-
28
-
29
-
30
-
31
-
32
-
33
-
34
-
35
-
36
-
37
-
38
-
39
-
40
-
41
-
42
-
43
-
44
-
45
-
46
-
47
-
48
-
49
-
50
-
51
-
52
-
53
-
54
-
55
-
56
-
57
-
58
-
59
-
60
-
61
-
62
-
63
-
64
-
65
-
66
-
67
-
68
-
69
-
70
-
71
-
72
-
73
-
 74
74 -
 75
75 -
 76
76 -
 77
77 -
 78
78 -
 79
79 -
 80
80 -
 81
81 -
 82
82 -
 83
83 -
 84
84 -
85
-
86
-
87
-
88
-
89
-
90
-
91
-
92
-
93
-
94
-
95
-
96
-
97
-
98
-
99
-
100
-
101
-
102
-
103
-
104
-
105
-
106
-
107
-
108
-
109
-
110
-
111
-
112
-
113
-
114
-
115
-
116
-
117
-
118
-
119
-
120
-
121
-
122
-
123
-
124
-
125
-
126
-
127
-
128
-
129
-
130
-
131
-
132
-
133
-
134
-
135
-
136
-
137
-
138
-
139
-
140
-
141
-
142
 |
 |