HP Scanjet Enterprise 7000n HP Scanjet 7000n Series - User Guide - Page 68
Secure Storage Erase, Data affected
 |
View all HP Scanjet Enterprise 7000n manuals
Add to My Manuals
Save this manual to your list of manuals |
Page 68 highlights
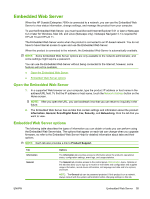
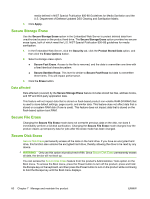
media defined in NIST Special Publication 800-88 Guidelines for Media Sanitation and the U.S. Department of Defense Updated DSS Clearing and Sanitization Matrix. 3. Click Apply. Secure Storage Erase Use the Secure Storage Erase option in the Embedded Web Server to protect deleted data from unauthorized access on the product hard drive. The Secure Storage Erase option provides two secure erase types, both of which meet the U.S. NIST Special Publication 800-88 guidelines for media sanitization. 1. In the Embedded Web Server, click the Security tab, click the Protect Stored Data option, and then click the Erase Options button. 2. Select a storage erase option. ● Secure Fast Erase. Access to the file is removed, and the data is overwritten one time with a fixed identical character pattern. ● Secure Sanitize Erase. This level is similar to Secure Fast Erase but data is overwritten three times. This will impact performance. 3. Click the Erase button. Data affected Data affected (covered) by the Secure Storage Erase feature includes stored fax files, address books, and HP and third-party application data. This feature will not impact data that is stored on flash-based product non-volatile RAM (NVRAM) that is used to store default settings, page counts, and similar data. This feature does not affect data that is stored on a system RAM disk (if one is used). This feature does not impact data that is stored on the flash-based system boot RAM. Secure File Erase Changing the Secure File Erase mode does not overwrite previous data on the disk, nor does it immediately perform a full-disk sanitization. Changing the Secure File Erase mode changes how the product cleans up temporary data for jobs after the erase mode has been changed. Secure Disk Erase Secure Disk Erase permanently erases all the data on the hard drive. If you have an encrypted hard drive, this function also unlocks the encrypted hard drive, thereby allowing the drive to be read by any device. WARNING! Only use this option at product end-of-life. Since Secure Disk Erase permanently erases all data, the device will not boot up. You can access the Secure Disk Erase feature from the product's Administrative Tools option on the Boot menu. To access the Boot menu, press the Power button to turn off the product, press and hold the Escape key on the keyboard, and then press the Power button to turn on the product while continuing to hold the Escape key until the Boot menu displays. 60 Chapter 7 Manage and maintain the product ENWW
-
 1
1 -
2
-
3
-
4
-
5
-
6
-
7
-
8
-
9
-
10
-
11
-
12
-
13
-
14
-
15
-
16
-
17
-
18
-
19
-
20
-
21
-
22
-
23
-
24
-
25
-
26
-
27
-
28
-
29
-
30
-
31
-
32
-
33
-
34
-
35
-
36
-
37
-
38
-
39
-
40
-
41
-
42
-
43
-
44
-
45
-
46
-
47
-
48
-
49
-
50
-
51
-
52
-
53
-
54
-
55
-
56
-
57
-
58
-
59
-
60
-
61
-
62
-
 63
63 -
 64
64 -
 65
65 -
 66
66 -
 67
67 -
 68
68 -
 69
69 -
 70
70 -
 71
71 -
 72
72 -
 73
73 -
74
-
75
-
76
-
77
-
78
-
79
-
80
-
81
-
82
-
83
-
84
-
85
-
86
-
87
-
88
-
89
-
90
-
91
-
92
-
93
-
94
-
95
-
96
-
97
-
98
-
99
-
100
-
101
-
102
-
103
-
104
-
105
-
106
-
107
-
108
-
109
-
110
-
111
-
112
-
113
-
114
-
115
-
116
-
117
-
118
-
119
-
120
-
121
-
122
-
123
-
124
-
125
-
126
-
127
-
128
-
129
-
130
 |
 |
