JVC KD-AV7010 Instructions
JVC KD-AV7010 - DVD Player With LCD Monitor Manual
 |
UPC - 046838019401
View all JVC KD-AV7010 manuals
Add to My Manuals
Save this manual to your list of manuals |
JVC KD-AV7010 manual content summary:
- JVC KD-AV7010 | Instructions - Page 1
FRANÇAIS ESPAÑOL ENGLISH DVD RECEIVER WITH MONITOR RECEPTOR DVD CON MONITOR RECEPTEUR DVD ET MONITEUR KD-AV7010 Detachable ATT MAIN SUB ZOOM DUAL AVOUT VOL ASPECT MENU GUI SET UP TUNER 1 4 7 10 OK DISC 2 5 8 11/0 TOPMENU RETURN AV 3 6 9 12/+10 VOLUME • This unit is equipped with the - JVC KD-AV7010 | Instructions - Page 2
pen or a similar tool. This will reset the built-in microcomputer. IMPORTANT FOR LASER PRODUCTS 1. CLASS 1 LASER PRODUCT 2. CAUTION: Do not open the top cover. There are no user serviceable parts inside the unit; leave all servicing to qualified service personnel. 3. CAUTION: Visible and invisible - JVC KD-AV7010 | Instructions - Page 3
MUST NOT WATCH THE MONITOR WHILE DRIVING." appears on the monitor, and no playback picture will be shown. - This warning appears only when the parking brake wire is connected to the parking brake system built in the car (refer to the Installation/Connection Manual). • This product has a fluorescent - JVC KD-AV7010 | Instructions - Page 4
read this manual 3 Introduction-Playable Discs 5 Quick Guide-How to Use the Controls ...... 6 Remote controller 6 Main unit (front 8 Preparation (Remote Controller-RM-RK220 9 Operation Methods 10 Basic Operations 12 Setting the clock 13 Changing the source 14 Changing the graphic screen 14 - JVC KD-AV7010 | Instructions - Page 5
on Region Code DVD players and DVD Video discs have their own Region Code numbers. This unit can only play back DVD discs whose Region Code numbers include "1." Examples: If you insert a DVD Video disc of an incorrect Region Code "REGION CODE ERROR!" appears on the monitor. Digital audio formats - JVC KD-AV7010 | Instructions - Page 6
/SUB set to SUB). Change the aspect ratio. Display the monitor adjustment screen. 10 11/0 12/+10 VOLUME GUI SET UP Display and erase GUI screen. Display Setup Menus. Change menu items. OK Confirm. *1 When using Dual Mode, the remote controller operates either main or sub source depending on the - JVC KD-AV7010 | Instructions - Page 7
5 6 7 8 9 10 11/0 12/+10 Return to the previous screen while operating the disc menu. Select title/chapter/track number. *3 CD 10 Select disc numbers. TV tuner operations Buttons To do: Start Auto Search. Start Manual Search. Change preset channel numbers. 1 2 3 4 5 6 7 8 9 - JVC KD-AV7010 | Instructions - Page 8
. Start Manual Search. monitor. Turn off the monitor. Open/close the monitor. (See page 55.) Change the monitor angle for a while. (See page 55.) Slide in/out the monitor. Remove the monitor. Adjust the monitor angle. (See page 55.) Change the aspect ratio. Display the monitor adjustment screen - JVC KD-AV7010 | Instructions - Page 9
to direct sunlight for a long time. Otherwise, it may be damaged. The unit is equipped with the steering wheel remote control function. • See the Installation/Connection Manual (separate volume) for connection. DO NOT expose the remote sensor on the control panel to strong light (direct sunlight or - JVC KD-AV7010 | Instructions - Page 10
unit using three types of operation methods. • This instruction manual explains the operations mainly using the Touch Panel Icons shown on the monitor Ex. DVD playback Changes the source. To erase and display the Touch Panel icons and indications, press the center portion of the monitor screen. • - JVC KD-AV7010 | Instructions - Page 11
remote controller You can use the Graphic User Interface in the same way as you touch the panel icons. Examples: 1 GUI SET UP 2 OK 3 OK Display GUI on the monitor . You can also use the buttons and controls on the main unit and remote controller if they have the same or similar name or marks as - JVC KD-AV7010 | Instructions - Page 12
, use the buttons on the main unit and the remote controller. 1 Turn on the power To change the monitor angle: Hold 2 "WAITING" scrolls on the 1 display of the main unit (and the monitor comes out *). • When the monitor comes out, power comes on to the monitor even if you have turned it - JVC KD-AV7010 | Instructions - Page 13
, touch the center portion of the monitor screen. 2 *1 3 *2 *1 Appears only when SIRIUS radio is connected (see also page 72). 4 Set the clock time. • Press to start the clock time counting exactly from 00 second. To display the clock time: When the unit is turned off, the clock time is - JVC KD-AV7010 | Instructions - Page 14
has been activated, and starts automatically when no operations are done for about 30 seconds (except while playing a DVD/ VCD). To cancel it, select one of the graphic screen. 2 1 While playing any source... Ex. While listening to FM broadcast 2 The current source is highlighted. Newly selected - JVC KD-AV7010 | Instructions - Page 15
screen, by selecting from four preset patterns. • While viewing the playback picture or display demonstration, you cannot show the level meter. How to read the display of the main unit mode is "MONO." 4 ST indicator lights while receiving an FM stereo broadcast. The following level meters are - JVC KD-AV7010 | Instructions - Page 16
ENGLISH Radio Operations Volume level appears when adjusted. Dual Mode indicator (see page 33) SOURCE icon (see pages 14 and 33) Current band/Preset no. Station frequency FM reception mode Search mode Sound mode (see page 39) Surround/DSP mode (see page 36) Not available for AM. Available only - JVC KD-AV7010 | Instructions - Page 17
in to a station 2 Select a band (FM/AM) • For Auto Search, press either icon once. "Auto Search" begins. When a station is received, searching stops. • For Manual Search, press either icon repeatedly (or hold) until a station you want is selected. • For Preset Search, press either icon repeatedly - JVC KD-AV7010 | Instructions - Page 18
into. 1 Select the band (FM1 - FM3, and AM) you want to store a station into. 2 Tune in to a station. then 2 Start SSM. then Select "MANUAL" (or "AUTO"). 3 4 Store the station into a preset number. Local FM stations with the strongest signals are searched and stored then automatically in the - JVC KD-AV7010 | Instructions - Page 19
) you want to store a station into. 2 2 Tune into a station. then Select "MANUAL" (or "AUTO"). Displaying the preset list 3 You can store and select the preset stations using the preset list on the monitor screen. To select a preset station using the preset list 1 4 Store the station into - JVC KD-AV7010 | Instructions - Page 20
see page 25) Current track no. (for VCD) Current title/chapter no. (for DVD) Play time information (see page 30) Audio signal format Playback mode (see page 30 are indicated a few second after detected. (See page 75.) DVD While playing *1 Before playing *1 Available only while playing. *2 Not - JVC KD-AV7010 | Instructions - Page 21
ENGLISH CD/MP3 Operations Dual Mode indicator (see page 33) SOURCE icon (see pages 14 and 33) Current track no. (for CD) Current folder/track no. (for MP3) Play time information (see page 30) Audio signal format (only for DTS CD) Playback mode (see page 30) Sound mode (see page 39) Surround/DSP - JVC KD-AV7010 | Instructions - Page 22
following... • For DVD playback, change the Setup Menu setting (see page 43). • If " " appears on the monitor, the disc cannot until you stop it. : Starts playback. The unit turns on, then draws the disc, and starts playback automatically. • The monitor does not come out from its compartment if - JVC KD-AV7010 | Instructions - Page 23
manual indicate the playable discs. DVD VCD VCD with/without PBC with PBC CD MP3 All playable discs On-screen guide icons During play, the following guide icons may appear for a while on the monitor. • The following guide icons are displayed when "GUIDE 1 on the remote controller. Each time - JVC KD-AV7010 | Instructions - Page 24
main unit and on the remote FULL controller. FULL On the remote controller NORMAL NORMAL OK then OK WIDE ZOOM WIDE ZOOM CINEMA CINEMA • When you change the aspect ratio, either "RECEIVER" or "CRADLE" (see page 33) appears with the selected aspect ratio. It indicates where the monitor is - JVC KD-AV7010 | Instructions - Page 25
function allows you to operate the While playing a DVD: DVD discs generally have their own menus or title screens, or some moving pictures. • When a VCD with PBC is detected, the PBC indicator appears on the monitor. • When "3" or "SELECT" is displayed on the monitor, press 3 (or OK on the remote - JVC KD-AV7010 | Instructions - Page 26
can zoom into a particular portion of the picture. • This function is only possible using the remote controller. 1 ZOOM DUAL \ x2 \ x4 \ x8 \ x1 \ x2 \ x4 \ x8 ZOOM x4 2 Move the zoomed-in portion on the monitor. ZOOM x4 OK Replaying the previous scenes To cancel Zoom, press OK or press ZOOM - JVC KD-AV7010 | Instructions - Page 27
languages, you can select the subtitle language to display on the monitor. • You can also select the subtitle language using SETUP menu (see page 44). 1 2 Select a subtitle language you want. For DVD: While playing a chapter containing audio languages, you can select the language to listen - JVC KD-AV7010 | Instructions - Page 28
ENGLISH When playing VCD: Selecting multi-angle views While playing a disc containing multi-angle views, you can view the same scene at different angles. 1 STEREO LEFT RIGHT 2 Select a view angle you want. • STEREO: To listen to normal stereo (left/ right) playback. • LEFT: To listen to the - JVC KD-AV7010 | Instructions - Page 29
ENGLISH Locating a folder/track using the list To locate a track by displaying the track list 1 To locate a folder by displaying the folder list • This functions only for MP3. 1 2 2 3 Select a folder you want. Current track name or ID3 Tag 3 Select a track you want. Current folder name or - JVC KD-AV7010 | Instructions - Page 30
is not in use. display the text and scroll it on the monitor if it is long and cannot be displayed at a time. 1 Repeat Play You can repeat playback. • Repeat Play can be deactivated only for DVD. 1 2 2 (For CD) (For MP3) Scroll Auto Scroll Off • Scroll: - JVC KD-AV7010 | Instructions - Page 31
Scan. Searching for scenes or songs You can use various search functions to find your favorite scenes or songs. Title/Chapter/Folder/Track Search • For DVD: Title Search before playing, and Chapter Search while playing. • For VCD: During stop when PBC is in use. 1 2 (For - JVC KD-AV7010 | Instructions - Page 32
To select number 10, press 10. • To select number 23, press +10, +10, then 3. You cannot select folder using the remote controller. Ex. when playing VCD/CD: Examples (for DVD) To play back from 2(H):34(M):00(S) Press number buttons 2, 3, 4, then ENTER. TIME 2 : 34 :00 Time Search You can start - JVC KD-AV7010 | Instructions - Page 33
/ Connection Manual (separate volume). Will be shaded (not available) if you have selected one of these sources as the main Selecting the sources source. To show the main/subsidiary source To activate Dual Mode and select the subsidiary source operation screen on the monitor 1 1 2 To - JVC KD-AV7010 | Instructions - Page 34
hideaway unit. • This functions without respect to the Dual Mode setting. When using the remote controller: • For Dual Mode operations... - When controlling the monitor connected to the AV OUTPUT jacks, aim the remote controller at the remote sensor on the main unit. - When controlling the monitor - JVC KD-AV7010 | Instructions - Page 35
ENGLISH Surround Mode Operations 1 2 *2 *1 It does not appear for some sources. *2 It will be shaded when not available. *1 *1 3 Activate and select the surround mode or DSP mode. *2 See page 41. See page 41. See page 34. See page 39. 4 Make adjustment if you want to. • If neither surround - JVC KD-AV7010 | Instructions - Page 36
-channel encoding and decoding sound. (1ch up to 5.1ch). • This unit provides two types of Dolby Pro Dolby Digital 5.1 CH Dolby Digital 5.1 CH another discrete 5.1-channel digital audio format available on CD, LD, and DVD software. Compared to Dolby Digital, the DTS Digital Surround format has - JVC KD-AV7010 | Instructions - Page 37
either "Dolby Pro Logic II Movie" or "Dolby Pro Logic II Music." • DSP On (Surround Off) Currently selected DSP mode is activated. Ex. When playing DVD 2 • DEFEAT (Surround/DSP Off) Both surround and DSP mode is canceled. • You cannot go to the next step. To be continued... 37 - JVC KD-AV7010 | Instructions - Page 38
DSP mode. When DSP mode is activated: When surround mode is activated: : Selected automatically when multichannel DTS signal is detected (while playing a DVD or a DTS CD). No further adjustment is allowed. : Selected automatically when multichannel Dolby Digital signal is detected (while playing - JVC KD-AV7010 | Instructions - Page 39
sound mode). Select sound modes. Adjust the level of each frequency band. Display the other set of the sound modes. Store your adjustment (display the screen below). Select memory no. to store. 39 - JVC KD-AV7010 | Instructions - Page 40
ENGLISH Selecting preset sound modes Storing your own sound modes You can select a sound mode suitable to the music genre. Available sound modes: • HARD ROCK / R&B / POP / JAZZ / DANCE / COUNTRY / REGGAE / CLASSIC • USER1 / USER2 / USER3 • FLAT (To cancel the sound mode) You can adjust the - JVC KD-AV7010 | Instructions - Page 41
ENGLISH Other Sound Adjustments Fader/Balance adjustments is only possible for the main source when using Dual Mode. 1 2 *1 3 *2 *1 4 Make adjustment as you like. To adjust the input level This setting is required for each source except FM. Once you have made an adjustment, the volume level will - JVC KD-AV7010 | Instructions - Page 42
only adjust the brightness. 1 Display SCREEN CONTROL screen. Hold Hold ASPECT On the main unit On the remote controller 2 Select an item to adjust. Adjustable items : Indicates the current ambient light level. As this level changes, the monitor adjusts the brightness automatically to match - JVC KD-AV7010 | Instructions - Page 43
You can preset the initial disc playback conditions. • No change can be made on the DVD Menu during play or when "DISC" is selected as the subsidiary (SUB) source. 1 2 *1 3 *1 It does page 72). 5 Change the setting. • For details, see the following pages. Ex. When setting "MONITOR TYPE." 43 - JVC KD-AV7010 | Instructions - Page 44
MONITOR TYPE Select the monitor type of your TV (connected to the AV OUTPUT jacks) to play DVD Video recorded with aspect ratio of 16:9. • For the removable monitor of this unit right edges of the pictures will not be shown on the screen. 16:9 Confirm Backspace (Erase) When the language you have - JVC KD-AV7010 | Instructions - Page 45
You can preset the initial monitor conditions. 1 2 *1 3 *1 It does not appear for some sources. *2 It will be shaded when not available. *2 *1 4 Select the item you want. See page 13. Appears only - JVC KD-AV7010 | Instructions - Page 46
wires, the corresponding indicators light up. - The boundaries cannot be shown on the monitor screen. This example is just to teach you where to touch on the Touch Panel when you operate on it. 1 Upper/lower portions: Adjust the volume. 2 Left/right portions: • Skips the chapters/tracks for DVD - JVC KD-AV7010 | Instructions - Page 47
shaded when not available. *2 *1 4 Select the item you want. See page 13. Appears only when SIRIUS radio is connected (see also page 72). Language selection screen appears. 5 Change the setting. • For details, see the following pages. Ex. When setting "CLOCK" to "OFF" 47 - JVC KD-AV7010 | Instructions - Page 48
for this Setup Menu and some of the messages displayed on the monitor. GUIDE • ON: • OFF: On-screen guide icons (see page 23) are displayed on the monitor while operating the built-in disc player. - When the TV tuner unit (KV-C1000) is connected, its onscreen display will be shown. Cancels this - JVC KD-AV7010 | Instructions - Page 49
• You cannot select "AUDIO MENU" when the subsidiary source operation screen is displayed on the monitor (with Dual Mode turned on; see page 33). 1 2 or enter the setting screen. • For details, see the following pages. Appears when TV tuner unit KV-C1000 is connected. Ex. When entering " - JVC KD-AV7010 | Instructions - Page 50
• REAR CENTER: For the rear seats. • : Displays the SPK DISTANCE screen. You can adjust the speaker distance from your listening position in meters or Movie" is automatically selected. While Linear PCM signals are detected (for DVD/CD), "Dolby Pro Logic II Music" is automatically selected. While - JVC KD-AV7010 | Instructions - Page 51
only when either the front speakers or the center speaker is set to "SMALL." AMP GAIN You can change the maximum volume level of this unit. When the maximum power of the speakers is less than 50 W, select "LOW" to prevent them from being damaged. • HIGH: You can adjust the volume - JVC KD-AV7010 | Instructions - Page 52
can determine the use of AV INPUT 2 jacks on the hideaway unit-select either "VIDEO" or "CAMERA." • When the playback it to the source playback screen by touching the center portion of the monitor screen. (In this case, you cannot change the aspect ratio and make monitor adjustments-see pages 24 and - JVC KD-AV7010 | Instructions - Page 53
ENGLISH Other Main Functions Assigning titles to the sources Roman alphabets Numbers and Symbols [Upper j Lower] Roman alphabet list Accented characters [Upper (x2) j Lower (x2)] Upper cases Lower cases Alternates between upper and lower cases. Moves the cursor position. Enter other - JVC KD-AV7010 | Instructions - Page 54
titles to 30 FM/AM, 30 TV stations, and 40 CDs (both in this unit and in the CD changer). Source Stations: CDs: Maximum character number 10 32 If the "DELETE DISC NAME" or "DELETE STATION NAME" screen appears The internal memory is full. Delete unwanted names before assignment. • You cannot - JVC KD-AV7010 | Instructions - Page 55
if it has been used, then comes out halfway. 2 AVOUT VOL On the main unit On the remote controller 3 Insert the blind cover to protect the internal mechanism from dust. Each time you press the button, the monitor changes its angle step by step. • By holding the button (+/-), you can easily - JVC KD-AV7010 | Instructions - Page 56
ENGLISH CD Changer Operations • You cannot select CD changer and SIRIUS radio at the same time when Dual Mode is activated (see page 33). Volume level appears when adjusted. Dual Mode indicator (see page 33) SOURCE icon (see pages 14 and 33) Current disc/folder/track no. Elapsed playing time - JVC KD-AV7010 | Instructions - Page 57
displayed when a JVC CD Text compatible CD changer is connected. It is recommended to use the JVC MP3-compatible CD changer with your unit. • You can You cannot use the KD-MK series CD changers with this unit. Before operating your CD changer: • Refer also to the Instructions supplied with your CD - JVC KD-AV7010 | Instructions - Page 58
Disc names will be shown once it is recognized. When using the remote controller You can directly select the disc number by To locate a folder may look differently from the one you display while playing it on the main unit. This happens because CD changer can also list up the folder in which - JVC KD-AV7010 | Instructions - Page 59
name or ID3 Tag Displaying the disc text information With Auto Scroll or Scroll selected, you can display the text and scroll it on the monitor if it is long and cannot be displayed at a time. 1 2 To next/previous (For CD) page of the list (For MP3) Shaded when no MP3 - JVC KD-AV7010 | Instructions - Page 60
ENGLISH Selecting playback modes Random Play You can use only one of the following playback You can play back tracks at random. modes at a time-Repeat Play, Random Play, and Intro Scan. 1 Repeat Play You can repeat playback. • Repeat Play cannot be deactivated. 2 1 Only for MP3 2 Only for - JVC KD-AV7010 | Instructions - Page 61
ENGLISH Intro Scan You can play back the first 15 seconds of each track sequentially. 1 2 Only for MP3 Searching for songs You can use search functions to find your favorite tracks (for CD/MP3) and folders (for MP3). Folder/Track Search You can select a specific track (for CD/MP3) or folder ( - JVC KD-AV7010 | Instructions - Page 62
guide you to back the car, set the usage of the AV INPUT 2 jacks correctly (see page 52). • For connections, see the Installation/ Connection Manual (separate volume). • TV: To watch TV programs through the TV tuner unit ... On the remote controller ASPECT On the main unit Not available while - JVC KD-AV7010 | Instructions - Page 63
ENGLISH TV Tuner Operations Volume level appears when adjusted. Dual Mode indicator (see page 33) SOURCE icon (see pages 14 and 33) Current preset no. Channel no. Search mode Sound mode (see page 39) Surround/DSP mode (see page 36) Playback picture will be shown in the picture view window. - JVC KD-AV7010 | Instructions - Page 64
(only possible after storing stations in memory). • For Auto Search, press either icon once. "Auto Search" begins. When a station is received, searching stops. • For Manual Search, press either icon repeatedly (or hold) until a station you want is selected. • For Preset Search, press either icon - JVC KD-AV7010 | Instructions - Page 65
presetting 1 Tune into a TV station. then To tune in to a preset station • See also "Watching TV programs" on page 64. 1 Select "MANUAL" (or "AUTO"). 2 Store the station into a preset number. 2 Select a preset number. To select the rest of the preset stations then To select the rest of - JVC KD-AV7010 | Instructions - Page 66
1 Tune into a TV station. You can store and select the preset station using the preset list on the monitor screen. To select a preset station using the preset list 1 Select "MANUAL" (or "AUTO"). then 2 2 3 Store the station into a preset number. To next/previous page of the list • Preset - JVC KD-AV7010 | Instructions - Page 67
channels from this unit by connecting the JVC SIRIUS radio (DLP monitor ("CHANNELS UPDATED" scrolls on the display). Before operating your SIRIUS radio: • For connection, see Installation/Connection Manual (separate volume). • Refer also to the Instructions supplied with your SIRIUS radio. then JVC - JVC KD-AV7010 | Instructions - Page 68
ENGLISH Volume level appears when adjusted. Dual Mode indicator (see page 33) SOURCE icon (see pages 14 and 33) Signal strength bar (see page 78) Current band/Preset no. Selected category Selected channel Current channel no. Search mode Sound mode (see page 39) Surround/DSP mode (see page 36) To - JVC KD-AV7010 | Instructions - Page 69
from the selected category. Displaying the text 2 information With Auto Scroll or Scroll selected, you can display the text and scroll it on the monitor if it is long and cannot be displayed at a time. 1 • Scroll: Text on the information area scrolls once. • Auto Scroll: Text on the - JVC KD-AV7010 | Instructions - Page 70
ENGLISH Storing user channels in memory 2 You can preset 6 channels for each band. 1 While listening to the channel you want to store... then 2 3 Store the channel into a preset number. then Preset channel information will be displayed. Listening to a user preset channel 1 While listening to - JVC KD-AV7010 | Instructions - Page 71
cannot listen to a channel with icon (it is skipped). To restore the skipped You can select the categories/channels using the lists on the monitor screen. 1 While listening to a channel... channel, see below. Skipping channels Once you skip some channels, they cannot be tuned in using / and the - JVC KD-AV7010 | Instructions - Page 72
2 3 Change the setting or enter the setting screen. ENGLISH To next/previous page of the list then SIRIUS ID The SIRIUS 12-digit identification number is shown. You can neither change nor set - JVC KD-AV7010 | Instructions - Page 73
• Attach the blind cover to the main unit whenever the monitor is removed to protect the internal mechanism from dust. Moisture condensation Moisture may condense on the lens inside the disc player in the following cases: • After starting the heater in the car. • If it becomes very humid inside the - JVC KD-AV7010 | Instructions - Page 74
ENGLISH More about This Receiver Operation Methods Basic Disc Operations • Touch Panel screen goes off if no operations Caution for DualDisc playback are made on it for about 30 seconds while viewing the playback picture. • The Non-DVD side of a "DualDisc" does not comply with the "Compact - JVC KD-AV7010 | Instructions - Page 75
on Recordable (R) and Rewritable (RW) discs • Use only "finalized" discs. • For DVD-R/DVD-RW: This unit can play back only discs recorded in the DVD-Video format. (Discs recorded in the DVD-VR format cannot be played.) • For CD-R/CD-RW: This unit can play back only audio CD (CD-DA) files if a disc - JVC KD-AV7010 | Instructions - Page 76
following formats-MP3i, MP3 PRO, Layer 1, Layer 2 format. • This unit can show the names of albums, artists (performer), and tracks of ID3 Tag (Version 1.0 and 1.1). • This unit can show up to 64 characters on the monitor screen. • This unit can handle only one-byte characters. Any other characters - JVC KD-AV7010 | Instructions - Page 77
is not always encoded as ambient light is very dark. Initial Setup-DVD MENU multi-channel source. If it is not multichannel encoded, "Dolby After you change RETURN on the monitor screen to go back to the language setting, eject the disc and insert the operation screen of the current source. it - JVC KD-AV7010 | Instructions - Page 78
JVC SIRIUS radio adapter, Other Main Functions KS-U100K (not supplied). By turning on the power to the unit, you can turn on/off the JVC TV stations are stored newly. - Received TV stations are preset in No.1 in. • When storing a TV station manually, a previously preset TV station is erased - JVC KD-AV7010 | Instructions - Page 79
ENGLISH Troubleshooting What appears to be trouble is not always serious. Check the following points before calling a service center. General • Sound is sometimes interrupted. ] You are driving on rough roads. Stop playback while driving on rough roads. ] Disc is scratched. • Sound cannot be - JVC KD-AV7010 | Instructions - Page 80
connected to the back lamp. To check whether the wiring is correctly done or not, see page 46. • TV tuner unit does not work at all. ] Press the reset button of the TV tuner unit. • "TV IS NOT CONNECTED" appears on the monitor. ] TV tuner unit is disconnected. Connect it again. • Auto Memory does - JVC KD-AV7010 | Instructions - Page 81
. ] Playable files are not recorded in the disc. • "NO DISC" appears on the monitor. ] No discs are in the magazine or the discs are inserted upside down. • "RESET 1" - "RESET 7" appears on the display of the main unit. ] The built-in microcomputer in the CD changer is malfunctioning. Press the - JVC KD-AV7010 | Instructions - Page 82
demonstration. To cancel it, select any other graphic screen. Playback picture will be shown in the picture view window. While playing a video source (except DVD/VCD), select no graphic screen (in other words, select the actual playback screen); otherwise, you cannot view the playback pictures. 82 - JVC KD-AV7010 | Instructions - Page 83
ENGLISH LANGUAGE CODES Code AA AB AF AM AR AS AY AZ BA BE BG BH BI BN BO BR CA CO CS CY DA DZ EL EO ET EU FA FI FJ FO FY GA GD GL GN GU HA HI HR HU HY IA IE IK IN IS IW JI JW Language Afar Abkhazian Afrikaans Ameharic Arabic Assamese Aymara Azerbaijani Bashkir Byelorussian Bulgarian Bihari - JVC KD-AV7010 | Instructions - Page 84
ENGLISH Specifications Main unit DVD/CD PLAYER SECTION Signal Detection System: Non- 1.5 dB [AM Tuner] Sensitivity: 20 µV Selectivity: 35 dB REMOVABLE MONITOR Screen Size: 7 inch wide liquid crystal display Number of Pixel: 336 960 °F) Other Terminal: Steering wheel remote input (OE REMOTE) 84 - JVC KD-AV7010 | Instructions - Page 85
16) mm (in.) CAUTION: When ejecting the monitor, keep an open space for the monitor to come out. If not, the monitor may obstruct the steering wheel and gearshift lever operations, as this may result in a traffic accident. Hideaway unit Input Terminals: AV INPUT 1/2: Audio: 0.5 Vrms (Left - JVC KD-AV7010 | Instructions - Page 86
de un producto JVC. Como primer paso, por favor lea detenidamente este manual para comprender bolígrafo o una herramienta similar. Esto hará que se reinicialice el microcomputador incorporado. o los ajustes de sonido. • Al abrir, el monitor se coloca en su lugar. PRECAUCIONES: • No inserte ning - JVC KD-AV7010 | Instructions - Page 87
NO DEBE MIRAR EL MONITOR MIENTRAS CONDUCE.", y no se mostrará la imagen de reproducción. - Esta advertencia aparece sólo cuando el cable del freno de estacionamiento se encuentra conectado al sistema del freno de estacionamiento incorporado al automóvil (refiérase al Manual de instalación/conexi - JVC KD-AV7010 | Instructions - Page 88
este manual 3 Introducción-Discos reproducibles 5 Guía rápida-Cómo usar los controles ....... 6 Control remoto 6 Unidad principal (parte delantera sonido 41 Ajustes del monitor 42 Configuraciones iniciales-MENÚ DE DVD ... 43 Configuraciones iniciales-MONITOR .... 45 Configuraciones iniciales - JVC KD-AV7010 | Instructions - Page 89
de las explicadas en este manual. Los siguientes discos no se pueden reproducir DVD Audio, DVD-ROM, DVD-RAM, DVDRW grabados en formato DVD-VR, CD-ROM, CD : Si inserta un disco DVD Vídeo con un código de región incorrecto Aparecerá "¡ERROR CÓDIGO REGIONAL!" en el monitor. * Fabricado bajo licencia - JVC KD-AV7010 | Instructions - Page 90
Activar/desactivar el modo dual. Ajustar el ángulo del monitor (con MAIN/SUB ajustado a MAIN). Ajustar el nivel de *2 Sólo para MP3 *3 Mientras se reproduce un DVD, se selecciona un capítulo; en los demás búsqueda automática. Iniciar la búsqueda manual. Cambiar los números de preajuste. Seleccionar - JVC KD-AV7010 | Instructions - Page 91
título/capítulo/pista. *3 Operaciones del sintonizador de TV Botones Para: Iniciar la búsqueda automática. Iniciar la búsqueda manual. Cambiar los números de los canales preajustados. 1 2 3 4 5 6 7 8 9 10 11/0 12/+10 Seleccionar los números de los canales preajustados. Operaciones - JVC KD-AV7010 | Instructions - Page 92
principal (parte delantera) Operaciones Iniciar la búsqueda automática. Iniciar la búsqueda manual. Cambiar el modo de recepción en FM. Operaciones monitors Botones Para: Encender el monitor. Apagar el monitor. Cierre/abra el monitor. (Consulte la página 55). Cambie el ángulo del monitor - JVC KD-AV7010 | Instructions - Page 93
se podría dañar. El receptor está equipado con la función de control remoto en el volante de dirección. • Para la conexión, consulte el Manual de instalación/conexión (volumen separado). NO exponga el sensor remoto del panel de control a una luz potente (luz solar directa o iluminación artificial - JVC KD-AV7010 | Instructions - Page 94
Este manual de instrucciones explica principalmente las operaciones realizadas utilizando los iconos del panel táctil que aparecen en el monitor. parte central de la pantalla del monitor. • Solamente se pueden borrar mientras se visualizan las imágenes de reproducción. Ej.: Reproducción de DVD - JVC KD-AV7010 | Instructions - Page 95
áfico de Usuario tal como lo hace para tocar los iconos del panel. Ejemplos: 1 GUI SET UP 2 OK 3 OK Visualice el GUI en el monitor (aparece el cursor- marco amarillo-alrededor del icono actualmente seleccionado). • Mientras esté seleccionada una de las fuentes de vídeo, la función GUI se activa - JVC KD-AV7010 | Instructions - Page 96
principal y del control remoto. 1 Encienda la unidad Para cambiar el ángulo del monitor: Hold 2 "WAITING" se desplaza en la 1 pantalla de la unidad principal (y sale el monitor *). • Al salir, el monitor se enciende, aunque usted lo haya apagado. • Con respecto al espacio requerido para - JVC KD-AV7010 | Instructions - Page 97
pantalla de la unidad principal durante unos momentos. • Si los iconos del panel táctil no aparecen en el monitor, toque la parte central de la pantalla del monitor. 2 *1 3 *2 *1 Aparece solamente cuando la radio SIRIUS está conectada (consulte también la página 72). 4 Ajuste la hora del reloj - JVC KD-AV7010 | Instructions - Page 98
, la cual se inicia automáticamente tras un período de inactividad de aproximadamente 30 segundos (excepto mientras se reproduce un DVD/VCD). 2 Para cancelarla, seleccione una de las pantallas gráficas. 1 Mientras se reproduce cualquier fuente... La fuente actual aparece resaltada. Aparece - JVC KD-AV7010 | Instructions - Page 99
ESPAÑOL Visualización del medidor de nivel Cómo leer la pantalla de la unidad principal: Podrá visualizar el medidor de nivel en la pantalla gráfica, seleccionándolo entre cuatro patrones preajustados. • Mientras se está viendo la imagen de reproducción o la demostración en pantalla, no se podr - JVC KD-AV7010 | Instructions - Page 100
ESPAÑOL Operaciones de la radio El nivel de volumen aparece al ajustarlo. Indicador del modo dual (consulte la página 33) Icono SOURCE (consulte las páginas 14 y 33) N˚ de banda/de preajuste actual Frecuencia de la emisora Modo de recepción en FM Modo de búsqueda Modo de sonido (consulte la pá - JVC KD-AV7010 | Instructions - Page 101
vez uno u otro icono. Se inicia la "Búsqueda automática". La búsqueda se interrumpe cuando se recibe una emisora. • Para la búsqueda manual, pulse repetidamente (o mantenga pulsado) uno u otro icono hasta que se seleccione la emisora deseada. • Para la búsqueda programada, pulse repetidamente uno - JVC KD-AV7010 | Instructions - Page 102
ESPAÑOL Cómo almacenar emisoras en la memoria Preajuste manual 1 Seleccione la banda (FM1 - FM3, y AM) Podrá (FM1 - FM3) en que desea almacenar las emisoras FM. 2 Sintonice una emisora. luego Seleccione "MANUAL" (o "AUTO"). 3 2 Inicie SSM. 4 Memorice la emisora en un número de preajuste. - JVC KD-AV7010 | Instructions - Page 103
Sintonice una emisora. luego Visualización de la lista de preajustes Seleccione "MANUAL" (o "AUTO"). 3 Podrá almacenar y seleccionar las emisoras preajustada utilizando la lista preajustada en la pantalla del monitor. Para seleccionar una emisora preajustada utilizando la lista de preajustes - JVC KD-AV7010 | Instructions - Page 104
(consulte las páginas 14 y 33) Indicador PBC (para VCD; consulte la página 25) N˚ de pista actual (para VCD) N˚ de título/capítulo actual (para DVD) Información del tiempo de reproducción (consulte la página 30) Formato de señal de audio Modo de reproducción (consulte la página 30) Modo de sonido - JVC KD-AV7010 | Instructions - Page 105
ESPAÑOL Operaciones del CD/MP3 Indicador del modo dual (consulte la página 33) Icono SOURCE (consulte las páginas 14 y 33) N˚ de pista actual (para CD) N˚ de carpeta/pista actual (para MP3) Información del tiempo de reproducción (consulte la página 30) Formato de señal de audio (sólo para DTS CD) - JVC KD-AV7010 | Instructions - Page 106
la reproducción de DVD, cambie el ajuste del Menú de Configuración (consulte la página 43). • Si aparece " " en el monitor, significa que el disco se introduce, y la reproducción se inicia automáticamente. • El monitor no sale de su compartimiento cuando "APERTURA/CIERRE AUTOMÁTICO" está ajustado a " - JVC KD-AV7010 | Instructions - Page 107
utilizadas en este manual indican los discos que se pueden reproducir. DVD VCD con/sin PBC VCD con PBC CD MP3 Todos los discos reproducibles Iconos de guía en pantalla Durante la reproducción, los siguientes iconos de guía podrían aparece durante unos momentos en el monitor. • Los siguientes - JVC KD-AV7010 | Instructions - Page 108
aparecerá ya sea "RECEPTOR" o "CRADLE" (consulte la página 33), junto con la relación de aspecto seleccionada. Indica dónde está cargado ahora el monitor. La relación de aspecto no se puede ajustar separadamente para "RECEPTOR" o "CRADLE". 24 luego Mientras se visualiza "FOLDER" en la pantalla de - JVC KD-AV7010 | Instructions - Page 109
reproduce utilizando los menús. un DVD: Cuando se inicia la reproducción, un menú Los discos DVD disponen generalmente de sus propios men parte, un menú (MENU) contiene normalmente diversas informaciones acerca del disco y de las selecciones de reproducción. aparece automáticamente en el monitor - JVC KD-AV7010 | Instructions - Page 110
También podrá utilizar el icono PBC en el panel táctil. \ x2 \ x4 \ x8 \ x1 \ x2 \ x4 \ x8 ZOOM x4 2 Mueva la parte ampliada de la imagen en el monitor. ZOOM x4 OK luego Para cancelar el zoom, pulse OK o pulse ZOOM repetidamente hasta que aparezca Reproducción de escenas anteriores "ZOOM - JVC KD-AV7010 | Instructions - Page 111
podrá seleccionar el idioma del subtítulo que se desea visualizar en el monitor. • También podrá seleccionar el idioma del subtítulo utilizando el menú 44). 1 2 Seleccione un idioma deseado para los subtítulos. Para DVD: Mientras se reproduce un capítulo que contiene múltiples idiomas de audio, - JVC KD-AV7010 | Instructions - Page 112
ESPAÑOL Cuando se reproduce un VCD: Selección de vistas multiángulo Mientras se reproduce un disco que contiene vistas multiángulo, podrá ver la misma escena desde ángulos diferentes. 1 STEREO LEFT RIGHT • STEREO: Para escuchar una reproducción estereofónica normal (izquierdo/ derecho). • - JVC KD-AV7010 | Instructions - Page 113
ESPAÑOL Localización de una carpeta/pista utilizando la lista Para localizar una pista visualizando la lista de pistas 1 Para localizar una carpeta visualizando la lista de carpetas • Esto funciona solamente para MP3. 1 2 2 3 Seleccione la carpeta que desea. Nombre de la pista actual o - JVC KD-AV7010 | Instructions - Page 114
" o "Scroll", es posible visualizar el texto y desplazarlo en el monitor si es largo y no se puede visualizar simultáneamente. 1 2 texto). Visualización de la información sobre el tiempo Cuando se reproduce un DVD: REPEAT PLAY CHAPTER REPEAT PLAY TITLE REPEAT PLAY OFF Cuando se reproduce - JVC KD-AV7010 | Instructions - Page 115
siguiente, y así sucesivamente. • OFF: Cancela la reproducción aleatoria. Exploración de introducciones musicales Búsqueda de título/capítulo/carpeta/ pista • Para DVD: Búsqueda de título antes de la reproducción, y búsqueda de capítulo durante la reproducción. • Para VCD: Durante la parada cuando - JVC KD-AV7010 | Instructions - Page 116
número 23, pulse +10, +10, y luego 3. No podrá seleccionar carpeta utilizando el control remoto. Ej. Cuando se reproduce un VCD/CD: Ejemplos (para DVD) Para reproducir desde 2(H):34(M):00(S) Pulse los botones numéricos 2, 3, 4, y luego ENTER. TIME 2 : 34 :00 Búsqueda por período de tiempo Para - JVC KD-AV7010 | Instructions - Page 117
OUTPUT. • Para las conexiones del cradle y del Estará sombreado (no disponible) si ha seleccionado una de estas fuentes como monitor opcional, consulte el Manual de fuente principal. instalación/conexión (volumen separado). Selección de las fuentes Para mostrar la pantalla de operación de la - JVC KD-AV7010 | Instructions - Page 118
jacks AV OUTPUT, apunte el control remoto hacia el sensor remoto de la unidad principal. Ajuste del volumen AV OUTPUT - Cuando se controla el monitor insertado en el cradle, apunte el control remoto hacia el sensor remoto del cradle. Seleccione un nivel de volumen apropiado para el componente - JVC KD-AV7010 | Instructions - Page 119
ESPAÑOL Operaciones del modo Surround 1 2 *2 *1 No aparece para algunas fuentes. *2 Aparece sombreado cuando no está disponible. *1 *1 3 Active y seleccione el modo Surround o el modo DSP. *2 Consulte la página 41. Consulte la página 41. Consulte la página 34. Consulte la página 39. 4 - JVC KD-AV7010 | Instructions - Page 120
de audio digital de 5,1 canales discretos disponible para CD, LD, y software DVD. Al compararse con Dolby Digital, el formato DTS Digital Surround tiene un ré directamente a los oídos del oyente sin ninguna reflexión. Por otra parte, los sonidos indirectos llegan con un retraso que depende de las - JVC KD-AV7010 | Instructions - Page 121
áticamente "Dolby Pro Logic II". • Podrá seleccionar "Dolby Pro Logic II Movie" o bien "Dolby Pro Logic II Music". Ej. Cuando se reproduce un DVD. 2 • DSP On (Surround Off) Se activa el modo DSP actualmente seleccionado. • DEFEAT (Surround/DSP Off) Se cancela ambos modos, Surround y DSP. • No podr - JVC KD-AV7010 | Instructions - Page 122
ESPAÑOL Cuando se activa el modo Surround: : Se selecciona automáticamente cuando se detecta la señal multicanal DTS (mientras se reproduce un DVD o un DTS CD). No se permiten otros ajustes. : Se selecciona automáticamente cuando se detecta la señal multicanal Dolby Digital (mientras se reproduce - JVC KD-AV7010 | Instructions - Page 123
ESPAÑOL Operaciones de los modos de sonido (iEQ) Las siguientes operaciones sólo son posibles para la fuente principal cuando se utiliza el modo dual. 1 2 *1 3 *2 *1 No aparece para algunas fuentes. *2 Aparece sombreado cuando no está disponible. *1 Consulte la página 35. Consulte la página 35. - JVC KD-AV7010 | Instructions - Page 124
ESPAÑOL Selección de los modos de sonido Cómo almacenar sus propios preajustados modos de sonido Podrá seleccionar un modo de sonido adecuado al género musical. Modos de sonido disponibles: • HARD ROCK / R&B / POP / JAZZ / DANCE / COUNTRY / REGGAE / CLASSIC • USER1 / USER2 / USER3 • FLAT ( - JVC KD-AV7010 | Instructions - Page 125
Otros ajustes de sonido Los ajustes de fader/balance sólo son posibles para la fuente principal cuando se utiliza el modo dual. 1 ESPAÑOL 2 *1 3 *2 *1 4 Efectúe los ajustes según sus preferencias. Para ajustar el nivel de entrada *1 No aparece para algunas fuentes. *2 Aparece sombreado cuando - JVC KD-AV7010 | Instructions - Page 126
remoto 2 Seleccione la opción que desea ajustar. Opciones ajustables : Indica el nivel actual de luz ambiente. Conforme cambia este nivel, el monitor ajusta automáticamente la luminosidad para que corresponda con el nivel actual de luz ambiente. *1 3 Ajuste la opción. : Ajuste separadamente la - JVC KD-AV7010 | Instructions - Page 127
las condiciones iniciales de reproducción del disco. • No se podrá realizar ningún cambio en el menú DVD durante la reproducción, o cuando se ha seleccionado "DISC" como fuente subsidiaria (SUB). 1 2 *1 Para los detalles, consulte las páginas siguientes. Ej. Cuando se ajusta "TIPO DE MONITOR". 43 - JVC KD-AV7010 | Instructions - Page 128
ón del cursor. TIPO DE MONITOR Seleccione el tipo de monitor de su televisor (conectado a los jacks AV OUTPUT) para reproducir DVD Vídeo grabado con una relaci mira una imagen de pantalla ancha, aparecerán bandas negras en las partes superior e inferior de la pantalla. • 4:3 PS (Panoramización - JVC KD-AV7010 | Instructions - Page 129
Podrá preajustar las condiciones iniciales del monitor. 1 2 *1 3 *1 No aparece para algunas fuentes. *2 Aparece sombreado cuando no está *2 *1 disponible. 4 Seleccione la opción que desea. Consulte la página 13. Aparece solamente cuando la radio - JVC KD-AV7010 | Instructions - Page 130
no se pueden mostrar en la pantalla del monitor. Este ejemplo es para explicarle dónde debe tocar el panel táctil para realizar las operaciones. 1 Partes superior/inferior: Ajusta el volumen. 2 Partes izquierda/derecha: • Salta los capítulos/pistas para DVD/VCD. • Efectúa la búsqueda de capítulos - JVC KD-AV7010 | Instructions - Page 131
ESPAÑOL Configuraciones iniciales-PANTALLA Podrá preajustar las condiciones iniciales en la pantalla. 1 2 *1 3 *1 No aparece para algunas fuentes. *2 Aparece sombreado cuando no está *2 *1 disponible. 4 Seleccione la opción que desea. Consulte la página 13. Aparece solamente cuando la radio - JVC KD-AV7010 | Instructions - Page 132
de altavoz/señal y los mensajes (consulte la página 75). Los mensajes se visualizan en la ventana de visualización de la pantalla del monitor... - Cuando se selecciona el modo de repetición, el modo aleatorio, la exploración de introducciones musicales, etc. - Cuando se inicia la búsqueda por per - JVC KD-AV7010 | Instructions - Page 133
las condiciones iniciales relacionadas con el audio y los modos de ajustes preferidos (PSM). • No podrá seleccionar "MENÚ DE AUDIO" cuando en el monitor se está visualizando la pantalla de operación de fuente subsidiaria (con el modo dual activado; consulte la página 33). 1 2 *1 3 *1 No aparece - JVC KD-AV7010 | Instructions - Page 134
se detecten señales Dolby Surround (PL II), se seleccionará automáticamente "Dolby Pro Logic II Movie". Mientras se detectan señales PCM Lineal (para DVD/CD), se seleccionará automáticamente "Dolby Pro Logic II Music". Mientras se detectan otras señales, el modo Surround se anula. • DESACT: Cancela - JVC KD-AV7010 | Instructions - Page 135
ESPAÑOL • DESACTIVAR: Selecciónelo cuando desea disfrutar de la reproducción con una gama dinámica total (no se aplica ningún efecto). • MED: Selecciónelo cuando desee reducir ligeramente la gama dinámica. • MÁX.: Selecciónelo cuando desee aplicar completamente el efecto de compresión - JVC KD-AV7010 | Instructions - Page 136
ón de vista de la cámara, es posible cambiar a la pantalla de reproducción tocando la parte central de la pantalla del monitor. (En este caso, no podrá cambiar la relación de aspecto ni realizar los ajustes del monitor-consulte las páginas 24 y 42). • AUTO: Al encender los faros, la pantalla se - JVC KD-AV7010 | Instructions - Page 137
Otras funciones principales Asignación de títulos a las fuentes Letras del alfabeto romano Números y símbolos [Mayúsculas j Minúsculas] Caracteres con acento [Mayúsculas (x2) j Minúsculas (x2)] Lista de letras del alfabeto romano Mayúsculas Cambia alternativamente entre mayúsculas y minúsculas. - JVC KD-AV7010 | Instructions - Page 138
ESPAÑOL Podrá asignar títulos a 30 emisoras FM/AM, 30 emisoras de TV, y 40 CDs (tanto en esta unidad como en el cambiador de CD). Fuente Emisoras: CDs: Número máximo de caracteres 10 32 Si aparece la pantalla "BORRAR NOMBRE DEL DISCO" o "BORRAR NOMBRE DE EMISORA" La memoria interna está llena. - JVC KD-AV7010 | Instructions - Page 139
. • Tenga cuidado de no dañar los conectores. Para cambiar el ángulo del monitor MAIN SUB luego Para desmontar el monitor 1 Hold El monitor vuelve a su compartimiento si se estaba usando y, a continuación, sale a medias. AVOUT VOL 2 En la unidad principal En el control remoto 3 Inserte la - JVC KD-AV7010 | Instructions - Page 140
ESPAÑOL Operaciones del cambiador de CD • No podrá seleccionar simultáneamente el cambiador de CD y la radio SIRIUS cuando está activado el modo dual (consulte la página 33). El nivel de volumen aparece al ajustarlo. Indicador del modo dual (consulte la página 33) Icono SOURCE (consulte las pá - JVC KD-AV7010 | Instructions - Page 141
con MP3 de JVC. • También se pueden conectar los cambiadores de CD de la serie CH-X (excepto CH-X99 y CH-X100). Sin embargo, como no son compatibles con discos MP3, no se pueden reproducir discos MP3. • Con esta unidad no podrá utilizar los cambiadores de CD de la serie KD-MK. Antes - JVC KD-AV7010 | Instructions - Page 142
ESPAÑOL Operaciones avanzadas del cambiador de CD Selección de discos/carpetas pistas 3 Seleccione el disco que desea. Podrá seleccionar el disco, (carpeta: sólo para MP3), y las pistas utilizando los botones de la unidad principal. 1 DISC FOLDER TRACK A la página siguiente/anterior 2 - JVC KD-AV7010 | Instructions - Page 143
ID3 Visualización de la información de texto del disco Seleccionando "Auto Scroll" o "Scroll", es posible visualizar el texto y desplazarlo en el monitor si es largo y no se puede visualizar simultáneamente. 1 A la página siguiente/anterior de la lista Aparece sombreado cuando no hay archivos - JVC KD-AV7010 | Instructions - Page 144
ESPAÑOL Selección de los modos de reproducción Reproducción aleatoria Podrá reproducir las pistas en orden aleatorio. Podrá utilizar solamente uno de los siguientes modos de reproducción a la vez- 1 Reproducción repetida, Reproducción aleatoria y Exploración de introducciones musicales. - JVC KD-AV7010 | Instructions - Page 145
ESPAÑOL Exploración de introducciones musicales Podrá reproducir secuencialmente los primeros 15 segundos de cada pista. 1 2 Sólo para MP3 Búsqueda de canciones Podrá utilizar las funciones de búsqueda para encontrar sus pistas (para CD/MP3) y carpetas favoritas (para MP3). Búsqueda de - JVC KD-AV7010 | Instructions - Page 146
atrás con el automóvil, ajuste correctamente el uso de los jacks AV INPUT 2 (consulte la página 52). • Para las conexiones, consulte el Manual de instalación/conexión (volumen separado). 1 Seleccione la fuente externa • TV: Para ver programas de TV a través de la unidad del sintonizador de TV - JVC KD-AV7010 | Instructions - Page 147
Operaciones del sintonizador de TV ESPAÑOL El nivel de volumen aparece al ajustarlo. Indicador del modo dual (consulte la página 33) Icono SOURCE (consulte las páginas 14 y 33) N˚ de preajuste actual N˚ de canal Modo de búsqueda Modo de sonido (consulte la página 39) Modo Surround/DSP (consulte - JVC KD-AV7010 | Instructions - Page 148
vez uno u otro icono. Se inicia la "Búsqueda automática". La búsqueda se interrumpe cuando se recibe una emisora. • Para la búsqueda manual, pulse repetidamente (o mantenga pulsado) uno u otro icono hasta que se seleccione la emisora deseada. • Para la búsqueda programada, pulse repetidamente uno - JVC KD-AV7010 | Instructions - Page 149
una emisora de TV. luego Para sintonizar una emisora preajustada • Consulte también "Para ver programas de TV" en la página 64. 1 Seleccione "MANUAL" (o "AUTO"). 2 Memorice la emisora en un número de preajuste. 2 Seleccione un número de preajuste. luego Para seleccionar las restantes emisoras - JVC KD-AV7010 | Instructions - Page 150
una emisora de TV. Podrá almacenar y seleccionar la emisora preajustada utilizando la lista de preajustes en la pantalla del monitor. Seleccione "MANUAL" Para seleccionar una emisora preajustada utilizando la lista de (o "AUTO"). luego preajustes 1 2 2 3 Memorice la emisora en un número - JVC KD-AV7010 | Instructions - Page 151
JVC-(DLP: Down Link Processor-adquirido opcionalmente) a la toma del cambiador de CD en la parte "CHANNELS UPDATING XX%* COMPLETED" en el monitor (aparece "UPDATING" en la pantalla). No consulte el Manual de instalación/conexión (volumen separado). • Consulte también el Manual de instrucciones - JVC KD-AV7010 | Instructions - Page 152
ESPAÑOL El nivel de volumen aparece al ajustarlo. 68 Indicador del modo dual (consulte la página 33) Icono SOURCE (consulte las páginas 14 y 33) Barra de intensidad de señal (consulte la página 78) Banda actual/N˚ de preajuste Categoría seleccionada Canal seleccionado N˚ de canal actual Modo de bú - JVC KD-AV7010 | Instructions - Page 153
la categoría seleccionada. Visualización de la información 2 del texto Seleccionando "Auto Scroll" o "Scroll", es posible visualizar el texto y desplazarlo en el monitor si es largo y no se puede visualizar simultáneamente. 1 • Scroll: El texto del área de información se desplaza una sola - JVC KD-AV7010 | Instructions - Page 154
Cómo almacenar canales de 2 usuario en la memoria Podrá preajustar 6 canales para cada banda. 1 Mientras escucha el canal que desea memorizar... luego 2 ESPAÑOL 3 Memorice el canal en un número de preajuste. luego Se visualizará la información sobre el canal preajustado. Para escuchar - JVC KD-AV7010 | Instructions - Page 155
la lista • No podrá escuchar un canal con el icono Podrá seleccionar las categorías/canales utilizando las listas de la pantalla del monitor. 1 Mientras escucha un canal... (será omitido). Para restablecer el canal omitido, véase abajo. Omisión de canales Una vez que omita ciertos canales, no - JVC KD-AV7010 | Instructions - Page 156
2 3 Cambie el ajuste o acceda a la pantalla de ajustes. ESPAÑOL A la página siguiente/anterior de la lista luego IDENTIFICACIÓN Se muestra el número de identificación de 12 dígitos de SIRIUS. No podrá cambiar ni ajustar el número de identificación. • También aparecerá SIRIUS ID (Identificación) - JVC KD-AV7010 | Instructions - Page 157
los conectores. • Para proteger el mecanismo interno contra el polvo, fije la cubierta ciega a la unidad principal cada vez que deba desmontar el monitor. Condensación de humedad Podría condensarse humedad en la lente alojada en el interior del reproductor de CD en los siguientes casos: • Después de - JVC KD-AV7010 | Instructions - Page 158
, también podrá encender la unidad. recomienda usar el lado no DVD de un DualDisc en este producto. General Apagado de la unidad • xima vez que encienda la unidad. Cambio de la pantalla gráfic • En este manual, las palabras "pista" y "archivo" se utilizan indistintamente para referirse a los - JVC KD-AV7010 | Instructions - Page 159
. • Los indicadores de altavoz/señal aparecen en los siguientes casos (sólo para DVD/CD): - Cuando se detecta un tipo diferente de señal digital, o - a "GRANDE" o "PEQ." (consulte la página 51). El sonido sale a través de los altavoces cuyos indicadores se encuentran encendidos en la pantalla - JVC KD-AV7010 | Instructions - Page 160
, artistas (ejecutante), y pistas de la Etiqueta ID3 (Versión 1,0 y 1,1). • Esta unidad puede mostrar hasta 64 caracteres en la pantalla del monitor. • Esta unidad puede manejar solamente caracteres de un byte. Cualesquier otros caracteres no serán visualizados correctamente. • Esta unidad puede - JVC KD-AV7010 | Instructions - Page 161
afecta el nivel de volumen del se pueda ajustar la luminosidad del monitor: monitor insertado en el cradle opcional - Con una luz ambiente muy podría ser "4:3 LB" con ajuste el nivel de fader a "0". algunos DVDs. Esto depende de sus • No podrá ajustar el nivel de entrada-Ajuste condiciones - JVC KD-AV7010 | Instructions - Page 162
U100K (no automáticamente el nivel de volumen a "30". Otras funciones principales suministrado). Al encender el receptor, podrá activar/desactivar la PnP JVC. Sin embargo, no podrá controlarse desde este receptor. • La barra de intensidad de la señal aumenta Asignación de títulos a las fuentes - JVC KD-AV7010 | Instructions - Page 163
No sale sonido del subwoofer (aunque esté activado-ajustado a "SÍ"). ] No sale sonido el idioma de los subtítulos. ] En algunos DVDs y VCDs, no está permitido cambiar el idioma sin monitor comprado adicionalmente (KV-MAV7001) e insertado en el cradle opcional (KV-CR100). ] Si no retira el monitor - JVC KD-AV7010 | Instructions - Page 164
MARCHA ATRÁS" está ajustado a "AUTO", pero el cable del engranaje de marcha atrás no está conectado a • Aparece "EL TELEVISOR NO ESTÁ CONECTADO" en el monitor. ] La unidad del sintonizador de TV está desconectado. televisor mientras está encendido. • Aparece "RESET 8" en la pantalla de la unidad - JVC KD-AV7010 | Instructions - Page 165
. ] No hay información de texto para el canal seleccionado. • Aparece "EL SATÉLITE NO ESTÁ CONECTADO" en el monitor (aparece "RESET 8" en la pantalla). ] La radio SIRIUS está desconectada. Conecte correctamente esta unidad y la radio SIRIUS. • No se escuchan sonidos. ] Aparece "CHANNELS UPDATING - JVC KD-AV7010 | Instructions - Page 166
gráfica. La imagen de reproducción será mostrada en la ventana de visualización de imágenes. Mientras se reproduce una fuente de vídeo (excepto DVD/VCD), seleccione sin pantalla gráfica (en otras palabras, seleccione la pantalla de reproducción actual); de lo contrario, no se podrán ver las im - JVC KD-AV7010 | Instructions - Page 167
ESPAÑOL CÓDIGOS DE IDIOMAS Código Idioma AA Afar AB Abjasiano AF Afrikaans AM Amárico AR Árabe AS Asamés AY Aimara AZ Azerbayano BA Bashkiro BE Bielorruso BG Búlgaro BH Bihari BI Bislama BN Bengalí, Bengalés BO Tibetano BR Bretón CA Catalán CO Corso CS Checo - JVC KD-AV7010 | Instructions - Page 168
4 Ω) Número de canales: 2 canales (estereofónicos) Respuesta de frecuencias: DVD, fs=48 kHz: 16 Hz a 22 000 Hz DVD, fs=96 kHz: 16 Hz a 44 000 Hz VCD, CD, MP3: 16 de AM] Sensibilidad: 20 µV Selectividad: 35 dB 84 MONITOR DESMONTABLE Tamaño de la pantalla: Panel de cristal líquido OE REMOTE) - JVC KD-AV7010 | Instructions - Page 169
Peso: 2,25 kg (5,1 lbs) (incluyendo monitor) Espacio requerido para expulsar el monitor 177(7) Unidad oculta Terminales de entrada: AV UNIT) Antena FM/AM (FM/AM ANTENNA) AV bus (AV BUS) Cambiador de CD (TO CHANGER) Cámara de retrovisión/Altavoz central (BACKCAMERA REMOTE/CENTER SPEAKER) Cable - JVC KD-AV7010 | Instructions - Page 170
JVC. Veuillez lire attentivement toutes les instructions verrouillage ne fonctionne pas ou a été mis hors service. Évitez toute exposition directe au rayon. Les ajustements sécurité.... • N'augmentez pas trop le niveau de volume car cela pourrait bloquer les sons extérieurs et rendre la conduite - JVC KD-AV7010 | Instructions - Page 171
cela peut entraîner un accident fatal. - où il peut gêner la visibilité. • NE COMMANDEZ pas l'appareil lors de la manipulation du volant car cela peut entraîner un accident de la circulation. • Le conducteur ne doit pas regarder le moniteur lorsqu'il conduit. Regarder le moniteur lorsqu'on - JVC KD-AV7010 | Instructions - Page 172
Introduction-Disques reproductibles ........ 5 Guide rapide-Utilisation des commandes ... de la liste des préréglages 19 Utilisation d'un DVD/VCD 20 Utilisation d'un disque CD/MP3 21 Opé du mode Surround/DSP 36 Mise en et hors service du mode Surround/DSP 37 Utilisation avancée du changeur - JVC KD-AV7010 | Instructions - Page 173
les opérations peuvent différer de celles expliquées dans ce manuel. Les disques suivants ne peuvent pas être reproduits DVD Audio, DVD-ROM, DVD-RAM, DVDRW enregistrés au format DVD-VR, CD-ROM, CD-I (CD-I Ready), Photo CD, etc. • La lecture de ces disques produit du bruit qui risque d'endommager les - JVC KD-AV7010 | Instructions - Page 174
Guide le volume. Régler le mode Dual sur principal ou secondaire. *1 Mettre en/hors service le mode Dual. Ajuster l'angle du moniteur (avec MAIN/SUB réglé sur MAIN . *2 Uniquement pour les disques MP3 *3 Lors de la lecture d'un DVD, un chapitre est choisi; inversement, un titre est choisi avant ou apr - JVC KD-AV7010 | Instructions - Page 175
FRANÇAIS Pour le disque Touches Pour: Reproduire le disque. Arrêter momentanément le disque. Arrêter le disque. Choisir un chapitre/plage. Rechercher. Choisir les dossiers. *2 OK puis OK Pour le changeur de CD Touches Pour: Choisir les dossiers. *2 Choisir les plages. Rechercher. OK - JVC KD-AV7010 | Instructions - Page 176
Appareil principal (avant) Opérations générales Touches Pour: Mettre sous tension l'appareil. Mettre hors tension l'appareil. Atténuer les sons. Pour le changeur de CD Touches Pour: Choisir les plages. Rechercher. Pour le tuner Touches Changer la source. (L'appareil se met - JVC KD-AV7010 | Instructions - Page 177
FRANÇAIS Préparation (Télécommande-RM-RK220) 1 (Face arrière) 2 Avec le côté + dirigé vers le haut Pile bouton au lithium (CR2025) 3 AVERTISSEMENT concernant la pile: • N'installez aucune autre pile qu'un CR2025 ou son équivalent; sinon, elle risquerait d'exploser. • Rangez la pile hors de la - JVC KD-AV7010 | Instructions - Page 178
trois types de méthode de fonctionnement. • Ce manuel d'instruction explique les opérations principalement à l'aide des icônes stylo-bille ou d'un objet pointu similaire (cela l'endommagerait). Ex. Lecture de DVD Change la source. Informations sur la source et le mode de lecture Pour faire - JVC KD-AV7010 | Instructions - Page 179
- cadre jaune-apparaît autour de l'icône actuelle). • Pendant qu'une des sources vidéo est choisie, la fonction GUI se met en et hors service chaque fois que vous appuyez sur une touche. Déplacez le curseur sur l'icône souhaitée. Validez. Pour quitter le mode de fonctionnement GUI, appuyez de - JVC KD-AV7010 | Instructions - Page 180
Opérations de base PRÉCAUTION concernant le moniteur: N'ouvrez pas ni ne fermez le moniteur à la main. Ne gênez pas le moniteur quand il se déplace. Un tel comportement peut endommager le mécanisme de déploiement du moniteur. 3 Ajustez le volume. Pour mettre l'appareil sous tension, utilisez les - JVC KD-AV7010 | Instructions - Page 181
Réglage de l'horloge 5 Vous pouvez aussi régler le système d'horloge sur 24 heures ou 12 heures. 1 Lors de la lecture d'une source... Quittez FRANÇAIS • Si les icônes du panneau tactile n'apparaissent pas sur le moniteur, touchez la position centrale de l'écran. 2 3 *1 *2 *1 Apparaît - JVC KD-AV7010 | Instructions - Page 182
pour les écrans graphiques. La démonstration des affichages a été mise en service à l'expédition de l'usine et démarre 2 automatiquement quand aucune op effectuée pendant environ 30 secondes (sauf lors de la lecture d'un DVD/VCD). Pour l'annuler, choisissez un des écrans graphiques. 1 Lors - JVC KD-AV7010 | Instructions - Page 183
d'un disque: 12 3 4 56 1 S'allume quand un signal Dolby Digital est détecté (voir page 36). 2 S'allume quand le Dolby Pro Logic II est en service (voir page 36). 3 S'allume quand un signal DTS est détecté (voir page 36). 4 Information principale-Durée de lecture/No de titre/No de chapitre/No - JVC KD-AV7010 | Instructions - Page 184
Utilisation de la radio Le niveau de volume apparaît pendant son ajustement. Indicateur du mode Dual (voir page 33) Icône SOURCE (voir pages 14 et 33) Bande actuelle/No de préréglage Fréquence de la station Mode de réception FM Mode de recherche Mode sonore (voir page 39) Mode Surround/DSP (voir - JVC KD-AV7010 | Instructions - Page 185
3 Choisissez le mode de recherche. AUTO: Pour démarrer la recherche automatique. MANUAL: Pour démarrer la recherche manuelle. PRESET: Pour choisir les numéros de mode de réception monophonique est mis en et hors service. • Quand le mode de réception FM est "MONO", la réception est améliorée mais - JVC KD-AV7010 | Instructions - Page 186
mémoriser des stations. 1 Choisissez la bande (FM1 - FM3 et AM) pour laquelle vous souhaitez mémoriser des stations. 2 Accordez une station. puis Choisissez "MANUAL" (ou "AUTO"). 3 2 Démarrez la recherche SSM. 4 Mémorisez la station sur un numéro de préréglage. puis puis Les stations locales FM - JVC KD-AV7010 | Instructions - Page 187
(FM1 - FM3 et AM) pour laquelle vous souhaitez mémoriser une station. 2 2 Accordez une station. puis Affichage de la liste des préréglages Choisissez "MANUAL" (ou "AUTO"). 3 Vous pouvez mémoriser et choisir les stations préréglées en utilisant la liste des préréglages sur l'écran du moniteur - JVC KD-AV7010 | Instructions - Page 188
és quelques secondes après avoir été détectés. (Voir page 75.) DVD Pendant la lecture *1 Avant la lecture *1 Disponible uniquement pendant la lecture. *2 Indisponible quand la lecture PBC est en service. *3 Indisponible quand la lecture PBC est en service, mais disponible en dehors de la lecture. 20 - JVC KD-AV7010 | Instructions - Page 189
FRANÇAIS Utilisation d'un disque CD/MP3 Indicateur de mode Dual (voir page 33) Icône SOURCE (voir pages 14 et 33) No de plage actuelle (pour les CD) No de dossier/plage actuelle (pour les MP3) Information sur la durée de lecture (voir page 30) Format de signal audio (uniquement pour les CD DTS) - JVC KD-AV7010 | Instructions - Page 190
FRANÇAIS Opérations de base des disques Avant de commencer, respectez ce qui suit... • Pour la lecture de DVD, le réglage du menu Setup (voir page 43). • Si " " apparaît sur le moniteur, c'est que le disque ne peut pas accepter votre commande. - Dans certains - JVC KD-AV7010 | Instructions - Page 191
apparaître un instant sur le moniteur. • Les icônes guides suivants sont affichés quand "GUIDE" est réglé sur "MARCHE" (voir page 48). : Apparaît au début d'une scène contenant plusieurs langues de sous-titrage (uniquement pour les DVD). : Apparaît au début d'une scène contenant plusieurs langues de - JVC KD-AV7010 | Instructions - Page 192
Changement du format de l'image Interdiction de l'éjection du disque FRANÇAIS Vous pouvez changer le format d'affichage des images de lecture. • Cette fonction est utilisable uniquement avec les touches de l'appareil principal ou de la télécommande. • Le format d'image ne peut pas être changé - JVC KD-AV7010 | Instructions - Page 193
Appuyez sur les touches de curseur (OK) Vous pouvez commander la lecture d'un DVD muni d'un menu de commande ou d'un VCD avec la fonction de commande Lors de la lecture d'un VCD: Lors de la lecture d'un DVD: Les disques DVD ont généralement leurs propres menus ou listes de titres. Une liste de - JVC KD-AV7010 | Instructions - Page 194
jusqu'à ce que "ZOOM x1" apparaisse. Vous pouvez réafficher les 10 dernières secondes de la dernière scène lors de la lecture d'un DVD-Relecture monotouche. 26 - JVC KD-AV7010 | Instructions - Page 195
à afficher sur le moniteur. • Vous pouvez aussi choisir la langue des sous- titres en utilisant le menu RÉGLAGE (voir page 44). 1 Pour les DVD: Lors de la lecture d'un chapitre contenant différentes langues des dialogues, vous pouvez choisir quelle langue écouter. • Vous pouvez aussi choisir la - JVC KD-AV7010 | Instructions - Page 196
FRANÇAIS Lors de la lecture d'un VCD: Sélection d'un angle de vue Lors de la lecture d'un disque contenant plusieurs angles de vue, vous pouvez voir la même scène sous des angles différents. 1 STEREO LEFT RIGHT • STEREO: • LEFT: • RIGHT: Pour écouter la lecture stéréo (gauche/droite) - JVC KD-AV7010 | Instructions - Page 197
FRANÇAIS Localisation d'un dossier/plage en utilisant la liste Pour localiser une plage en affichant la liste des plages 1 Pour localiser un dossier en affichant la liste des dossiers • C'est possible uniquement avec les disques MP3. 1 2 2 3 Choisissez le dossier souhaité. Nom de la plage - JVC KD-AV7010 | Instructions - Page 198
ne peuvent pas être affichés en une fois. 1 Lecture répétée Vous pouvez répéter la lecture. • La lecture répétée peut être mise hors service uniquement pour les DVD. 2 1 FRANÇAIS (Pour les CD) (Pour les MP3) 2 Scroll Auto Scroll Off • Scroll: Le texte de la zone d'information défile - JVC KD-AV7010 | Instructions - Page 199
Vous pouvez utilisez diverses fonctions de recherche pour trouver vos scènes et morceaux préférés. Recherche de titre/chapitre/dossier/plage • Pour les DVD: Recherche de titre avant la lecture et recherche de chapitre pendant la lecture. • Pour les VCD: À l'arrêt quand la fonction PBC est utilis - JVC KD-AV7010 | Instructions - Page 200
durée de lecture écoulée du titre actuel (pour les DVD) et du disque (pour les VCD/CD). • Pour les DVD: Pendant la lecture ou une pause. (Pour certains DVD: n'importe quand) • Pour les VCD: En dehors de la lecture quand PBC est en service. 1 Pour commencer la lecture à partir de 58(M):00(S) Appuyez - JVC KD-AV7010 | Instructions - Page 201
" SUB sont mises en valeur. (satellite) ne peuvent pas être choisis comme source principale/secondaire en même temps même quand mode Dual est en service. (Référez-vous aussi aux pages 56 et 69.) Vous pouvez écouter la source principale à travers les enceintes et la source secondaire par le - JVC KD-AV7010 | Instructions - Page 202
puis AVOUT VOL 34 2 Appuyez sur les touches de source, puis sur les touches de commande de la source. Quand le mode Dual est en service... • La source de lecture ne change pas sur "DISC" bien qu'un disque soit en place. "DUAL" clignote sur l'affichage de l'appareil principal. • Vous pouvez - JVC KD-AV7010 | Instructions - Page 203
FRANÇAIS Utilisation du mode Surround 1 2 *2 *1 N'apparaît pas pour certaines sources. *2 Apparaît en gris quand n'est pas *1 *1 disponible. 3 Mettez en service et choisissez le mode Surround ou DSP. *2 Voir page 41. Voir page 41. Voir page 34. Voir page 39. 4 Réalisez des ajustements si - JVC KD-AV7010 | Instructions - Page 204
supports stéréo à 2 comme 0,1 canal, on parle de 5,1 canaux). canaux. Le Dolby Digital permet les sons Surround stéréo et règle la fréquence de coupure des Aucun son ne sort du caisson de grave (bien aigus sur 20 kHz, comparé au 7 kHz du Dolby qu'il soit en service CD, LD et DVD. Comparé au - JVC KD-AV7010 | Instructions - Page 205
pouvez choisir "Dolby Pro Logic II Movie" ou "Dolby Pro Logic II Music". Ex. Lors de la lecture d'un DVD. 2 • DSP On (Surround Off) Le mode DSP actuellement choisi est mis en service. • DEFEAT (Surround/DSP Off) Les modes Surround et DSP sont annulés. • Vous ne pouvez pas passer à l'étape suivante - JVC KD-AV7010 | Instructions - Page 206
le mode Surround ou DSP choisi. Quand le mode DSP est en service: FRANÇAIS Quand le mode Surround est en service: : Choisi automatiquement quand un signal DTS multicanaux est détecté (lors de la lecture d'un DVD ou d'un CD DTS). Aucun autre ajustement n'est permis. : Choisi automatiquement - JVC KD-AV7010 | Instructions - Page 207
FRANÇAIS Utilisation des modes sonores (iEQ) Les opérations suivantes sont possibles uniquement pour la source principale lors de l'utilisation du mode Dual. 1 2 *2 *1 N'apparaît pas pour certaines sources. *2 Apparaît en gris quand n'est pas *1 *1 disponible. 3 Voir page 35. Voir page 35. - JVC KD-AV7010 | Instructions - Page 208
FRANÇAIS Sélection d'un mode sonore préréglé Mémorisation de votre propre mode sonore Vous pouvez choisir le mode sonore qui convient à votre genre de musique. Modes sonores disponibles: • HARD ROCK / R&B / POP / JAZZ / DANCE / COUNTRY / REGGAE / CLASSIC • USER1 / USER2 / USER3 • FLAT (Pour - JVC KD-AV7010 | Instructions - Page 209
Autres ajustements sonores L'ajustement du fader et de la balance est possible uniquement pour la source principale lors de l'utilisation du mode Dual. 1 FRANÇAIS 2 *1 3 *2 *1 4 Réalisez l'ajustement souhaité. Pour ajuster le niveau d'entrée Ce réglage est requis pour chaque source sauf FM. Une - JVC KD-AV7010 | Instructions - Page 210
FRANÇAIS Ajustements du moniteur Quand aucune image de lecture de la source n'est affichée, vous pouvez uniquement ajuster la luminosité. 1 Affichez l'écran COMMANDE D'ÉCRAN. Options ajustables Hold Sur l'appareil principal Hold ASPECT Sur la télécommande : Indique le niveau actuel de lumière - JVC KD-AV7010 | Instructions - Page 211
pouvez prérégler les conditions initiales de lecture de disque. • Aucun changement ne peut être fait sur le menu de DVD pendant la lecture ou quand "DISC" est choisi comme source secondaire (SUB). 1 2 *1 3 *1 N'apparaît pas pour certaines sources. *2 Apparaît en gris quand n'est pas disponible - JVC KD-AV7010 | Instructions - Page 212
la langue des menus. TYPE MONITEUR Choisissez le type de moniteur correspondant à votre téléviseur (connecté aux prises AV OUTPUT) pour reproduire les DVD Vidéo enregistrés au format 16:9. • Pour le moniteur détachable de cet appareil, réglez sur "16:9 AUTO". LANGUE AUDIO Choisissez la langue des - JVC KD-AV7010 | Instructions - Page 213
FRANÇAIS Réglage initial-MONITEUR Vous pouvez prérégler les conditions initiales du moniteur. 1 2 *1 3 *1 N'apparaît pas pour certaines sources. *2 Apparaît en gris quand n'est pas disponible. *2 *1 4 Choisissez l'option souhaitée. Voir page 13. Apparaît uniquement quand la radio SIRIUS est - JVC KD-AV7010 | Instructions - Page 214
du volume. 2 Parties gauche/droite: • Saut de chapitres/plages pour les DVD/VCD. • Recherche de chapitre/plage pour les DVD/VCD. • Recherche des canaux de télévision pour le téléviseur (voir page 63). 3 Partie centrale: Mise en et hors service des icônes sur l'écran. (Cela fonctionne aussi même si - JVC KD-AV7010 | Instructions - Page 215
FRANÇAIS Réglage initial-AFFICHAGE SUR L'ÉCRAN Vous pouvez prérégler les conditions initiales de l'affichage sur l'écran. 1 2 *1 3 *1 N'apparaît pas pour certaines sources. *2 Apparaît en gris quand n'est pas disponible. *2 *1 4 Choisissez l'option souhaitée. Voir page 13. Apparaît - JVC KD-AV7010 | Instructions - Page 216
éatoire, balayage des introction, etc. est choisi. - Quand la recherche temporelle, de titre, de chapitre et de plage est démarée. • MARCHE: Les icônes guides sur l'écran (voir page 23) sont affichés sur le moniteur lors de l'utilisation du lecteur de disque intégré. - Quand le tuner de télévision - JVC KD-AV7010 | Instructions - Page 217
choisir "MENU AUDIO" quand l'écran de commande de la source auxilaire est affiché sur le moniteur (avec le mode Dual en service; voir page 33). 1 2 *1 3 *1 N'apparaît pas pour certaines sources. *2 Apparaît en gris quand n'est pas disponible. *2 *1 4 Choisissez l'option souhaitée. Voir page - JVC KD-AV7010 | Instructions - Page 218
FRANÇAIS SURROUND AUTO Vous pouvez mettre en service automatiquement un mode surround approprié quand un Pro Logic II Movie" est choisi automatiquement. Quand des signaux PCM sont détectés (pour les DVD/CD), "Dolby Pro Logic II Music" est choisi automatiquement. Quand d'autres signaux sont détect - JVC KD-AV7010 | Instructions - Page 219
• ARRET:Choisissez ce réglage si vous souhaitez profiter d'une lecture avec sa plage dynamique entière (aucun effet n'est appliqué). • MÉD.: Choisissez ce réglage si vous souhaitez réduire légèrement la plage dynamique. • MAX.: Choisissez ce réglage si vous souhaitez appliquer complètement l'effet - JVC KD-AV7010 | Instructions - Page 220
KV-C1000 est connecté. • Aucun réglage n'est requis. MODE DE GRADATEUR • AUTO: Assombrit l'affichage quand vous allumez les feux de la voiture. • MARCHE: Met en service le gradateur. • ARRET: Annulation. 52 - JVC KD-AV7010 | Instructions - Page 221
Autres fonctions principales Affectation de titres aux sources Alphabets romains Chiffres et symboles [Majuscules j Minucules] Alphabet romain Caractères accentués [Majuscules (x2) j Minucules (x2)] Majuscules Minuscules Permet de passer des majuscules aux minuscules. Déplace la position du - JVC KD-AV7010 | Instructions - Page 222
FRANÇAIS Vous pouvez affecter des titres à 30 stations FM/AM, 30 stations de télévision et 40 CD (dans cet appareil et dans le changeur de CD). Source Stations: CD: Nombre maximum de caractères 10 32 • Vous ne pouvez aps affecter un titre aux disques CD Text et MP3. Si l'écran "EFFACER LE NOM - JVC KD-AV7010 | Instructions - Page 223
FRANÇAIS Modification de la position/angle du moniteur Pour accéder aux commutateurs de la voiture situés derrière le moniteur, maintenez pressée OPEN. Vous pouvez changer la position et l'angle du L'angle du moniteur change comme montré sur montieur. l'illustration pendant environ 30 - JVC KD-AV7010 | Instructions - Page 224
changeur de CD • Vous ne pouvez pas choisir le changeur de CD et la radio SIRIUS en même temps quand le Dual Mode est en service (voir page 33). Le niveau de volume apparaît ici quand il est ajusté. Indicateur du mode Dual (voir page 33) Icône SOURCE (voir pages - JVC KD-AV7010 | Instructions - Page 225
quand un changeur de CD JVC compatible avec les CD Text est connecté. Il est recommandé d'utiliser un changeur de CD JVC compatible MP3 avec votre de CD de la série KD-MK avec cet appareil. Avant d'utiliser votre changeur de CD: • Référez-vous aussi aux instructions fournies avec votre changeur de - JVC KD-AV7010 | Instructions - Page 226
FRANÇAIS Utilisation avancée du changeur de CD Sélection d'un disque/dossier/plage 3 Choisissez le disque souhaité. Vous pouvez choisir le disque, (dossier: uniquement pour les disques MP3) et la plage en utilisant les touches de l'appareil principal. 1 DISC FOLDER TRACK À la page suivante/ pr - JVC KD-AV7010 | Instructions - Page 227
FRANÇAIS 3 Choisissez le dossier souhaité. Nom de la plage actuelle ou balise ID3 Affichage des informations sur le disque Quand le défilement automatique ou le défilement est choisi, vous pouvez afficher les textes et les faire défiler sur le moniteur s'ils sont trop longs et ne peuvent pas ê - JVC KD-AV7010 | Instructions - Page 228
les plages dans un ordre aléatoire. introductions. 1 Lecture rététée Vous pouvez répéter la lecture. • La lecture répétée ne peut pas être mise hors service. Uniquement pour les disques MP3 1 2 Uniquement pour les disques MP3 Lors de la lecture d'un CD: 2 RANDOM PLAY DISC RANDOM PLAY ALL - JVC KD-AV7010 | Instructions - Page 229
FRANÇAIS Balayage des introductions Vous pouvez reproduire les 15 premières secondes de chaque plage dans l'ordre. 1 Uniquement pour les disques MP3 2 Recherche d'un morceau ○ ○ ○ ○ ○ ○ Vous pouvez utiliser les fonctions de recherche pour trouver vos plages (pour les CD/MP3) et vos dossiers - JVC KD-AV7010 | Instructions - Page 230
FRANÇAIS Utilisation d'appareils extérieurs Vous pouvez connecter deux appareils vidéo comme comme appareils de lecture et un tuner de télévision optionnel (KV-C1000). • Quand vous connectez une caméra vidéo comme caméra de recul aux prises AV INPUT 2 pour vous guider quand vous reculez, réglez l' - JVC KD-AV7010 | Instructions - Page 231
Utilisation du tuner de télévision Le niveau de volume apparaît quand il est ajusté. Indicateur du mode Dual (voir page 33) Icône SOURCE (voir pages 14 et 33) No de préréglage actuel No de canal Mode de recherche Mode sonore (voir page 39) Mode Surround/DSP (voir page 36) L'image de lecture appara - JVC KD-AV7010 | Instructions - Page 232
télévision. • Pour accorder une station préréglée, référez- vous à "Visionnage d'un programme de télévision". AUTO: Pour démarrer la recherche automatique. MANUAL: Pour démarrer la recherche manuelle. PRESET: Pour choisir les numéros de préréglage (possible uniquement après la mémorisation des - JVC KD-AV7010 | Instructions - Page 233
une station de télévision. puis Pour accorder une station préréglée • Référez-vous aussi à "Visionnage d'un programme de télévision" à la page 64. 1 Choisissez "MANUAL" (ou "AUTO"). 2 Mémorisez la station sur un numéro de préréglage. 2 Choisissez un numéro de préréglage. Pour choisir les autres - JVC KD-AV7010 | Instructions - Page 234
en utilisant la liste des préréglages sur l'écran du moniteur. Pour choisir une station préréglée en utilisant la liste des préréglages Choisissez "MANUAL" (ou "AUTO"). puis 1 2 2 3 Mémorisez la station sur un numéro de préréglage. À la page suivante/ précédente de la liste • Les numéros de - JVC KD-AV7010 | Instructions - Page 235
en connectant le processeur (DLP: Processeur de signaux satellite-terre) JVC de radio SIRIUS (disponible en option) aux prises du changeur d'installation/raccordement (volume séparé). • Référez-vous aussi aux Manuel d'instructions fournies avec votre radio SIRIUS. * Change chaque fois que 20% de la - JVC KD-AV7010 | Instructions - Page 236
Le niveau de volume apparaît quand il est ajusté. Indicateur du mode Dual (voir page 33) Icône SOURCE (voir pages 14 et 33) Barre de force du signal (voir page 78) Bande/No de préréglage actuel Catégorie choisie Canal choisi No du canal actuel Mode de recherche Mode sonore (voir page 39) Mode - JVC KD-AV7010 | Instructions - Page 237
la radio SIRIUS ® • Vous ne pouvez pas choisir la radio SIRIUS et le changeur de CD en même temps quand le mode Dual est en service (voir page 33). 1 Choisissez "SAT (SIRIUS)". Vous pouvez accorder tous les canaux de toutes les catégories en choisissant "ALL". 4 Choisissez le mode de recherche - JVC KD-AV7010 | Instructions - Page 238
Mémorisation de canaux personnalisés 2 Vous pouvez prérégler 6 canaux pour chaque bande. 1 Lors de l'écoute du canal que vous souhaitez mémoriser... puis 2 FRANÇAIS 3 Mémorisez le canal sur un numéro de préréglage. puis Les informations du canal préréglé sont affichées. coute d'un canal préré - JVC KD-AV7010 | Instructions - Page 239
FRANÇAIS 2 Pour choisir un canal... puis • Les numéros de préréglage personnalisés, les noms des canaux, les noms des chansons et les noms des artistes apparaissent sur la liste. Sélection d'une catégorie/canal en utilisant les listes À la page suivante/ précédente de la liste • Vous ne - JVC KD-AV7010 | Instructions - Page 240
É: GMT-3:30 2 72 HEURE D'ÉTÉ Si vous avez réglé "RÉGLAGE AUTO DE L'HORLOGE" sur "AUTO" et que votre zone résidentielle utilise l'heure d'été, mettez l'heure d'été (DST) en service. • MARCHE: Met en service l'heure d'été. • ARRET: Cette fonction est annulée. - JVC KD-AV7010 | Instructions - Page 241
le disque dans sa boîte, insérez doucement le disque autour du support central (avec surface imprimée dirigée vers le haut). • Assurez-vous de . Pour garder les disques propres Un disque sale peut ne pas être reproduit correctement. Si un disque devient sale, essuyez-le avec un chiffon doux en ligne - JVC KD-AV7010 | Instructions - Page 242
• La recherche vers l'arrière s'arrête automatiquement quand le début du disque est atteint. La lecture reprend alors à la vitesse normale. • Pour certains DVD/VCD, il n'est pas possible de changer la langue des sous-titres et la préréglée précédemment est effacée quand langue des dialogues (ou - JVC KD-AV7010 | Instructions - Page 243
/signal apparaissent dans les cas suivants (uniquement pour les DVD/CD): - Quand un type différent de signal du disque et des causes suivantes: - Les disques sont sales ou rayés. - Les disques sont conservés dans un manquantes, etc.) ou la condition du support (tâche, rayure, gondolage, etc.) est - JVC KD-AV7010 | Instructions - Page 244
FRANÇAIS Remarques sur les fichiers MP3 • Cet appareil peut reproduire les fichiers MP3 uniquement s'ils portent le code d'extension (quelle que soit la casse des lettres- majuscule/minuscule). • Cet appareil ne peut pas reproduire les fichiers codés dans les formats suivants- MP3i, MP3 PRO, - JVC KD-AV7010 | Instructions - Page 245
source quand la lumière ambiante est très sombre. Réglage initial-MENU DVD multicanaux. S'ils ne sont pas codés au format multicanaux, "Dolby Digital" réinsérez-le (ou insérez un autre disque) pour que votre réglage entre en service. • Si le fader ou la balance a été réglé près d'une extrémité, - JVC KD-AV7010 | Instructions - Page 246
SIRIUS PnP ("Plug and Play") KT-SR1000 de volume automatiquement sur "30". Autres fonctions principales ou KT-SR2000 en utilisant l'adaptateur de radio JVC SIRIUS KS-U100K (non fourni). En mettant sous tension l'autoradio, vous pouvez mettre sous/hors tension la radio Affectation de titres aux - JVC KD-AV7010 | Instructions - Page 247
ÇAIS Guide de la radio. ] L'antenne n'est pas connectée solidement. Lecture de disque-DVD/VCD • Vous ne pouvez pas voir les images de lecture sur le pas changer le format de l'image. ] Quand le fonctionnement GUI est en service, vous ne pouvez pas changer le format de l'image. • Les côtés gauche - JVC KD-AV7010 | Instructions - Page 248
-le à l'appareil satellite. Rappelez-vous que les signaux audio/vidéo sont toujours transmis au téléviseur quand il est sous tension. • "RESET 8" apparaît sur l'affichage de l'appareil principal. ] C'est appareil n'est pas connecté correctement au tuner de télévision. Connectez cet appareil et - JVC KD-AV7010 | Instructions - Page 249
le disque. • "NO DISC" apparaît sur le moniteur. ] Il n'y a pas de disque dans le magasin ou les disques sont insérés à l'envers. • "RESET 1" - "RESET 7" apparaît sur l'affichage de l'appareil principal. ] Le micro-ordinateur intégré dans le changeur de CD ne fonctionne pas correctement. Appuyez sur - JVC KD-AV7010 | Instructions - Page 250
vous à la page 14 pour les détails. Vous pouvez mettre en service la démonstration des affichages. Pour l'annuler, choisissez un autre écran fenêtre d'affichage. Lors de la lecture d'une source vidéo (sauf un DVD/VCD), ne choisissez pas d'écran graphique (en d'autres mots, choisissez l'écran - JVC KD-AV7010 | Instructions - Page 251
FRANÇAIS CODES DE LANGUE Code Langue AA Afar AB Abkhaze AF Afrikaner AM Amharique AR Arabe AS Assamais AY Aymara AZ Azerbadjanais BA Bashkir BE Biélorusse BG Bulgare BH Bihari BI Bislama BN Bengali, Bangla BO Tibétain BR Breton CA Catalan CO Corse CS Tchèque CY Gallois DA - JVC KD-AV7010 | Instructions - Page 252
: 80 dBA (référence: 1 W sur 4 Ω) Nombre dc canaux: 2 canaux (stéréo) Réponse en fréquence: DVD, fs=48 kHz: 16 Hz à 22 000 Hz DVD, fs=96 kHz: 16 Hz à 44 000 Hz VCD, CD, MP3: 16 Hz à 20 000 Hz Plage dynamique (32°F à 104°F) Autre prise: Entrée pour la télécommande de volant (OE REMOTE) 84 - JVC KD-AV7010 | Instructions - Page 253
pleine échelle) Autres prises: Intégration du système (TO MAIN UNIT) Antenne FM/AM (FM/AM ANTENNA) Liaison AV (AV BUS) Changeur de CD (TO CHANGER) Caméra de recul/Enceinte centrale (BACKCAMERA REMOTE/CENTER SPEAKER) Cordon d'alimentation (POWER) Dimensions (L × H × P): 230 mm - JVC KD-AV7010 | Instructions - Page 254
Having TROUBLE with operation? Please reset your unit Refer to page of How to Reset Still having trouble?? USA ONLY Call 1-800-252-5722 http://www.jvc.com We can help you! EN, SP, FR © 2005 Victor Company of Japan, Limited 0205MNMMDWJEIN - JVC KD-AV7010 | Instructions - Page 255
Instructions DVD RECEIVER WITH MONITOR KD-AV7010
-
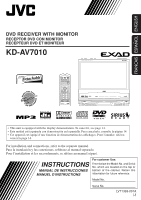 1
1 -
 2
2 -
 3
3 -
 4
4 -
 5
5 -
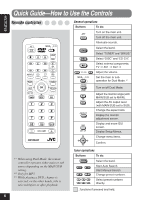 6
6 -
 7
7 -
8
-
9
-
10
-
11
-
12
-
13
-
14
-
15
-
16
-
17
-
18
-
19
-
20
-
21
-
22
-
23
-
24
-
25
-
26
-
27
-
28
-
29
-
30
-
31
-
32
-
33
-
34
-
35
-
36
-
37
-
38
-
39
-
40
-
41
-
42
-
43
-
44
-
45
-
46
-
47
-
48
-
49
-
50
-
51
-
52
-
53
-
54
-
55
-
56
-
57
-
58
-
59
-
60
-
61
-
62
-
63
-
64
-
65
-
66
-
67
-
68
-
69
-
70
-
71
-
72
-
73
-
74
-
75
-
76
-
77
-
78
-
79
-
80
-
81
-
82
-
83
-
84
-
85
-
86
-
87
-
88
-
89
-
90
-
91
-
92
-
93
-
94
-
95
-
96
-
97
-
98
-
99
-
100
-
101
-
102
-
103
-
104
-
105
-
106
-
107
-
108
-
109
-
110
-
111
-
112
-
113
-
114
-
115
-
116
-
117
-
118
-
119
-
120
-
121
-
122
-
123
-
124
-
125
-
126
-
127
-
128
-
129
-
130
-
131
-
132
-
133
-
134
-
135
-
136
-
137
-
138
-
139
-
140
-
141
-
142
-
143
-
144
-
145
-
146
-
147
-
148
-
149
-
150
-
151
-
152
-
153
-
154
-
155
-
156
-
157
-
158
-
159
-
160
-
161
-
162
-
163
-
164
-
165
-
166
-
167
-
168
-
169
-
170
-
171
-
172
-
173
-
174
-
175
-
176
-
177
-
178
-
179
-
180
-
181
-
182
-
183
-
184
-
185
-
186
-
187
-
188
-
189
-
190
-
191
-
192
-
193
-
194
-
195
-
196
-
197
-
198
-
199
-
200
-
201
-
202
-
203
-
204
-
205
-
206
-
207
-
208
-
209
-
210
-
211
-
212
-
213
-
214
-
215
-
216
-
217
-
218
-
219
-
220
-
221
-
222
-
223
-
224
-
225
-
226
-
227
-
228
-
229
-
230
-
231
-
232
-
233
-
234
-
235
-
236
-
237
-
238
-
239
-
240
-
241
-
242
-
243
-
244
-
245
-
246
-
247
-
248
-
249
-
250
-
251
-
252
-
253
-
254
-
255
 |
 |
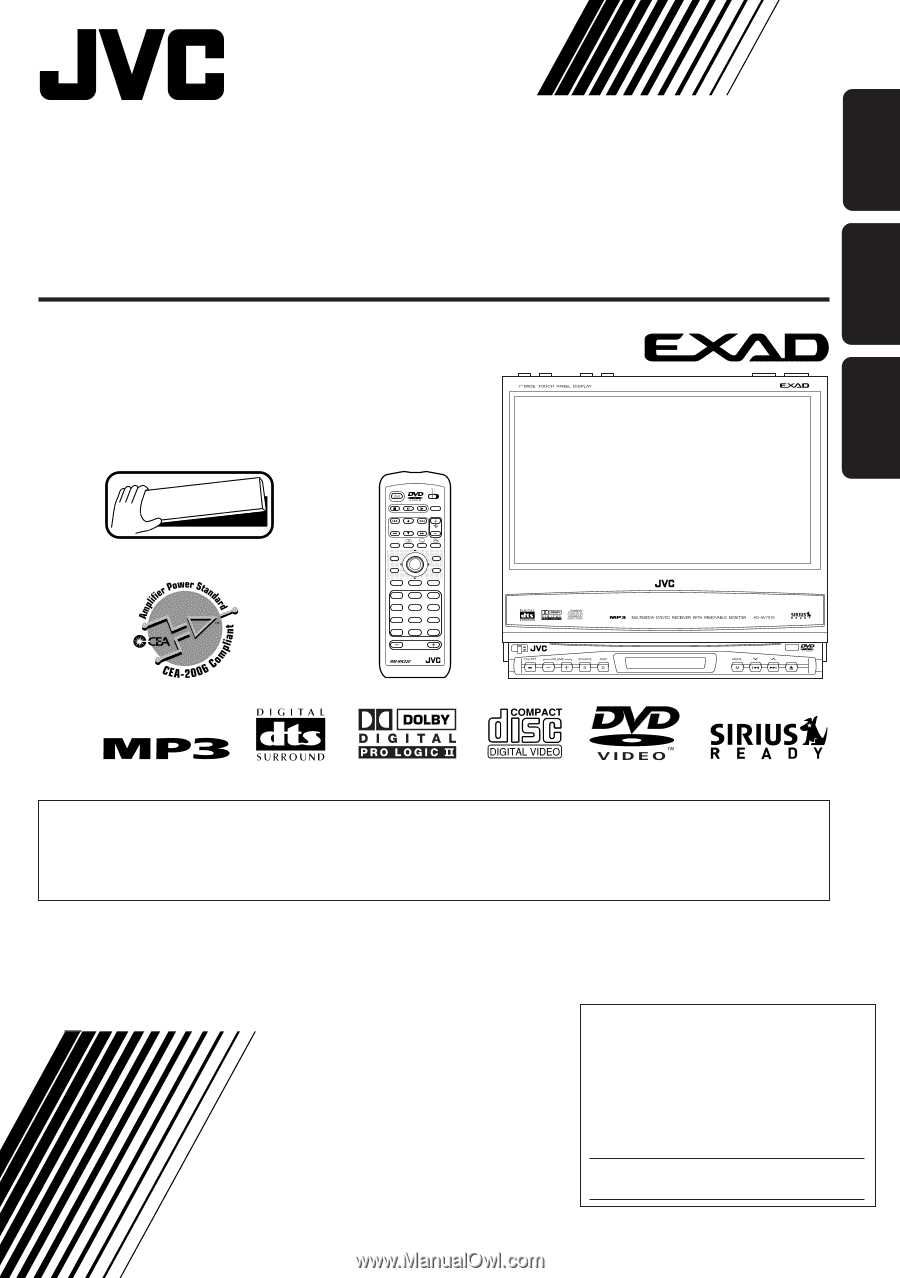
LVT1369-001A
[J]
INSTRUCTIONS
MANUAL DE INSTRUCCIONES
MANUEL D’INSTRUCTIONS
For customer Use:
Enter below the Model No. and Serial
No. which are located on the top or
bottom of the cabinet. Retain this
information for future reference.
Model No.
Serial No.
For installation and connections, refer to the separate manual.
Para la instalación y las conexiones, refiérase al manual separado.
Pour l’installation et les raccordements, se référer au manuel séparé.
ENGLISH
Detachable
ESPAÑOL
FRANÇAIS
DVD RECEIVER WITH MONITOR
RECEPTOR DVD CON MONITOR
RECEPTEUR DVD ET MONITEUR
KD-AV7010
•
This unit is equipped with the display demonstration. To cancel it, see page 14.
•
Esta unidad está equipada con demostración en la pantalla. Para cancelarla, consulte la página 14.
•
Cet appareil est équipé d’une fonction de démonstration des affichages. Pour l’annuler, référez-
vous à la page 14.
ATT
MAIN
SUB
ZOOM
ASPECT
MENU
VOLUME
TOPMENU
TUNER
5
6
4
2
3
1
8
9
7
11
/
0
12
/+1
0
10
DISC
OK
AV
GUI
SET UP
RETURN
DUAL
AVOUT VOL