Konica Minolta PS7000 Twain Driver and Overlay Manager Software Installation a - Page 32
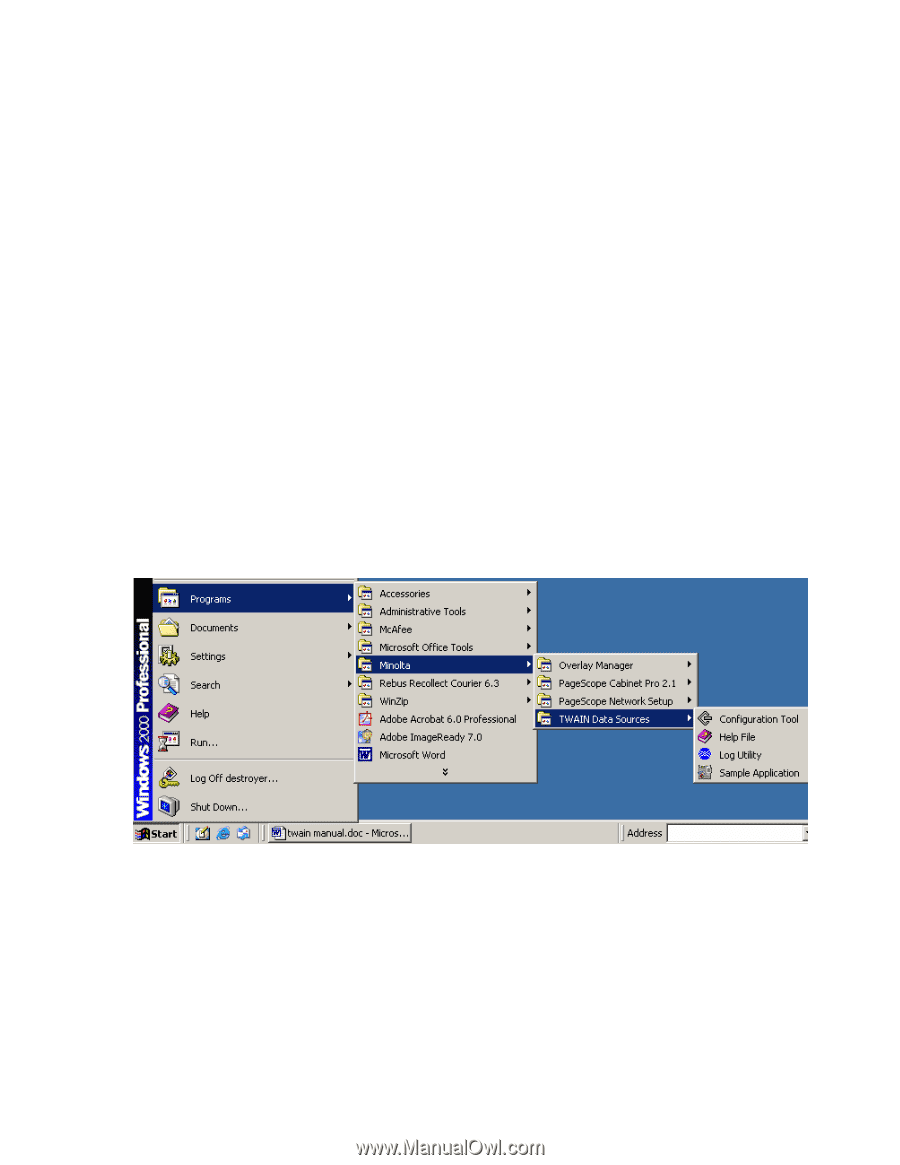
in the Programs/Minolta TWAIN Data Sources menu.
 |
View all Konica Minolta PS7000 manuals
Add to My Manuals
Save this manual to your list of manuals |
Page 32 highlights
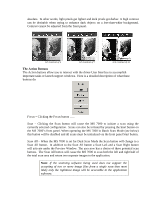
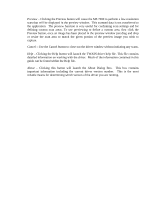
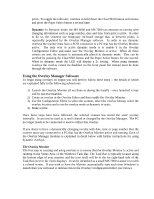
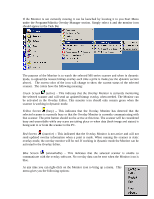
driver with the hardware currently not attached or detected will be shown with a red X through the scanner icon. Refresh - The Refresh button can be pressed to launch the TWAIN configuration utility and to rescan the SCSI bus. Add - The Add button is not currently used with the Minolta TWAIN drivers. Remove - The Remove button will become active whenever a listed driver is selected and the associated hardware of that driver is currently connected and detected. Once a driver is selected you can press the Remove button to delete that driver from your system. Properties - Pressing this button will cause the Scanner Settings Window to launch. The Scanner Settings Window will look exactly the same as the Driver's User Interface with the exception being that the Scan button is replaced with an OK button. The Scanner Settings Window can be used to set the default settings for applications that do not provide direct access to the Driver's User Interface. (See the driver User Interface section for more details on how to configure the scanner). Close - The Close button will close the Status Window and complete the configuration process. Although the TWAIN Configuration utility will automatically run during installation, you will likely wish to launch it again when a new scanner is attached or to do routine maintenance. To access the utility, simply locate and select it in your Start Menu bar. It can typically be found in the Programs/Minolta TWAIN Data Sources menu. The Minolta Sample TWAIN Application Installed with the driver is a sample scanning application. Please note that this application has no viewing capabilities and will require other software for viewing a scanned image. It simply executes a scan and stores the image as a TIFF file. It can be an excellent tool for confirming
-
 1
1 -
2
-
3
-
4
-
5
-
6
-
7
-
8
-
9
-
10
-
11
-
12
-
13
-
14
-
15
-
16
-
17
-
18
-
19
-
20
-
21
-
22
-
23
-
24
-
25
-
26
-
 27
27 -
 28
28 -
 29
29 -
 30
30 -
 31
31 -
 32
32 -
 33
33 -
 34
34 -
 35
35 -
 36
36 -
 37
37 -
38
-
39
-
40
-
41
-
42
-
43
-
44
-
45
-
46
-
47
-
48
-
49
-
50
-
51
-
52
-
53
-
54
-
55
-
56
-
57
-
58
-
59
 |
 |