Konica Minolta PS7000 Twain Driver and Overlay Manager Software Installation a - Page 9
The Preview W, indow - drivers
 |
View all Konica Minolta PS7000 manuals
Add to My Manuals
Save this manual to your list of manuals |
Page 9 highlights
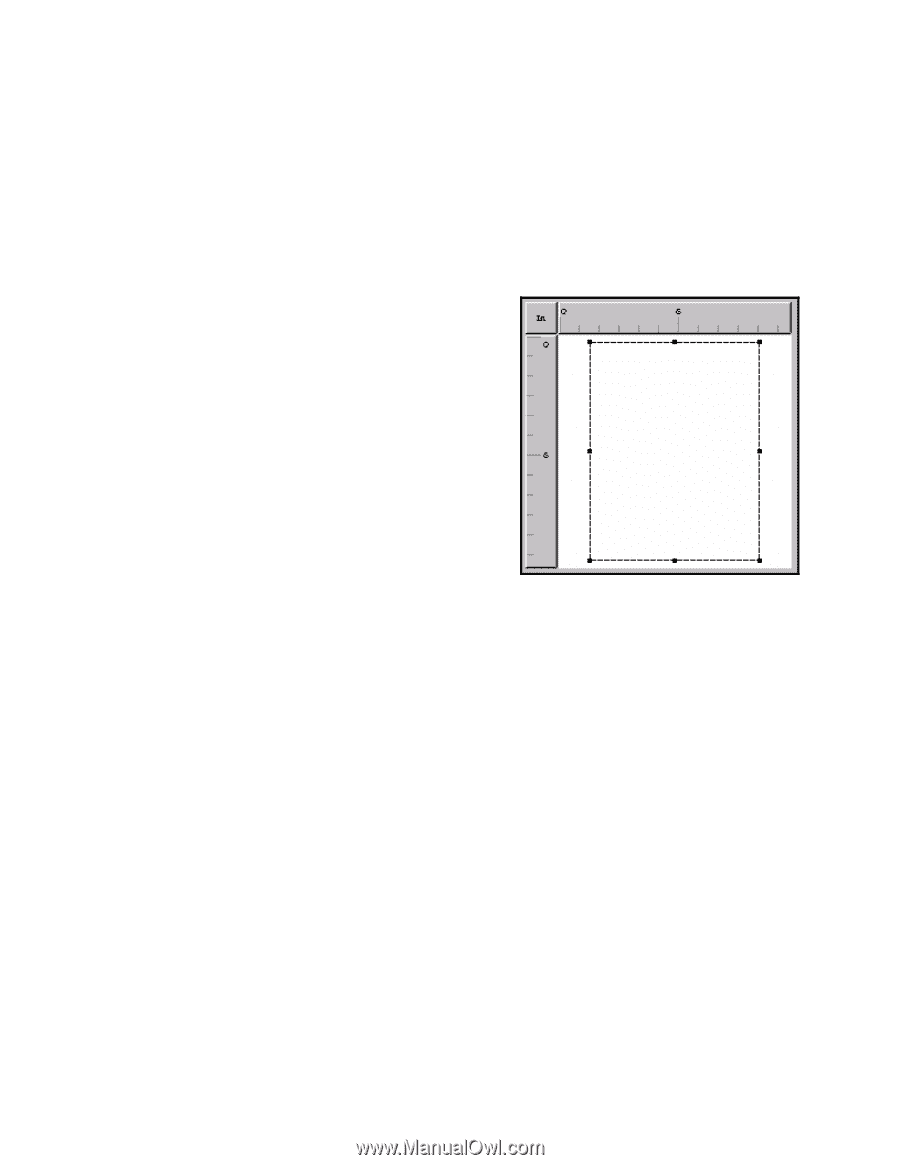
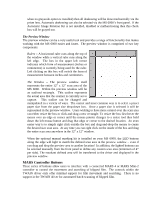
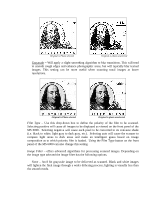
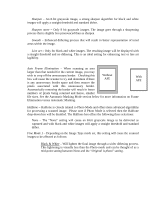
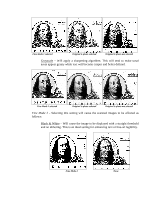
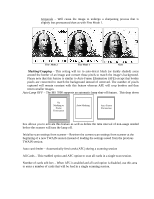
when no grayscale option is installed) then all deskewing will be done mechanically via the prism lens. Automatic deskewing can also be selected via the MS 6000's front panel. If the Automatic Image Rotation Kit is not installed, disabled or malfunctioning then this check box will be grayed out. The Preview Window The preview window can be a very useful tool and provides a range of functionality that makes working with the MS 6000 easier and faster. The preview window is comprised of two key components: Rulers - A horizontal ruler runs along the top of the window while a vertical ruler runs along the left edge. The box in the upper left corner indicates which form of measurement (inches or centimeters) is currently being used for the ruler. Left clicking on this box will switch the form of measurement between inches and centimeters. The Window - The preview window itself represents the entire 12" x 12" scan area of the MS 6000. Within the preview window will be an outlined rectangle. This outline represents the actual area that the scanner is currently set to capture. This outline can be changed and manipulated in a variety of ways. The easiest and most common way is to select a preset paper size from the paper size drop-down box. Once a paper size is selected it will be represented in the preview window. Users wishing to have more control over the scan area can either resize the box or click and-drag a new rectangle. To resize the box first hover the mouse over an edge or corner until the mouse pointer changes to a resize tool then hold down the left mouse button and drag that edge or corner to the desired location. An even easier way is to simply right click outside the box and drag-and-drop the mouse to create the desired size scan area. At any time you can right click on the inside of the box and drag the entire scan area anywhere in the 12" x 12" window. When the optional manual masking kit is installed on your MS 6000, the LED buttons along the edge will light to match the defined scan area in the preview window - even if you drag and drop the preview area to another location! In addition, the lighted buttons can be selected manually from the front panel to define any custom scan area (minimum of 4" per side). The resultant defined area will be transferred to the driver and displayed in the preview window. MARS Controller Buttons These series of buttons allow users to interface with a connected MARS 4 or MARS Mini-2 controller to control the movement and searching of blipped film. The controls within the TWAIN driver only offer minimal support for film movement and searching. There is no support in the TWAIN driver for automated batch-scanning of blipped film.
-
 1
1 -
2
-
3
-
 4
4 -
 5
5 -
 6
6 -
 7
7 -
 8
8 -
 9
9 -
 10
10 -
 11
11 -
 12
12 -
 13
13 -
 14
14 -
15
-
16
-
17
-
18
-
19
-
20
-
21
-
22
-
23
-
24
-
25
-
26
-
27
-
28
-
29
-
30
-
31
-
32
-
33
-
34
-
35
-
36
-
37
-
38
-
39
-
40
-
41
-
42
-
43
-
44
-
45
-
46
-
47
-
48
-
49
-
50
-
51
-
52
-
53
-
54
-
55
-
56
-
57
-
58
-
59
 |
 |