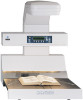
Konica Minolta PS7000 Twain Driver and Overlay Manager Software Installation a - Page 57
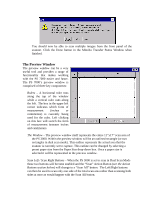
The Preview Window
 |
View all Konica Minolta PS7000 manuals
Add to My Manuals
Save this manual to your list of manuals |
Page 57 highlights
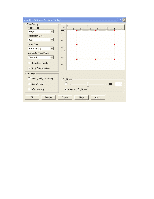
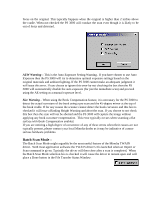
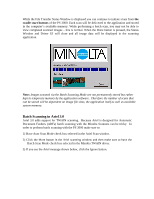
You should now be able to scan multiple images from the front panel of the scanner. Click the Done button in the Minolta Transfer Status Window when finished. The Preview Window The preview window can be a very useful tool and provides a range of functionality that makes working with the PS 7000 easier and faster. The PS 7000's preview window is comprised of three key components: Rulers - A horizontal ruler runs along the top of the window while a vertical ruler runs along the left. The box in the upper left corner indicates which form of measurement (inches or centimeters) is currently being used for the ruler. Left clicking on this box will switch the form of measurement between inches and centimeters. The Window - The preview window itself represents the entire 11"x17" scan area of the PS 3000. Within the preview window will be an outlined rectangle (or two rectangles in dual scan mode). This outline represents the actual area that the scanner is currently set to capture. This outline can be changed by selecting a preset paper size from the Paper Size drop-down box. Once a paper size is selected it will be represented in the preview window. Scan Left / Scan Right Buttons - When the PS 3000 is set to scan in Dual Scan Mode these two buttons will become enabled and the "Scan" Action Button (see the Action Buttons section below) will change to a "Scan All" button. The Left/Right buttons can then be used to scan only one side of the total scan area rather than scanning both sides at once as would happen with the Scan All button.
-
 1
1 -
2
-
3
-
4
-
5
-
6
-
7
-
8
-
9
-
10
-
11
-
12
-
13
-
14
-
15
-
16
-
17
-
18
-
19
-
20
-
21
-
22
-
23
-
24
-
25
-
26
-
27
-
28
-
29
-
30
-
31
-
32
-
33
-
34
-
35
-
36
-
37
-
38
-
39
-
40
-
41
-
42
-
43
-
44
-
45
-
46
-
47
-
48
-
49
-
50
-
51
-
 52
52 -
 53
53 -
 54
54 -
 55
55 -
 56
56 -
 57
57 -
 58
58 -
 59
59
 |
 |
