Kyocera KM-1650 1650/2050/2550 Operation Guide (Advanced) - Page 26
Offset Copying, Notes
 |
View all Kyocera KM-1650 manuals
Add to My Manuals
Save this manual to your list of manuals |
Page 26 highlights
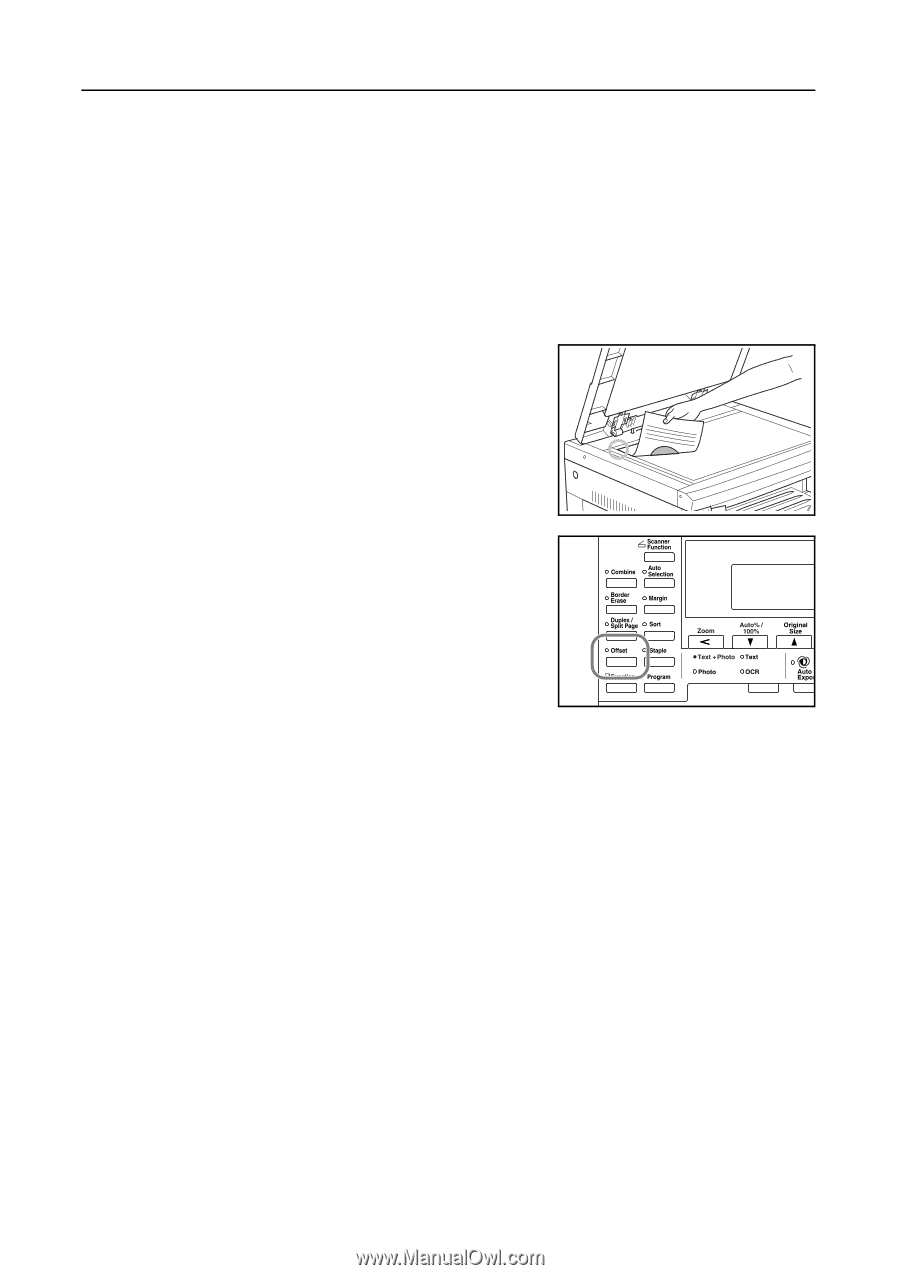
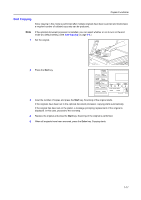
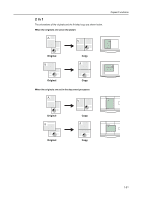
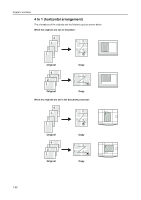
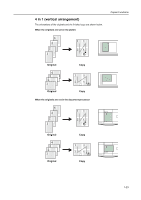
Copier Functions Offset Copying For copying of multiple sets, the orientation of the copies can be changed at the end of each set for easy classification. Notes • If the optional document processor or finisher is not installed, use this function with sort copying. • You can select whether or not to turn on the offset mode at a default setting. (See Offset Copying on page 3-9.) • When setting the offset copying, turn the auto rotation on. (See Auto Rotation on page 1-29.) • The paper sizes that can be used for offset copying are limited to A4, B5, 11 × 8 1/2", and 16K. 1 Set the original. 2 Press the Offset key. 3 Press the Sort key. 4 Input the number of copies and press the Start key. Scanning of the original starts. If the originals have been set in the optional document processor, copying starts automatically. If the original has been set on the platen, a message prompting replacement of the original is displayed. In this case, proceed to the next step. 5 Replace the original and press the Start key. Scanning of the original is performed. 6 When all originals have been scanned, press the Enter key. Copying starts. 1-18
-
 1
1 -
2
-
3
-
4
-
5
-
6
-
7
-
8
-
9
-
10
-
11
-
12
-
13
-
14
-
15
-
16
-
17
-
18
-
19
-
20
-
 21
21 -
 22
22 -
 23
23 -
 24
24 -
 25
25 -
 26
26 -
 27
27 -
 28
28 -
 29
29 -
 30
30 -
 31
31 -
32
-
33
-
34
-
35
-
36
-
37
-
38
-
39
-
40
-
41
-
42
-
43
-
44
-
45
-
46
-
47
-
48
-
49
-
50
-
51
-
52
-
53
-
54
-
55
-
56
-
57
-
58
-
59
-
60
-
61
-
62
-
63
-
64
-
65
-
66
-
67
-
68
-
69
-
70
-
71
-
72
-
73
-
74
-
75
-
76
-
77
-
78
-
79
-
80
-
81
-
82
-
83
-
84
-
85
-
86
-
87
-
88
-
89
-
90
-
91
-
92
-
93
-
94
-
95
-
96
-
97
-
98
-
99
-
100
-
101
-
102
-
103
-
104
-
105
-
106
-
107
-
108
-
109
-
110
-
111
-
112
-
113
-
114
-
115
-
116
-
117
-
118
-
119
-
120
-
121
-
122
-
123
-
124
-
125
-
126
-
127
-
128
-
129
-
130
-
131
-
132
-
133
-
134
-
135
-
136
-
137
-
138
-
139
-
140
-
141
-
142
-
143
-
144
-
145
-
146
-
147
-
148
-
149
-
150
-
151
-
152
-
153
-
154
-
155
-
156
-
157
-
158
-
159
-
160
-
161
-
162
-
163
-
164
-
165
-
166
-
167
-
168
-
169
-
170
-
171
-
172
-
173
-
174
-
175
-
176
 |
 |