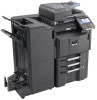
Kyocera TASKalfa 4500i Kyocera Command Center RX User Guide Rev-1.2 - Page 16
Printing a Document, Toner Save Level
 |
View all Kyocera TASKalfa 4500i manuals
Add to My Manuals
Save this manual to your list of manuals |
Page 16 highlights
Document Box Sending a Document to a Destination 1 Select a document you want to send as described above. You can send only one document at a time. 2 Click Send. The Send Settings page opens. The selected file is shown in Selected Files. 3 In Destination, select a destination from Address Book, E-mail, Folder, FAX and i-FAX. To select a destination, select Address Boox to display the destinations currently registered (depending on E-mail, Folders, FAX, i-FAX, or Groups). Note, however, FAX is not displayed if the entry of new addresses is prohibited in the device's system menu. To delete a destination from Destinations, click Delete. 4 Use the Color Selection drop-down list if you want to change the color of the document to send. For example, you can send a color document as a monochrome document. 5 Name the document in File Name. 6 Enter the date of sending and job ID in Additional Information. These entries are appended in the file name. 7 Use the File Format drop-down list to select the type of the document you want to send. 8 Click Send. If you are prompted to confirm sending, in case Confirmation Screen is activated on the device's operation panel, make confirmation. The document is sent to the destination. Printing a Document 1 Select the document(s) to print as described above. 2 Click Print. The Print Settings page opens. The files selected are shown in Selected Files. 3 If desired, change the order of the documents to be printed by clicking Top, Up, Down, and Bottom. You can exclude a document from the Selected Files list by clicking Delete. 4 Enter the number of copies to print in Copies. 5 Use the Color Selection drop-down list if you want to change the color of the document when it is printed. 6 In Functions, change settings for Duplex, EcoPrint, Toner Save Level as desired. 4-4 User Guide
-
 1
1 -
2
-
3
-
4
-
5
-
6
-
7
-
8
-
9
-
10
-
 11
11 -
 12
12 -
 13
13 -
 14
14 -
 15
15 -
 16
16 -
 17
17 -
 18
18 -
 19
19 -
 20
20 -
 21
21 -
22
-
23
-
24
-
25
-
26
-
27
-
28
-
29
-
30
-
31
-
32
-
33
-
34
-
35
-
36
-
37
-
38
-
39
-
40
-
41
-
42
-
43
-
44
-
45
-
46
-
47
-
48
-
49
-
50
-
51
-
52
-
53
-
54
-
55
-
56
-
57
-
58
-
59
-
60
-
61
-
62
-
63
-
64
-
65
-
66
-
67
-
68
-
69
-
70
-
71
-
72
-
73
-
74
-
75
-
76
-
77
 |
 |
