Lexmark T642 Service Manual - Page 165
POST incomplete, displays cartridge holder is installed, and cannot clear message, displays
 |
UPC - 734646722001
View all Lexmark T642 manuals
Add to My Manuals
Save this manual to your list of manuals |
Page 165 highlights
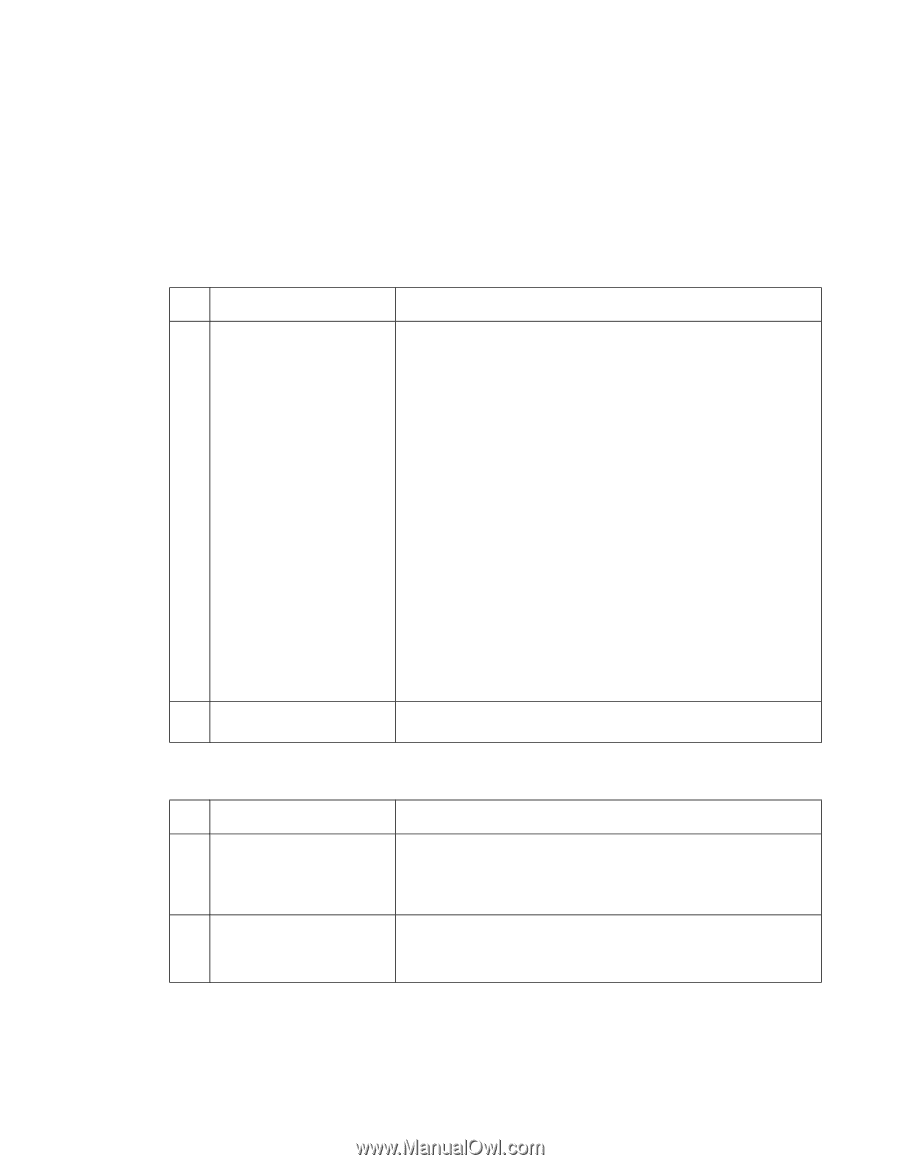
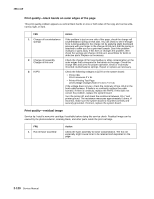
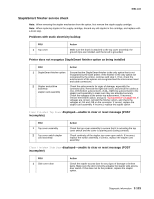
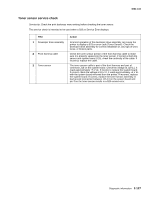
4061-xx0 POST incomplete-Insert Stapler Cartridge displays (cartridge holder is installed and cannot clear message) When this failure occurs, the following may also occur in the order shown: • Insert Staple Cartridge displayed. The stapler assembly may cycle or fire a few times. • 282.xx Stapler Jam displayed. The stapler assembly may try to cycle or fire. • 990.xx Service - Check Bin 1 displayed. FRU 1 Stapler cartridge holder Stapler assembly 2 Stapler to stapler board (J3) cable Action Before proceeding with the service check, gently try to remove the stapler cartridge holder from the stapler assembly. If the holder is jammed in the stapler assembly: 1. Turn the printer off, and remove the right side cover. Use care when removing the cover, as the right side door switch and cable assembly are easily damaged. Do not allow the right side cover to hang by the switch and cable assembly. 2. Disconnect the 10 pin cable from the stapler assembly. 3. Hold the stapler assembly with one hand while removing the three screws from the assembly. The assembly is heavy and easy to drop. 4. Check the stapler assembly for damaged or broken parts. Check the flag and spring assembly on the front of the stapler assembly to see if the flag or spring are broken or missing. If any problem is found, replace the stapler assembly. If no problem is found, continue with step 5. 5. Carefully cycle the large gear on the side of the stapler assembly, and try to free the cartridge holder assembly. Note: Look for staples jammed at the throat of the cartridge holder, and remove any that are found. Gently try to remove the cartridge holder from the stapler assembly. It may be necessary to manually cycle the large gear on the side of the stapler assembly to release the cartridge holder. 6. Reinstall the stapler assembly with a new stapler cartridge holder and staples. Run the Finisher Feed Test to check the option. If the problem continues, go to step 2. Check the continuity of the cable. If a problem is found, replace the stapler option. 283.xx Staple Jam-Check Stapler displays FRU 1 Staple cartridge holder 2 Staple unit Action Check the staple cartridge holder for any signs of damage and for any jammed staples in the cartridge. Replace the staple cartridge holder if damaged. If staples are jammed in the cartridge, replace the old strip of staples with a new strip, and try the finisher feed test from the diagnostic menu. Remove the staple cartridge holder from the staple unit, and remove the staple unit. Check for any staples that might be in the staple unit mechanism. Check for correct operation and for any signs of damage. Diagnostic information 2-125
-
 1
1 -
2
-
3
-
4
-
5
-
6
-
7
-
8
-
9
-
10
-
11
-
12
-
13
-
14
-
15
-
16
-
17
-
18
-
19
-
20
-
21
-
22
-
23
-
24
-
25
-
26
-
27
-
28
-
29
-
30
-
31
-
32
-
33
-
34
-
35
-
36
-
37
-
38
-
39
-
40
-
41
-
42
-
43
-
44
-
45
-
46
-
47
-
48
-
49
-
50
-
51
-
52
-
53
-
54
-
55
-
56
-
57
-
58
-
59
-
60
-
61
-
62
-
63
-
64
-
65
-
66
-
67
-
68
-
69
-
70
-
71
-
72
-
73
-
74
-
75
-
76
-
77
-
78
-
79
-
80
-
81
-
82
-
83
-
84
-
85
-
86
-
87
-
88
-
89
-
90
-
91
-
92
-
93
-
94
-
95
-
96
-
97
-
98
-
99
-
100
-
101
-
102
-
103
-
104
-
105
-
106
-
107
-
108
-
109
-
110
-
111
-
112
-
113
-
114
-
115
-
116
-
117
-
118
-
119
-
120
-
121
-
122
-
123
-
124
-
125
-
126
-
127
-
128
-
129
-
130
-
131
-
132
-
133
-
134
-
135
-
136
-
137
-
138
-
139
-
140
-
141
-
142
-
143
-
144
-
145
-
146
-
147
-
148
-
149
-
150
-
151
-
152
-
153
-
154
-
155
-
156
-
157
-
158
-
159
-
 160
160 -
 161
161 -
 162
162 -
 163
163 -
 164
164 -
 165
165 -
 166
166 -
 167
167 -
 168
168 -
 169
169 -
 170
170 -
171
-
172
-
173
-
174
-
175
-
176
-
177
-
178
-
179
-
180
-
181
-
182
-
183
-
184
-
185
-
186
-
187
-
188
-
189
-
190
-
191
-
192
-
193
-
194
-
195
-
196
-
197
-
198
-
199
-
200
-
201
-
202
-
203
-
204
-
205
-
206
-
207
-
208
-
209
-
210
-
211
-
212
-
213
-
214
-
215
-
216
-
217
-
218
-
219
-
220
-
221
-
222
-
223
-
224
-
225
-
226
-
227
-
228
-
229
-
230
-
231
-
232
-
233
-
234
-
235
-
236
-
237
-
238
-
239
-
240
-
241
-
242
-
243
-
244
-
245
-
246
-
247
-
248
-
249
-
250
-
251
-
252
-
253
-
254
-
255
-
256
-
257
-
258
-
259
-
260
-
261
-
262
-
263
-
264
-
265
-
266
-
267
-
268
-
269
-
270
-
271
-
272
-
273
-
274
-
275
-
276
-
277
-
278
-
279
-
280
-
281
-
282
-
283
-
284
-
285
-
286
-
287
-
288
-
289
-
290
-
291
-
292
-
293
-
294
-
295
-
296
-
297
-
298
-
299
-
300
-
301
-
302
-
303
-
304
-
305
-
306
-
307
-
308
-
309
-
310
-
311
-
312
-
313
-
314
-
315
-
316
-
317
-
318
-
319
-
320
-
321
-
322
-
323
-
324
-
325
-
326
-
327
-
328
-
329
-
330
-
331
-
332
-
333
-
334
-
335
-
336
-
337
-
338
-
339
-
340
-
341
-
342
-
343
-
344
-
345
-
346
-
347
-
348
-
349
-
350
-
351
-
352
-
353
-
354
-
355
-
356
-
357
-
358
-
359
-
360
-
361
-
362
-
363
-
364
-
365
-
366
-
367
-
368
-
369
-
370
-
371
-
372
-
373
-
374
-
375
-
376
-
377
-
378
-
379
-
380
-
381
-
382
-
383
-
384
-
385
-
386
-
387
-
388
-
389
-
390
-
391
-
392
-
393
-
394
-
395
-
396
-
397
-
398
-
399
-
400
-
401
-
402
-
403
-
404
-
405
-
406
-
407
-
408
-
409
-
410
-
411
-
412
-
413
-
414
-
415
-
416
-
417
-
418
-
419
-
420
-
421
-
422
 |
 |