Lexmark X8350 User's Guide for Windows - Page 104
Cannot print from digital camera using PictBridge, Print troubleshooting, Improving print quality - power port and power cord
 |
UPC - 734646098717
View all Lexmark X8350 manuals
Add to My Manuals
Save this manual to your list of manuals |
Page 104 highlights
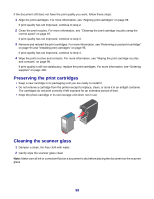
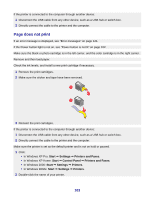
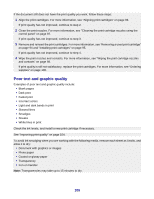
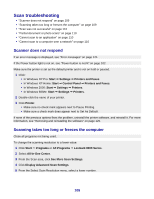
3 Click Printer. • Make sure no check mark appears next to Pause Printing. • Make sure a check mark does appear next to Set As Default. 1 Press Power to turn the printer off. 2 Disconnect the power supply cord from the wall outlet. 3 Gently remove the power supply from the printer. 4 Reconnect the power supply to the printer. 5 Plug the power supply cord into the wall outlet. 6 Press Power to turn the printer on. If none of the previous options fixes the problem, uninstall the printer software, and reinstall it. For more information, see "Removing and reinstalling the software" on page 125. Cannot print from digital camera using PictBridge Enable PictBridge printing on the camera by selecting the correct USB mode. For more information, see the digital camera documentation. 1 Disconnect the camera. 2 Connect a PictBridge-enabled digital camera to the PictBridge port. See the digital camera documentation to determine whether it is PictBridge-enabled. Use only the USB cable that came with the camera. Remove the memory card or the flash drive from the printer. Print troubleshooting • "Improving print quality" on page 98 • "Poor text and graphic quality" on page 105 • "Poor quality at the edges of the page" on page 106 • "Partial document or photo prints" on page 107 • "Printer does not print or respond" on page 106 • "Print speed is slow" on page 106 Improving print quality If you are not satisfied with the print quality of a document, make sure you: • Use the appropriate paper for the document. Use Lexmark Premium Photo Paper if you are printing photos or other high quality images. • Use a paper that is a heavier weight, bright white, or coated. • Select a higher print quality. 104
-
 1
1 -
2
-
3
-
4
-
5
-
6
-
7
-
8
-
9
-
10
-
11
-
12
-
13
-
14
-
15
-
16
-
17
-
18
-
19
-
20
-
21
-
22
-
23
-
24
-
25
-
26
-
27
-
28
-
29
-
30
-
31
-
32
-
33
-
34
-
35
-
36
-
37
-
38
-
39
-
40
-
41
-
42
-
43
-
44
-
45
-
46
-
47
-
48
-
49
-
50
-
51
-
52
-
53
-
54
-
55
-
56
-
57
-
58
-
59
-
60
-
61
-
62
-
63
-
64
-
65
-
66
-
67
-
68
-
69
-
70
-
71
-
72
-
73
-
74
-
75
-
76
-
77
-
78
-
79
-
80
-
81
-
82
-
83
-
84
-
85
-
86
-
87
-
88
-
89
-
90
-
91
-
92
-
93
-
94
-
95
-
96
-
97
-
98
-
 99
99 -
 100
100 -
 101
101 -
 102
102 -
 103
103 -
 104
104 -
 105
105 -
 106
106 -
 107
107 -
 108
108 -
 109
109 -
110
-
111
-
112
-
113
-
114
-
115
-
116
-
117
-
118
-
119
-
120
-
121
-
122
-
123
-
124
-
125
-
126
-
127
-
128
-
129
-
130
-
131
-
132
-
133
-
134
-
135
-
136
 |
 |
