Lexmark X8350 User's Guide for Windows - Page 91
Direct IP printing, Installing the shared printer on other network computers on the client computers - mac
 |
UPC - 734646098717
View all Lexmark X8350 manuals
Add to My Manuals
Save this manual to your list of manuals |
Page 91 highlights
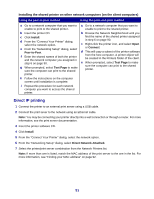
Installing the shared printer on other network computers (on the client computers) Using the peer-to-peer method Using the point-and-print method a Go to a network computer that you want to enable to print to the shared printer. b Insert the printer CD. c Click Install. d From the "Connect Your Printer" dialog, select the network option. e From the "Networking Setup" dialog, select Peer-to-Peer. f Enter the shared names of both the printer and the network computer you assigned in step 6 on page 90. g When prompted, select Test Page to make sure the computer can print to the shared printer. h Follow the instructions on the computer screen until installation is complete. i Repeat this procedure for each network computer you want to access the shared printer. a Go to a network computer that you want to enable to print to the shared printer. b Browse the Network Neighborhood until you find the name of the shared printer assigned in step 6 on page 90. c Right-click the printer icon, and select Open or Connect. d This will copy a subset of the printer software from the host computer. A printer object will be created in the Printers folder of the client. e When prompted, select Test Page to make sure the computer can print to the shared printer. Direct IP printing 1 Connect the printer to an external print server using a USB cable. 2 Connect the print sever to the network using an Ethernet cable. Note: You may be connecting your printer directly into a wall connection or through a router. For more information, see the print server documentation. 3 Insert the printer software CD. 4 Click Install. 5 From the "Connect Your Printer" dialog, select the network option. 6 From the "Networking Setup" dialog, select Direct Network Attached. 7 Select the printer/print server combination from the Network Printers list. Note: If more than one is listed, match the MAC address of the print server to the one in the list. For more information, see "Finding your MAC address" on page 92. 91
-
 1
1 -
2
-
3
-
4
-
5
-
6
-
7
-
8
-
9
-
10
-
11
-
12
-
13
-
14
-
15
-
16
-
17
-
18
-
19
-
20
-
21
-
22
-
23
-
24
-
25
-
26
-
27
-
28
-
29
-
30
-
31
-
32
-
33
-
34
-
35
-
36
-
37
-
38
-
39
-
40
-
41
-
42
-
43
-
44
-
45
-
46
-
47
-
48
-
49
-
50
-
51
-
52
-
53
-
54
-
55
-
56
-
57
-
58
-
59
-
60
-
61
-
62
-
63
-
64
-
65
-
66
-
67
-
68
-
69
-
70
-
71
-
72
-
73
-
74
-
75
-
76
-
77
-
78
-
79
-
80
-
81
-
82
-
83
-
84
-
85
-
 86
86 -
 87
87 -
 88
88 -
 89
89 -
 90
90 -
 91
91 -
 92
92 -
 93
93 -
 94
94 -
 95
95 -
 96
96 -
97
-
98
-
99
-
100
-
101
-
102
-
103
-
104
-
105
-
106
-
107
-
108
-
109
-
110
-
111
-
112
-
113
-
114
-
115
-
116
-
117
-
118
-
119
-
120
-
121
-
122
-
123
-
124
-
125
-
126
-
127
-
128
-
129
-
130
-
131
-
132
-
133
-
134
-
135
-
136
 |
 |
