Lexmark X8350 User's Guide for Windows - Page 28
Customizing fax settings using the control panel, Using the Fax Mode menu - ink cartridge
 |
UPC - 734646098717
View all Lexmark X8350 manuals
Add to My Manuals
Save this manual to your list of manuals |
Page 28 highlights
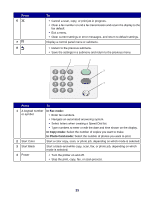
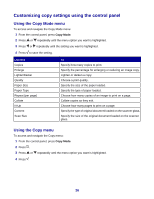
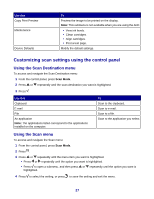
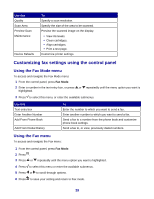
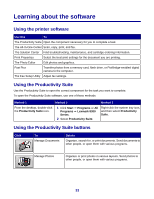
Use this Quality Scan Area Preview Scan Maintenance Device Defaults To Specify a scan resolution. Specify the size of the area to be scanned. Preview the scanned image on the display. • View ink levels. • Clean cartridges. • Align cartridges. • Print a test page. Customize printer settings. Customizing fax settings using the control panel Using the Fax Mode menu To access and navigate the Fax Mode menu: 1 From the control panel, press Fax Mode. 2 Enter a number in the text entry box, or press or repeatedly until the menu option you want is highlighted. 3 Press to select this menu, or enter the available submenus. Use this Text entry box Enter Another Number Add From Phone Book Add From Redial History To Enter the number to which you want to send a fax. Enter another number to which you want to send a fax. Send a fax to a number from the phone book and customize phone book settings. Send a fax to, or view, previously dialed numbers. Using the Fax menu To access and navigate the Fax menu: 1 From the control panel, press Fax Mode. 2 Press . 3 Press or repeatedly until the menu option you want is highlighted. 4 Press to select this menu or enter the available submenus. 5 Press or to scroll through options. 6 Press to save your setting and return to Fax mode. 28
-
 1
1 -
2
-
3
-
4
-
5
-
6
-
7
-
8
-
9
-
10
-
11
-
12
-
13
-
14
-
15
-
16
-
17
-
18
-
19
-
20
-
21
-
22
-
 23
23 -
 24
24 -
 25
25 -
 26
26 -
 27
27 -
 28
28 -
 29
29 -
 30
30 -
 31
31 -
 32
32 -
 33
33 -
34
-
35
-
36
-
37
-
38
-
39
-
40
-
41
-
42
-
43
-
44
-
45
-
46
-
47
-
48
-
49
-
50
-
51
-
52
-
53
-
54
-
55
-
56
-
57
-
58
-
59
-
60
-
61
-
62
-
63
-
64
-
65
-
66
-
67
-
68
-
69
-
70
-
71
-
72
-
73
-
74
-
75
-
76
-
77
-
78
-
79
-
80
-
81
-
82
-
83
-
84
-
85
-
86
-
87
-
88
-
89
-
90
-
91
-
92
-
93
-
94
-
95
-
96
-
97
-
98
-
99
-
100
-
101
-
102
-
103
-
104
-
105
-
106
-
107
-
108
-
109
-
110
-
111
-
112
-
113
-
114
-
115
-
116
-
117
-
118
-
119
-
120
-
121
-
122
-
123
-
124
-
125
-
126
-
127
-
128
-
129
-
130
-
131
-
132
-
133
-
134
-
135
-
136
 |
 |
