Lexmark X8350 User's Guide for Windows - Page 60
Printing a DPOF selection, Viewing a photo slide show on the control panel
 |
UPC - 734646098717
View all Lexmark X8350 manuals
Add to My Manuals
Save this manual to your list of manuals |
Page 60 highlights
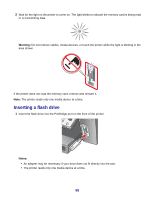
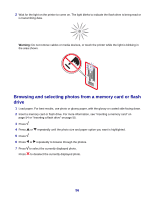
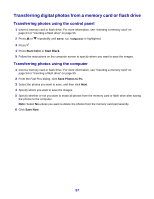
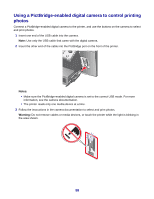
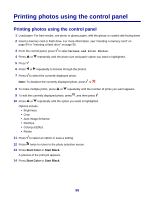
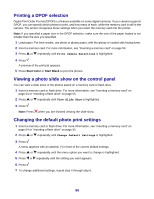
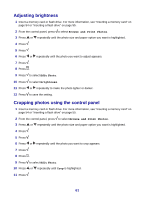
Printing a DPOF selection Digital Print Order Format (DPOF) is a feature available on some digital cameras. If your camera supports DPOF, you can specify which photos to print, and how many of each, while the memory card is still in the camera. The printer recognizes these settings when you insert the memory card into the printer. Note: If you specified a paper size in the DPOF selection, make sure the size of the paper loaded is not smaller than the size you specified. 1 Load paper. For best results, use photo or glossy paper, with the glossy or coated side facing down. 2 Insert a memory card. For more information, see "Inserting a memory card" on page 54. 3 Press or repeatedly until Print Camera Selections is highlighted. 4 Press . A preview of the print job appears. 5 Press Start Color or Start Black to print the photos. Viewing a photo slide show on the control panel You can view a slide show of the photos saved on a memory card or flash drive. 1 Insert a memory card or flash drive. For more information, see "Inserting a memory card" on page 54 or "Inserting a flash drive" on page 55. 2 Press or repeatedly until View Slide Show is highlighted. 3 Press . Note: Press when you are finished viewing the slide show. Changing the default photo print settings 1 Insert a memory card or flash drive. For more information, see "Inserting a memory card" on page 54 or "Inserting a flash drive" on page 55. 2 Press or repeatedly until Change Default Settings is highlighted. 3 Press . A menu appears with an asterisk (*) in front of the current default settings. 4 Press or repeatedly until the menu option you want to change is highlighted. 5 Press or repeatedly until the setting you want appears. 6 Press . 7 To change additional settings, repeat step 4 through step 6. 60
-
 1
1 -
2
-
3
-
4
-
5
-
6
-
7
-
8
-
9
-
10
-
11
-
12
-
13
-
14
-
15
-
16
-
17
-
18
-
19
-
20
-
21
-
22
-
23
-
24
-
25
-
26
-
27
-
28
-
29
-
30
-
31
-
32
-
33
-
34
-
35
-
36
-
37
-
38
-
39
-
40
-
41
-
42
-
43
-
44
-
45
-
46
-
47
-
48
-
49
-
50
-
51
-
52
-
53
-
54
-
 55
55 -
 56
56 -
 57
57 -
 58
58 -
 59
59 -
 60
60 -
 61
61 -
 62
62 -
 63
63 -
 64
64 -
 65
65 -
66
-
67
-
68
-
69
-
70
-
71
-
72
-
73
-
74
-
75
-
76
-
77
-
78
-
79
-
80
-
81
-
82
-
83
-
84
-
85
-
86
-
87
-
88
-
89
-
90
-
91
-
92
-
93
-
94
-
95
-
96
-
97
-
98
-
99
-
100
-
101
-
102
-
103
-
104
-
105
-
106
-
107
-
108
-
109
-
110
-
111
-
112
-
113
-
114
-
115
-
116
-
117
-
118
-
119
-
120
-
121
-
122
-
123
-
124
-
125
-
126
-
127
-
128
-
129
-
130
-
131
-
132
-
133
-
134
-
135
-
136
 |
 |
