Magnavox MWR10D6 Quick Guide - Page 13
Using a remote control, Installing batteries in the remote control, DISPLAY menu - instruction manuals
 |
View all Magnavox MWR10D6 manuals
Add to My Manuals
Save this manual to your list of manuals |
Page 13 highlights
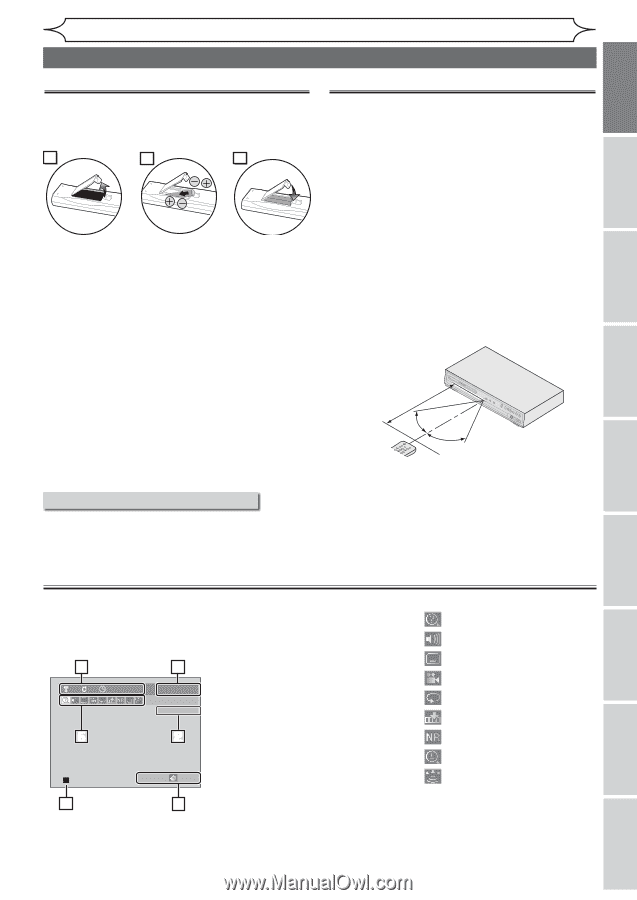
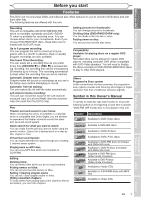
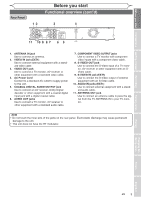
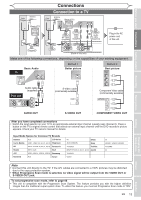
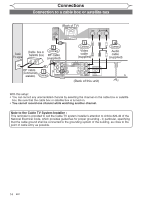
Before you start Connections Getting started Recording Before you start Functional overview (cont'd) Installing batteries in the remote control Using a remote control Install two "AAA" size batteries (supplied) matching the polarity indicated inside battery compartment of the remote control. 1 2 3 Note: Incorrect use of batteries can result in hazards such as leakage and bursting. Please observe the following: • Do not mix new and old batteries together. • Do not use different kinds of batteries together, although they may look similar, different batteries may have different voltages. • Make sure that the plus and minus ends of each battery match the indications in the battery compartment. • Remove batteries from equipment that is not going to be used for a month or more. • When disposing of used batteries, please comply with governmental regulations or environmental public instruction's rules that apply in your country or area. • Do not recharge, short-circuit, heat, burn or disassemble batteries. Keep in mind the following when using the remote control: • Make sure that there is no obstacle between the remote control and the remote sensor on the unit. • Remote operation may become unreliable if strong sunlight or fluorescent light is shining on the remote sensor of the unit. • Remote control for different devices can interfere with each other. Avoid using remote control for other equipment located close to the unit. • Replace the batteries when you notice a fall off in the operating range of the remote control. • The maximum operable ranges from the unit are as follows. - Line of sight: approx. 23 feet (7m) - Either side of the center: approx. 16 feet (5m) within 30° - Above: approx. 16 feet (5m) within 15° - Below: approx. 10 feet (3m) within 30° Within about 23 feet (7m) 30° STANDBY-ON 1 4 2 OPEN/CLOSE RemoteREV P OTROIGPINMAELNU/ REC PAUSE CLEAR 7 0 STOP PLAY SKIP 5 8 CM 9 SKIP 6 3 FWD control ENTER PLAYMLEINSUT 30° OPEN/CLOSE CHANNEL REC SPEED REC/OTR REV FWD S-VIDEO STOP PLAY POWER VIDEO L AUDIO R Guide to Displays on screen menu This unit uses the following on screen menu for most operations: Setup menu and Title list, and Display menu. They allow you to change the playing status of the disc during playback. The Display menu also gives you information on the status of the disc. DISPLAY menu Press [DISPLAY] to call up the Display menu. This menu will give you the information on the playing disc. Some operations are available while disc is playing. 4 1 11 0:00:00 DVD+RW CH 2 5 2 HQ(1Hr) 1:01 6 3 1. Indicates a disc type and a format mode (Format mode is displayed with DVD-RW/DVD-R (Video mode) disc inserted). NOTE: In some descriptions on this manual, only one disc type is indicated as an example. 2. Indicates a channel number. 3. Indicates a recording mode and possible recording time left. 4. Indicates a title number, chapter number and the time lapse of disc play. 5. Each icon means: : Search : Audio : Subtitle : Angle : Repeat : Marker : Noise Reduction : Zoom : Surround 6. Indicates current disc status. Playing discs Editing Changing the Setup menu Others Español EN 11
-
 1
1 -
2
-
3
-
4
-
5
-
6
-
7
-
 8
8 -
 9
9 -
 10
10 -
 11
11 -
 12
12 -
 13
13 -
 14
14 -
 15
15 -
 16
16 -
 17
17 -
 18
18 -
19
-
20
-
21
-
22
-
23
-
24
-
25
-
26
-
27
-
28
-
29
-
30
-
31
-
32
-
33
-
34
-
35
-
36
-
37
-
38
-
39
-
40
-
41
-
42
-
43
-
44
-
45
-
46
-
47
-
48
-
49
-
50
-
51
-
52
-
53
-
54
-
55
-
56
-
57
-
58
-
59
-
60
-
61
-
62
-
63
-
64
-
65
-
66
-
67
-
68
-
69
-
70
-
71
-
72
-
73
-
74
-
75
-
76
-
77
-
78
-
79
-
80
-
81
-
82
 |
 |