Magnavox MWR10D6 Quick Guide - Page 37
Setting a disc to protect, Settings for an external source cont'd
 |
View all Magnavox MWR10D6 manuals
Add to My Manuals
Save this manual to your list of manuals |
Page 37 highlights
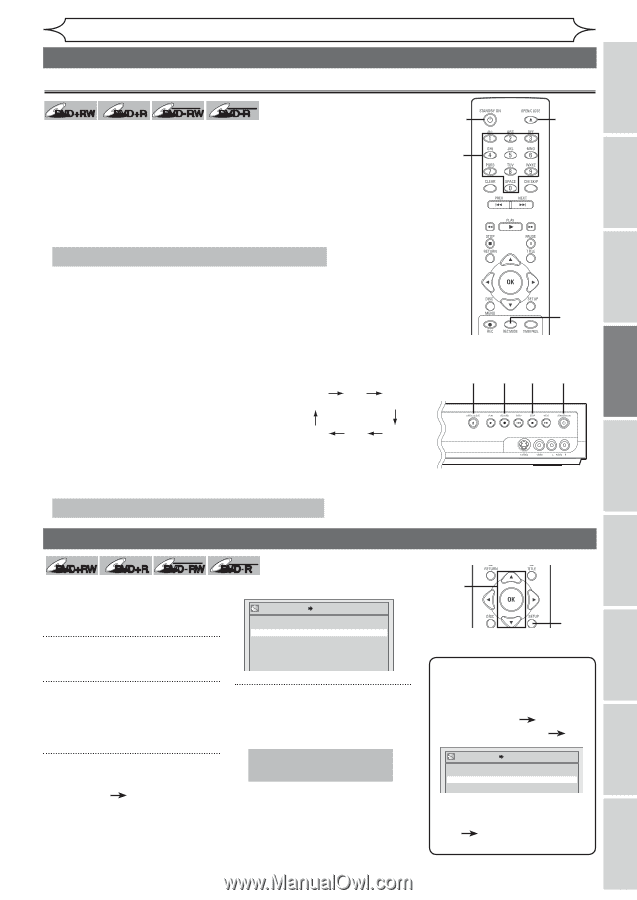
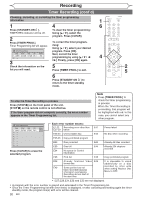
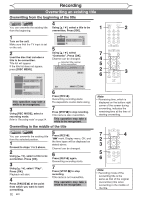
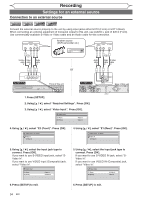
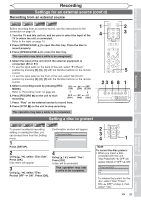
Before you start Connections Getting started Recording Playing discs Recording Settings for an external source (cont'd) Recording from an external source +VR +VR DVD+RW DVD+R DVD-RW DVD-R Before recording from an external source, see the instructions for the connection on page 34. 1. Turn the TV and this unit on, and be sure to select the input of the TV to which the unit is connected. Refer to the table on page 13. 2. Press [OPEN/CLOSE A] to open the disc tray. Place the disc to record properly. 3. Press [OPEN/CLOSE A] to close the disc tray. This operation may take a while to be recognized. 4. Select the input of the unit which the external equipment is connected. (E2 or E1) • To use the input jacks on the back of this unit, select "E1 (Rear)" position by pressing [0], [0], [1] with the Number buttons on the remote control. • To use the input jacks on the front of this unit, select "E2 (Front)" position by pressing [0], [0], [2] with the Number buttons on the remote control. 5. Select a recording mode by pressing [REC MODE]. Refer to "Recording mode" on page 24. HQ SP SPP (1Hr) (2Hr) (2.5Hr) 6. Press [RECORD I] on the unit to start recording. SLP EP LP (6Hr) (4Hr) (3Hr) 7. Press "Play" on the external source to record from. 8. Press [STOP C] on the unit to stop recording. 1 2 4 3 5 23 6 8 1 This operation may take a while to be completed. Setting a disc to protect +VR DVD+RW DVD+R DVD-RW To prevent accidental recording, editing or erasing the titles, you can protect them from the Setting menu. 1 Press [SETUP]. +VR DVD-R Confirmation window will appear. Disc Protect OFF ON Yes No 2 Using [K / L], select "Disc Edit". Press [OK]. Disc menu will appear. 3 Using [K / L], select "Disc Protect OFF ON". Press [OK]. 4 Using [K / L], select "Yes". Press [OK]. A disc will be protected. This operation may take a while to be completed. 2 3 4 1 Note To cancel the disc protect: • When you insert a disc protected with this unit, "Disc Protect ON OFF" will appear instead of "OFF ON". Disc Protect ON OFF Yes No To release the protect for the disc, select "Disc Protect ON OFF" at step 3, then select "Yes". Editing Changing the Setup menu Others Español EN 35
-
 1
1 -
2
-
3
-
4
-
5
-
6
-
7
-
8
-
9
-
10
-
11
-
12
-
13
-
14
-
15
-
16
-
17
-
18
-
19
-
20
-
21
-
22
-
23
-
24
-
25
-
26
-
27
-
28
-
29
-
30
-
31
-
 32
32 -
 33
33 -
 34
34 -
 35
35 -
 36
36 -
 37
37 -
 38
38 -
 39
39 -
 40
40 -
 41
41 -
 42
42 -
43
-
44
-
45
-
46
-
47
-
48
-
49
-
50
-
51
-
52
-
53
-
54
-
55
-
56
-
57
-
58
-
59
-
60
-
61
-
62
-
63
-
64
-
65
-
66
-
67
-
68
-
69
-
70
-
71
-
72
-
73
-
74
-
75
-
76
-
77
-
78
-
79
-
80
-
81
-
82
 |
 |