Magnavox MWR10D6 Quick Guide - Page 30
One-touch Timer Recording
 |
View all Magnavox MWR10D6 manuals
Add to My Manuals
Save this manual to your list of manuals |
Page 30 highlights
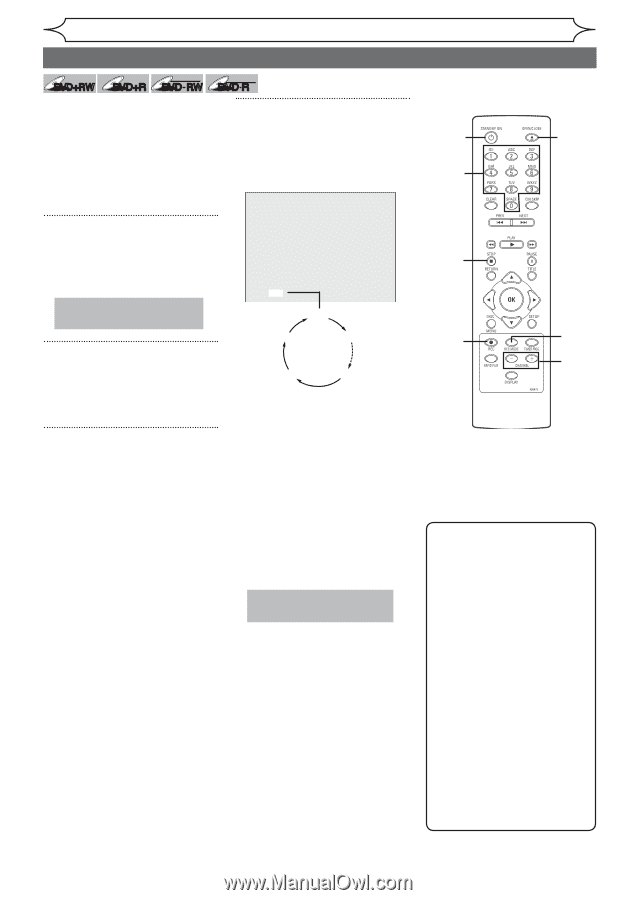
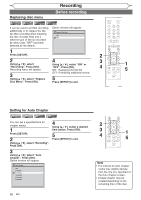
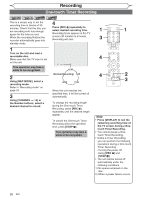
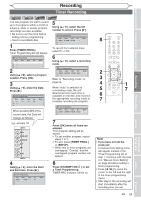
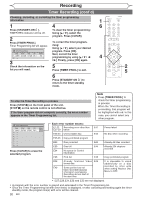
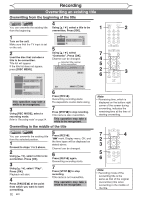
Recording One-touch Timer Recording +VR +VR DVD+RW DVD+R DVD-RW DVD-R This is a simple way to set the recording time in blocks of 30 4 minutes. Check that the disc you are recording onto has enough Press [REC I] repeatedly to select desired recording time. 1 1 space for the time you set. Recording times appear on the TV When the recording finishes the recorder automatically goes into screen (30 minutes to 8 hours). Recording will start. 3 standby mode. 1 Turn on the unit and load a recordable disc. Make sure that the TV input is set on the unit. This operation may take a while to be recognized. 2 Using [REC MODE], select a recording mode. Refer to "Recording mode" on page 24. 3 Using [CHANNEL - / +] or the Number buttons, select a desired channel to record. I 0:30 0:30 (Normal Recording) 1:00 8:00 7:30 When the unit reaches the specified time, it will be turned off automatically. To change the recording length during the One-touch Timer Recording, press [REC I] repeatedly until the desired length appear. To cancel the One-touch Timer Recording within the specified time, press [STOP C] . This operation may take a while to be completed. 4 4 2 3 Note • Press [DISPLAY] to see the remaining recording time on the TV screen during a Onetouch Timer Recording. • You cannot pause a Onetouch Timer Recording. • Unlike a Timer Recording, you can perform the following operations during a One-touch Timer Recording. -Turning the power off. -Using [REC I] and [STOP C]. • The unit will be turned off automatically under the following conditions. 1) No space remained on the disc. 2) When a power failure occurs. 28 EN
-
 1
1 -
2
-
3
-
4
-
5
-
6
-
7
-
8
-
9
-
10
-
11
-
12
-
13
-
14
-
15
-
16
-
17
-
18
-
19
-
20
-
21
-
22
-
23
-
24
-
 25
25 -
 26
26 -
 27
27 -
 28
28 -
 29
29 -
 30
30 -
 31
31 -
 32
32 -
 33
33 -
 34
34 -
 35
35 -
36
-
37
-
38
-
39
-
40
-
41
-
42
-
43
-
44
-
45
-
46
-
47
-
48
-
49
-
50
-
51
-
52
-
53
-
54
-
55
-
56
-
57
-
58
-
59
-
60
-
61
-
62
-
63
-
64
-
65
-
66
-
67
-
68
-
69
-
70
-
71
-
72
-
73
-
74
-
75
-
76
-
77
-
78
-
79
-
80
-
81
-
82
 |
 |