Panasonic WVCU650 Operating Instructions - Page 57
Recorder Functions, Auto Pan Setup and Activation, Disk Selection, WJ-HD300 Series Only
 |
UPC - 791871504277
View all Panasonic WVCU650 manuals
Add to My Manuals
Save this manual to your list of manuals |
Page 57 highlights
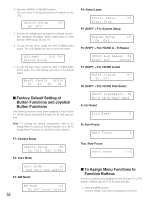
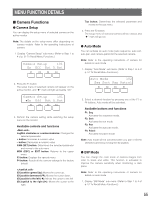
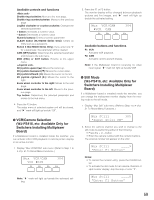
● Auto Pan Setup and Activation You will set up and activate the auto pan function. The camera can pan between the start and end points you will set. To set the start and end point of auto pan 1. Display "Auto Pan" sub menu. (Refer to Step 1 to 4 of p. 51 To Recall Menu Functions.) Auto Pan Setup 105 Play Rvrs Start End F1 F2 F3 F4 2. By moving the 3D joystick, move the camera to a point you wish to start auto pan. 3. Press the F3 button. The start point of auto pan will be set. 4. By moving the 3D joystick, move the camera to a point you wish to end auto pan. 5. Press the F4 button. The end point of auto pan will be set. To activate auto pan Press the F1 button. The auto pan will be activated, and the camera will pan between the set. Notes: • When you press the F2 button, the auto pan direction will be reversed. • Auto pan will be canceled when you pan or tilt the selected camera by moving the 3D joystick. ■ Recorder Functions ● Disk Selection (WJ-HD300 Series Only) You will specify a disk for search playback. 1. Display "HD300 DiskSelect" sub menu. (Refer to Step 1 to 4 of p. 51 To Recall Menu Functions.) HD300 DiskSelect 201 Nr-A Cp-A Cpy1 Cpy2 F1 F2 F3 F4 2. Press one of the F1 to F4 buttons. The specified disk will be selected. Available buttons and functions F1: Nr-A Specifies the normal or event recording area for playback. F2: Cp-A Specifies the copy area for playback. F3: Cpy1 This function is reserved for future use. F4: Cpy2 This function is reserved for future use. 3. When you specify a disk, the search list display will appear on the active monitor, and "Search Mode" menu will appear on the LCD. Then, perform the search playback operation. (Refer to p. 35 Search Playback.) Search Mode HD300 Thumb Text Copy ● A-B Repeat Playback Setting (WJ-HD300 Series Only) You can playback the recorded images repeatedly by specifying the start point (A) and end point (B). 1. Display "HD300 A- B Repeat" sub menu. (Refer to Step 1 to 4 of p. 51 To Recall Menu Functions.) HD300 A-B Repeat 202 Start End Cancel F1 F2 F3 F4 2. During playback, press the F1 button at the point you wish to start playback. The playback start point (A) will be set. Note: To cancel the start point, press the F4 button. 3. Press the F2 button at the point you wish to end playback. The playback end point (B) will be set, and the repeat playback will be performed between (A) and (B). 57
-
 1
1 -
2
-
3
-
4
-
5
-
6
-
7
-
8
-
9
-
10
-
11
-
12
-
13
-
14
-
15
-
16
-
17
-
18
-
19
-
20
-
21
-
22
-
23
-
24
-
25
-
26
-
27
-
28
-
29
-
30
-
31
-
32
-
33
-
34
-
35
-
36
-
37
-
38
-
39
-
40
-
41
-
42
-
43
-
44
-
45
-
46
-
47
-
48
-
49
-
50
-
51
-
 52
52 -
 53
53 -
 54
54 -
 55
55 -
 56
56 -
 57
57 -
 58
58 -
 59
59 -
 60
60 -
 61
61 -
 62
62 -
63
-
64
-
65
-
66
-
67
-
68
-
69
-
70
-
71
-
72
-
73
-
74
-
75
-
76
-
77
-
78
 |
 |
