Pioneer AVH-X5600BHS Owner's Manual - Page 36
Using subwoofer output, Adjusting loudness
 |
View all Pioneer AVH-X5600BHS manuals
Add to My Manuals
Save this manual to your list of manuals |
Page 36 highlights
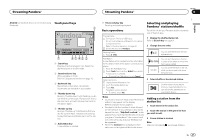
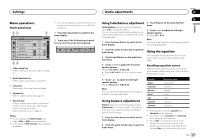
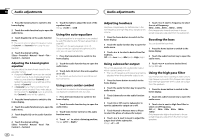
Section 19 Audio adjustments Audio adjustments 1 Press the home button to switch to the home display. 2 Touch the audio function key to open the audio menu. 3 Touch Graphic EQ on the audio function menu. # You cannot select or adjust the equalizer curves of Custom1 and Custom2 when using the autoequalizer. 4 Touch the desired setting. S.Bass-Powerful-Natural-Vocal-Flat- Custom1-Custom2 5 Touch the table to adjust the level of the equalizer band. Range: +12dB to -12dB Using the auto-equalizer The auto-equalizer is an equalizer curve created by auto EQ (refer to Auto EQ (auto-equalizing) on page 43). You can turn the auto-equalizer on or off. If you connect an optional microphone to this unit, you can use this function. 1 Press the home button to switch to the home display. Adjusting the 8-band graphic equalizer You can adjust the level of each band for the equalizer curves. ! A separate Custom1 curve can be created for each source. If you make adjustments when a curve other than Custom2 is selected, the equalizer curve settings will be stored in Custom1. ! A Custom2 curve that is common for all sources can be created. If you make adjustments when the Custom2 curve is selected, the Custom2 curve will be updated. 1 Press the home button to switch to the home display. 2 Touch the audio function key to open the audio menu. 3 Touch Graphic EQ on the audio function menu. 4 Touch the desired setting. S.Bass-Powerful-Natural-Vocal-Flat- Custom1-Custom2 2 Touch the audio function key to open the audio menu. 3 Touch Auto EQ to turn the auto-equalizer on or off. # You cannot use this function if auto EQ has not been carried out. Using sonic center control Sound that is suited for the listening position can easily be created with this function. 1 Press the home button to switch to the home display. 2 Touch the audio function key to open the audio menu. 3 Touch Sonic Center Control on the audio function menu. 4 Touch or to select a listening position. Range: Left 7 to Right 7 Adjusting loudness Loudness compensates for deficiencies in the low-frequency and high-frequency ranges at low volume. 1 Press the home button to switch to the home display. 2 Touch the audio function key to open the audio menu. 3 Touch c or d to select a desired level for loudness. Off (off)-Low (low)-Mid (mid)-High (high) 7 Touch c or d next to Frequency to select the cut-off frequency. 50Hz-63Hz-80Hz-100Hz-125Hz Only frequencies lower than those in the selected range are outputted from the subwoofer. Boosting the bass You can boost the bass level. 1 Press the home button to switch to the home display. 2 Touch the audio function key to open the audio menu. Using subwoofer output This unit is equipped with a subwoofer output which can be turned on or off. ! The cut-off frequency and output level can be adjusted when the subwoofer output is on. 1 Press the home button to switch to the home display. 2 Touch the audio function key to open the audio menu. 3 Touch Subwoofer on the audio function menu. 4 Touch On or Off next to Subwoofer to turn the subwoofer output on or off. 5 Touch Normal or Reverse next to Phase to select the phase of subwoofer output. 6 Touch c or d next to Level to adjust the output level of the subwoofer. Range: +6 to -24 3 Touch c or d to select a desired level. Range: 0 to +6 Using the high pass filter Use this function when wanting to listen only to high-frequency sounds. Only frequencies higher than the high-pass filter (HPF) cutoff are output from the speakers. 1 Press the home button to switch to the home display. 2 Touch the audio function key to open the audio menu. 3 Touch c or d next to High Pass Filter to select cut-off frequency. Off (off)-50Hz-63Hz-80Hz-100Hz- 125Hz Only frequencies higher than those in the selected range are output from the front or rear speakers. 36 En
-
 1
1 -
2
-
3
-
4
-
5
-
6
-
7
-
8
-
9
-
10
-
11
-
12
-
13
-
14
-
15
-
16
-
17
-
18
-
19
-
20
-
21
-
22
-
23
-
24
-
25
-
26
-
27
-
28
-
29
-
30
-
 31
31 -
 32
32 -
 33
33 -
 34
34 -
 35
35 -
 36
36 -
 37
37 -
 38
38 -
 39
39 -
 40
40 -
 41
41 -
42
-
43
-
44
-
45
-
46
-
47
-
48
-
49
-
50
-
51
-
52
-
53
-
54
-
55
-
56
-
57
-
58
-
59
-
60
-
61
-
62
-
63
-
64
-
65
-
66
-
67
-
68
-
69
-
70
-
71
-
72
-
73
-
74
-
75
-
76
-
77
-
78
-
79
-
80
-
81
-
82
-
83
-
84
-
85
-
86
-
87
-
88
-
89
-
90
-
91
-
92
-
93
-
94
-
95
-
96
-
97
-
98
-
99
-
100
-
101
-
102
-
103
-
104
-
105
-
106
-
107
-
108
-
109
-
110
-
111
-
112
-
113
-
114
-
115
-
116
-
117
-
118
-
119
-
120
-
121
-
122
-
123
-
124
-
125
-
126
-
127
-
128
-
129
-
130
-
131
-
132
-
133
-
134
-
135
-
136
-
137
-
138
-
139
-
140
-
141
-
142
-
143
-
144
-
145
-
146
-
147
-
148
-
149
-
150
-
151
-
152
-
153
-
154
-
155
-
156
-
157
-
158
-
159
-
160
-
161
-
162
-
163
-
164
-
165
-
166
-
167
-
168
-
169
-
170
-
171
-
172
-
173
-
174
-
175
-
176
-
177
-
178
-
179
-
180
-
181
-
182
-
183
-
184
-
185
-
186
-
187
-
188
-
189
-
190
-
191
-
192
-
193
-
194
-
195
-
196
-
197
-
198
-
199
-
200
-
201
-
202
-
203
-
204
-
205
-
206
-
207
-
208
-
209
-
210
-
211
-
212
-
213
-
214
-
215
-
216
-
217
-
218
-
219
-
220
 |
 |
