Pioneer DVR-660H-S Operating Instructions - Page 66
Playing and recording from a DV/HDD camcorder, Copying from an HDD, camcorder
 |
UPC - 012562888897
View all Pioneer DVR-660H-S manuals
Add to My Manuals
Save this manual to your list of manuals |
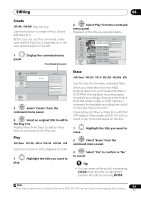
Page 66 highlights
07 Playing and recording from a DV/HDD camcorder • Audio input to the DV IN jack should be 32 kHz or 48 kHz (not 44.1 kHz). • Picture disturbance in the recording may occur if the source component pauses playback or plays an unrecorded section of tape, or if the power fails in the source component, or the DV cable is disconnected. • The DV IN jack is an input only. There is no output functionality. Copying from an HDD camcorder Important • For a description of the images that can be copied to the recorder, see Connecting an HDD camcorder on page 25. 1 Make sure your HDD camcorder is connected to the front panel USB port. Make the necessary settings for USB signal transfer on the HDD camcorder. For details, see the HDD camcorder's operating instructions. HOME MENU 2 Display the Home Menu. 3 ENTER Select 'DV/HDD-Cam' > 'HDDCam Copy'. 4 ENTER Select 'Difference Copy' or 'All Movie Copy'. • When Difference Copy is selected, only images that have never been copied to the recorder are copied. Images that have already been copied are not copied, even if they have been deleted from the recorder's HDD. • When All Movie Copy is selected, all the images on the HDD camcorder are copied. 5 ENTER Select 'Yes' to confirm or 'No' to cancel. Select Yes and press ENTER. The screen shown below appears. Progress Bar All Movie Copy Copying Number of copied movies/Total movies Remaining time (estimate) 0 / 12 1h 25m Exit • To cancel copying press ENTER. • No other recorder operation is possible during copying. • The timer recording operation does not function during copying. Note • Images taken on the same date are copied as a single title. • Chapter markers are inserted at the positions where shooting started. Note that chapters that have been created automatically cannot be combined with other chapters. • The maximum number of chapters per title is 99. If 100 or more scenes are taken on a single day, the chapter numbers over 99 are stored in an extra file. • The maximum length of one title is 12 hours. Videos for which the shooting start to end time is over 12 hours cannot be copied. • Copied titles are named "USB (date of shooting)". 66 En
-
 1
1 -
2
-
3
-
4
-
5
-
6
-
7
-
8
-
9
-
10
-
11
-
12
-
13
-
14
-
15
-
16
-
17
-
18
-
19
-
20
-
21
-
22
-
23
-
24
-
25
-
26
-
27
-
28
-
29
-
30
-
31
-
32
-
33
-
34
-
35
-
36
-
37
-
38
-
39
-
40
-
41
-
42
-
43
-
44
-
45
-
46
-
47
-
48
-
49
-
50
-
51
-
52
-
53
-
54
-
55
-
56
-
57
-
58
-
59
-
60
-
 61
61 -
 62
62 -
 63
63 -
 64
64 -
 65
65 -
 66
66 -
 67
67 -
 68
68 -
 69
69 -
 70
70 -
 71
71 -
72
-
73
-
74
-
75
-
76
-
77
-
78
-
79
-
80
-
81
-
82
-
83
-
84
-
85
-
86
-
87
-
88
-
89
-
90
-
91
-
92
-
93
-
94
-
95
-
96
-
97
-
98
-
99
-
100
-
101
-
102
-
103
-
104
-
105
-
106
-
107
-
108
-
109
-
110
-
111
-
112
-
113
-
114
-
115
-
116
-
117
-
118
-
119
-
120
-
121
-
122
-
123
-
124
-
125
-
126
-
127
-
128
-
129
-
130
-
131
-
132
-
133
-
134
-
135
-
136
-
137
-
138
-
139
-
140
-
141
-
142
-
143
-
144
-
145
 |
 |
