Pioneer DVR-660H-S Operating Instructions - Page 99
Playing and copying photos PhotoViewer, Copying selected files to a, DVD-R/-RW, Editing files on
 |
UPC - 012562888897
View all Pioneer DVR-660H-S manuals
Add to My Manuals
Save this manual to your list of manuals |
Page 99 highlights
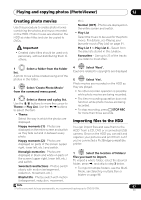
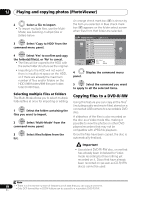
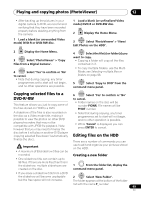
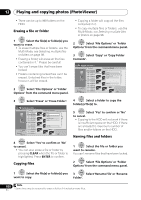
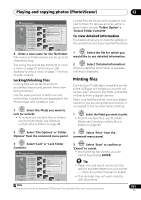
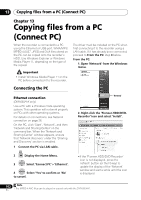
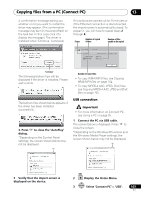
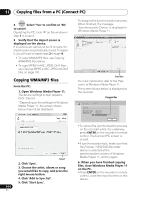
Playing and copying photos (PhotoViewer) 12 • After backing up the pictures in your digital camera to DVD, we recommend verifying that they have been recorded properly before deleting anything from the camera. 1 Load a blank (or unrecorded Video mode) DVD-R or DVD-RW disc. HOME MENU 2 Display the Home Menu. 3 ENTER Select 'PhotoViewer' > 'Copy Files from a Digital Camera'. 4 ENTER Select 'Yes' to confirm or 'No' to cancel. • Note that during copying, any timer programmes set to start will not begin, and no other operations are possible. 1 Load a blank (or unfinalized Video mode) DVD-R or DVD-RW disc. HOME MENU 2 Display the Home Menu. 3 ENTER Select 'PhotoViewer' > 'View/ Edit Photos on the HDD'. 4 ENTER Select the file(s) or folder(s) you want to copy. • Copying a folder will copy all the files contained in it. • To copy multiple folders, use the MultiMode; see Selecting multiple files or folders on page 98. 5 ENTER Select 'Copy to DVD' from the command menu panel. Copying selected files to a DVD-R/-RW This feature allows you just to copy some of the files stored on HDD to a DVD. A slideshow of the files is also recorded on the disc as a Video mode title, making it possible to view the photos on other DVD players/recorders that may not be compatible with JPEG file playback. Note however that you may need to finalize the disc before it will play on another DVD player (copying selected files doesn't automatically finalize the disc). Important • A maximum of 99 slideshow titles can be recorded. • One slideshow title can contain up to 99 files. If there are more files than this in the slideshow, multiple slideshows are created on the disc. 6 ENTER Select 'Yes' to confirm or 'No' to cancel. • Folder names on the disc will be number PIONR. File names will be PHOT number. • Note that during copying, any timer programmes set to start will not begin, and no other operation is possible. • While 'Cancel' is displayed, you can press ENTER to cancel. Editing files on the HDD There are a number of commands you can use to edit and organize your pictures stored on the HDD. Creating a new folder 1 From the folder list, display the command menu panel. • If you erase a slideshow title from a DVD the slideshow will become unplayable but the free space will not increase. 2 ENTER Select 'New Folder'. The folder appears at the bottom of the folder list with the name F_number. 99 En
-
 1
1 -
2
-
3
-
4
-
5
-
6
-
7
-
8
-
9
-
10
-
11
-
12
-
13
-
14
-
15
-
16
-
17
-
18
-
19
-
20
-
21
-
22
-
23
-
24
-
25
-
26
-
27
-
28
-
29
-
30
-
31
-
32
-
33
-
34
-
35
-
36
-
37
-
38
-
39
-
40
-
41
-
42
-
43
-
44
-
45
-
46
-
47
-
48
-
49
-
50
-
51
-
52
-
53
-
54
-
55
-
56
-
57
-
58
-
59
-
60
-
61
-
62
-
63
-
64
-
65
-
66
-
67
-
68
-
69
-
70
-
71
-
72
-
73
-
74
-
75
-
76
-
77
-
78
-
79
-
80
-
81
-
82
-
83
-
84
-
85
-
86
-
87
-
88
-
89
-
90
-
91
-
92
-
93
-
 94
94 -
 95
95 -
 96
96 -
 97
97 -
 98
98 -
 99
99 -
 100
100 -
 101
101 -
 102
102 -
 103
103 -
 104
104 -
105
-
106
-
107
-
108
-
109
-
110
-
111
-
112
-
113
-
114
-
115
-
116
-
117
-
118
-
119
-
120
-
121
-
122
-
123
-
124
-
125
-
126
-
127
-
128
-
129
-
130
-
131
-
132
-
133
-
134
-
135
-
136
-
137
-
138
-
139
-
140
-
141
-
142
-
143
-
144
-
145
 |
 |
