Samsung GT-P1010/W16 User Manual (user Manual) (ver.f6) (English) - Page 64
Photos and Video, Camera, Applications, Image Viewer, Menu Key
 |
View all Samsung GT-P1010/W16 manuals
Add to My Manuals
Save this manual to your list of manuals |
Page 64 highlights
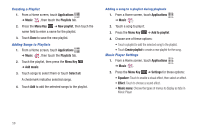
Section 8: Photos and Video Camera Use your device's built-in camera to take photos and record video. ᮣ From a Home screen, touch Camera . - or - From a Home screen, touch Applications ➔ Camera . Mode Camera Options Image Viewer Important!: Do not take photos of people without their permission. Do not take photos in places where cameras are not allowed. Do not take photos in places where you may interfere with another person's privacy. 60 Taking Photos 1. From a Home screen, touch Camera . - or - From a Home screen, touch Applications ➔ Camera . 2. Using the display as a viewfinder, compose your photo by aiming the lens at the subject. To configure settings, see "Camera Options" on page 61. 3. To take the photo, touch the Camera button. 4. After taking a photo, touch Image Viewer to view the photo. While viewing the photo, use these options: • Touch the screen with two fingers or double-tap on the screen to zoom all the way in or out. For more information, refer to "Pinch" on page 18. • Press the Menu Key for options: - Share: Send the photo by using AllShare, Bluetooth, Email, Gmail, or Picasa. - Set as: Assign the photo as Contact icon , Home screen Wallpaper, or Lock screen Wallpaper. - Delete: Erase the photo.
-
 1
1 -
2
-
3
-
4
-
5
-
6
-
7
-
8
-
9
-
10
-
11
-
12
-
13
-
14
-
15
-
16
-
17
-
18
-
19
-
20
-
21
-
22
-
23
-
24
-
25
-
26
-
27
-
28
-
29
-
30
-
31
-
32
-
33
-
34
-
35
-
36
-
37
-
38
-
39
-
40
-
41
-
42
-
43
-
44
-
45
-
46
-
47
-
48
-
49
-
50
-
51
-
52
-
53
-
54
-
55
-
56
-
57
-
58
-
 59
59 -
 60
60 -
 61
61 -
 62
62 -
 63
63 -
 64
64 -
 65
65 -
 66
66 -
 67
67 -
 68
68 -
 69
69 -
70
-
71
-
72
-
73
-
74
-
75
-
76
-
77
-
78
-
79
-
80
-
81
-
82
-
83
-
84
-
85
-
86
-
87
-
88
-
89
-
90
-
91
-
92
-
93
-
94
-
95
-
96
-
97
-
98
-
99
-
100
-
101
-
102
-
103
-
104
-
105
-
106
-
107
-
108
-
109
-
110
-
111
-
112
-
113
-
114
-
115
-
116
-
117
-
118
-
119
-
120
-
121
-
122
-
123
-
124
-
125
-
126
-
127
-
128
-
129
-
130
-
131
-
132
-
133
-
134
-
135
-
136
-
137
-
138
-
139
-
140
-
141
-
142
-
143
-
144
-
145
-
146
-
147
 |
 |
