Samsung GT-P1010/W16 User Manual (user Manual) (ver.f6) (English) - Page 67
Record, Pause, Image Viewer, Menu Key, Back Key, Recording mode, Scene, Flash, Exposure value
 |
View all Samsung GT-P1010/W16 manuals
Add to My Manuals
Save this manual to your list of manuals |
Page 67 highlights
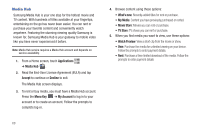
3. To start recording, touch the Record button. During recording, the button changes to Pause . Touch Pause to temporarily stop recording. To resume recording, touch Record again. 4. To stop recording, touch the Stop button. 5. After recording, touch Image Viewer to view the video. While viewing the video, use these options: • Double-tap on the video to zoom all the way in or out. • Press the Menu Key for the following options: - Touch Share to send the video via AllShare, YouTube, Bluetooth, Gmail, or Email. - Touch Play to review the video. - Touch Delete to erase the video. • Press the Back Key to return to the Camcorder. Tip: Touch the video to show or hide Image Viewer options. Camcorder Options Configure the camcorder. Camcorder options are represented by icons across both sides of the screen. While in Camcorder mode, touch the following icons to configure the camcorder: Recording mode: Indicates recording mode. Scene: Not available for videos. Flash: Touch Off or On. Exposure value: Set the brightness of the video. Settings ➔ Video: • White balance: Set the light source. Options are: Auto, Daylight, Cloudy, Incandescent, or Fluorescent. • Effects: Apply an effect to videos. Options are: Normal, Negative, Black and white, or Sepia. • Video quality: Choose a quality setting for videos. Options are: Fine or Normal. Photos and Video 63
-
 1
1 -
2
-
3
-
4
-
5
-
6
-
7
-
8
-
9
-
10
-
11
-
12
-
13
-
14
-
15
-
16
-
17
-
18
-
19
-
20
-
21
-
22
-
23
-
24
-
25
-
26
-
27
-
28
-
29
-
30
-
31
-
32
-
33
-
34
-
35
-
36
-
37
-
38
-
39
-
40
-
41
-
42
-
43
-
44
-
45
-
46
-
47
-
48
-
49
-
50
-
51
-
52
-
53
-
54
-
55
-
56
-
57
-
58
-
59
-
60
-
61
-
 62
62 -
 63
63 -
 64
64 -
 65
65 -
 66
66 -
 67
67 -
 68
68 -
 69
69 -
 70
70 -
 71
71 -
 72
72 -
73
-
74
-
75
-
76
-
77
-
78
-
79
-
80
-
81
-
82
-
83
-
84
-
85
-
86
-
87
-
88
-
89
-
90
-
91
-
92
-
93
-
94
-
95
-
96
-
97
-
98
-
99
-
100
-
101
-
102
-
103
-
104
-
105
-
106
-
107
-
108
-
109
-
110
-
111
-
112
-
113
-
114
-
115
-
116
-
117
-
118
-
119
-
120
-
121
-
122
-
123
-
124
-
125
-
126
-
127
-
128
-
129
-
130
-
131
-
132
-
133
-
134
-
135
-
136
-
137
-
138
-
139
-
140
-
141
-
142
-
143
-
144
-
145
-
146
-
147
 |
 |
