Samsung SCH-R261 User Manual - Page 43
Saving a Number After a Call, Speed Dial
 |
View all Samsung SCH-R261 manuals
Add to My Manuals
Save this manual to your list of manuals |
Page 43 highlights
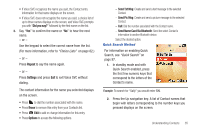
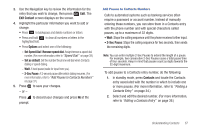
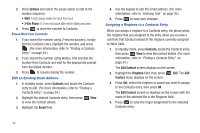
Saving a Number After a Call Once you finish a call, you can store the caller's number to your Contacts list. Note: If the call was incoming and Caller ID information was unavailable, then the Save option is also unavailable. 1. Press to end your call. The call time, length of call, phone number, and name of the party (if available) display on the screen. 2. Press Save. The Save menu displays on the screen showing the following options: • Create New: Lets you create a new Contacts entry. • Update Existing: Lets you add the number you entered to an existing Contacts entry. 3. Follow the instructions in the upcoming sections depending on whether the number is a new entry or you wish to add it to an existing entry. Deleting a Contacts Entry 1. In standby mode, press Contacts. 2. Locate the Contacts entry to delete, then press Options ➔ Erase. (For more information, refer to "Finding a Contacts Entry" on page 34.) The phone prompts to confirm the erasure. 3. Press Yes to confirm erasure of the selected Contact. - or - Press No to retain the Contact. Speed Dial A Contacts entry's Speed Dial number corresponds to the number keys you press to speed dial one of that entry's numbers. Example: • To speed dial the Contacts entry assigned to Speed Dial 5, press and hold , (1-touch dialing). • To speed dial the Contacts entry assigned to Speed Dial 35, press then press and hold , (2-touch dialing). • To speed dial the Contacts entry assigned to Speed Dial 235, press , press , then press and hold , (3-touch dialing). You can assign one or more Speed Dial numbers to a Contacts entry during new entry creation or by editing an existing entry. Assignment During Entry Creation To assign a Speed Call number to a new Contacts entry number, do the following: 1. Follow either of the New Contacts entry procedures until you enter a name for the entry (see "Adding a New Contacts Entry" on page 36.) Understanding Contacts 39
-
 1
1 -
2
-
3
-
4
-
5
-
6
-
7
-
8
-
9
-
10
-
11
-
12
-
13
-
14
-
15
-
16
-
17
-
18
-
19
-
20
-
21
-
22
-
23
-
24
-
25
-
26
-
27
-
28
-
29
-
30
-
31
-
32
-
33
-
34
-
35
-
36
-
37
-
 38
38 -
 39
39 -
 40
40 -
 41
41 -
 42
42 -
 43
43 -
 44
44 -
 45
45 -
 46
46 -
 47
47 -
 48
48 -
49
-
50
-
51
-
52
-
53
-
54
-
55
-
56
-
57
-
58
-
59
-
60
-
61
-
62
-
63
-
64
-
65
-
66
-
67
-
68
-
69
-
70
-
71
-
72
-
73
-
74
-
75
-
76
-
77
-
78
-
79
-
80
-
81
-
82
-
83
-
84
-
85
-
86
-
87
-
88
-
89
-
90
-
91
-
92
-
93
-
94
-
95
-
96
-
97
-
98
-
99
-
100
-
101
-
102
-
103
-
104
-
105
-
106
-
107
-
108
-
109
-
110
-
111
-
112
-
113
-
114
-
115
-
116
-
117
-
118
-
119
-
120
-
121
-
122
-
123
-
124
-
125
-
126
-
127
-
128
-
129
-
130
-
131
-
132
-
133
-
134
 |
 |
