Samsung SPH-M910 User Manual (user Manual) (ver.f9) (English) - Page 63
Finding a Phone Number, Dialing From the Contacts List, Exchange Server.
 |
View all Samsung SPH-M910 manuals
Add to My Manuals
Save this manual to your list of manuals |
Page 63 highlights
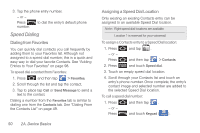
Device Basics 3. Tap Create contact. 4. Tap a destination for your new contact to be synchronized. With each new email account you create, the list of options grows. Ⅲ The new contact can be easily synchronized to either your Phone (locally stored- will be deleted when phone resets), Google (Gmail account), or Corporate (OutlookExchange Server). Note: You will not see the above option to select a destination unless you have previously established a Google or Corporate account on the device. See "Synchronizing Accounts" on page 67. 5. Touch the First name and Last name fields and use the onscreen or QWERTY keyboard to enter the new contact name. 6. Touch Save to store and update the new entry. Finding a Phone Number You can search Contacts for entries by name. 1. Press and tap . - or - From the Keypad screen, tap . Contacts 2. Turn the device on its side and slide open the QWERTY keyboard. 3. Enter the first letter or letters of an entry. (The more letters you enter, the more specific the search.) 4. To display contact details, tap an entry from the list. Dialing From the Contacts List 1. Press and tap . Shortcut: From Keypad screen, tap Contacts ( ) to list Contacts entries. 2. Scroll through the list and tap the entry you want to call. 2A. Device Basics 49
-
 1
1 -
2
-
3
-
4
-
5
-
6
-
7
-
8
-
9
-
10
-
11
-
12
-
13
-
14
-
15
-
16
-
17
-
18
-
19
-
20
-
21
-
22
-
23
-
24
-
25
-
26
-
27
-
28
-
29
-
30
-
31
-
32
-
33
-
34
-
35
-
36
-
37
-
38
-
39
-
40
-
41
-
42
-
43
-
44
-
45
-
46
-
47
-
48
-
49
-
50
-
51
-
52
-
53
-
54
-
55
-
56
-
57
-
 58
58 -
 59
59 -
 60
60 -
 61
61 -
 62
62 -
 63
63 -
 64
64 -
 65
65 -
 66
66 -
 67
67 -
 68
68 -
69
-
70
-
71
-
72
-
73
-
74
-
75
-
76
-
77
-
78
-
79
-
80
-
81
-
82
-
83
-
84
-
85
-
86
-
87
-
88
-
89
-
90
-
91
-
92
-
93
-
94
-
95
-
96
-
97
-
98
-
99
-
100
-
101
-
102
-
103
-
104
-
105
-
106
-
107
-
108
-
109
-
110
-
111
-
112
-
113
-
114
-
115
-
116
-
117
-
118
-
119
-
120
-
121
-
122
-
123
-
124
-
125
-
126
-
127
-
128
-
129
-
130
-
131
-
132
-
133
-
134
-
135
-
136
-
137
-
138
-
139
-
140
-
141
-
142
-
143
-
144
-
145
-
146
-
147
-
148
-
149
-
150
-
151
-
152
-
153
-
154
-
155
-
156
-
157
-
158
-
159
-
160
-
161
-
162
-
163
-
164
-
165
-
166
-
167
-
168
-
169
-
170
-
171
-
172
-
173
-
174
-
175
-
176
-
177
-
178
-
179
-
180
-
181
-
182
-
183
-
184
-
185
-
186
-
187
-
188
-
189
-
190
-
191
-
192
-
193
-
194
-
195
-
196
-
197
-
198
-
199
-
200
-
201
-
202
-
203
-
204
-
205
-
206
-
207
-
208
-
209
-
210
-
211
-
212
-
213
-
214
-
215
-
216
-
217
-
218
-
219
-
220
-
221
-
222
-
223
-
224
-
225
-
226
-
227
-
228
-
229
-
230
-
231
-
232
-
233
 |
 |
