Sony STR-DN1010 Operating Instructions
Sony STR-DN1010 - Multi Channel Av Receiver Manual
 |
UPC - 027242779945
View all Sony STR-DN1010 manuals
Add to My Manuals
Save this manual to your list of manuals |
Sony STR-DN1010 manual content summary:
- Sony STR-DN1010 | Operating Instructions - Page 1
4-174-068-12(1) Multi Channel AV Receiver Operating Instructions STR-DN1010 ©2010 Sony Corporation - Sony STR-DN1010 | Operating Instructions - Page 2
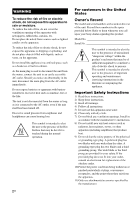
not cover the ventilation opening of the apparatus with user to the presence of important operating and maintenance (servicing) instructions in the literature accompanying the appliance. Important Safety Instructions 1) Read these instructions. 2) Keep these instructions outlet. 10)Protect the power - Sony STR-DN1010 | Operating Instructions - Page 3
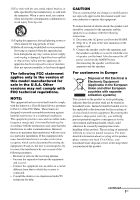
or modifications not expressly approved in this manual could void your authority to operate this equipment. To reduce the risk of electric shock, the speaker cord should be connected to the apparatus and the speakers in accordance with the following instructions. 1) Disconnect the AC power cord from - Sony STR-DN1010 | Operating Instructions - Page 4
4GB About This Manual • The instructions in this manual are for model STR-DN1010. Check your model number by looking at the lower right corner of the front panel. In this manual, models of area code U2 is used for illustration purposes unless stated otherwise. Any difference in operation is clearly - Sony STR-DN1010 | Operating Instructions - Page 5
worldwide patents issued & pending. DTS is a registered trademark and the DTS logos, Symbol, DTS-HD and DTS-HD Master Audio are trademarks of DTS, Inc. © 1996-2008 DTS, Inc. All Rights Reserved. This receiver incorporates High-Definition Multimedia Interface (HDMITM) technology. HDMI, the HDMI Logo - Sony STR-DN1010 | Operating Instructions - Page 6
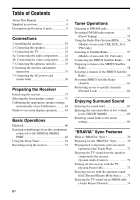
Enjoying the TV sound from the speakers connected to the receiver (System Audio Control 72 Turning off the receiver with the TV (System Power Off 73 Enjoying movies with the optimum sound field (Theater/Theatre Mode Sync)........ 73 Enjoying the TV sound via an HDMI cable (Audio Return Channel 74 - Sony STR-DN1010 | Operating Instructions - Page 7
is in standby mode...... 83 Advanced Operations Switching between digital and analog audio (INPUT MODE 84 Enjoying the sound/images from other inputs 85 Using a bi-amplifier connection 88 Using the setting menu 89 Auto Calibration menu 90 Speaker Settings menu 91 Surround Settings menu 95 - Sony STR-DN1010 | Operating Instructions - Page 8
Supplied accessories • Operating Instructions (this manual) • Quick Setup Guide • GUI Menu List • FM wire antenna (aerial) (1) • AM loop antenna (aerial) (1) Inserting batteries into the remote Insert two R6 (size-AA) batteries in the RM- - Sony STR-DN1010 | Operating Instructions - Page 9
Receives signals from remote commander. C White indicator Lights up when the receiver is on. Lights off when the receiver is off. D MULTI CHANNEL DECODING indicator Lights up when multi channel audio all speakers at the same time (page 46, 122). I VIDEO 2 IN jacks Connects to a portable audio/video - Sony STR-DN1010 | Operating Instructions - Page 10
of the display (page 111). M INPUT MODE Selects the input mode when the same components are connected to both digital and analog jacks (page 84). N 2CH/A.DIRECT, A.F.D., MOVIE, MUSIC Selects a sound field (page 65, 66). O SPEAKERS Selects the front speaker system (page 37). P PHONES jack Connects - Sony STR-DN1010 | Operating Instructions - Page 11
Audio Return Channel (ARC) signals are detected (page 100). Indicator and explanation E Dolby Digital Surround indicators Lights up one of the respective indicators when the receiver is decoding the corresponding Dolby Digital format signals. D D EX D+ TrueHD Dolby Digital Dolby Digital Surround - Sony STR-DN1010 | Operating Instructions - Page 12
the channels being played back. The boxes around the letters vary to show how the receiver downmixes or upmixes the source sound (based on the speaker pattern settings). LH RH L R C SL SR S SBL SBR SB Front Left High Front Right High Front Left Front Right Center (monaural) Surround Left Surround - Sony STR-DN1010 | Operating Instructions - Page 13
Sony DIGITAL MEDIA PORT HDMI IN/ OUT* jacks Connects to a DVD player, satellite tuner, Blu-ray disc player, etc. The image is output to a TV or a projector while the sound can be output from a TV or/and speakers connected to this receiver (page 23, 27). E SPEAKERS section Connects to speakers - Sony STR-DN1010 | Operating Instructions - Page 14
selected input image when you connect the MONITOR OUT or HDMI TV OUT jack to a TV (page 23). Remote commander You can use the supplied remote to operate the receiver and to control the Sony audio/video components that the remote is assigned to operate. You can also program the remote to control non - Sony STR-DN1010 | Operating Instructions - Page 15
time (SYSTEM STANDBY). Saving the power in standby mode. When "Ctrl for HDMI" is set to "OFF" (page 70) and "S-AIR Stby" is set to "OFF" (page 83). 4 B AV ?/1a) (on/standby) Turns on or off the audio/video components that the remote is programmed to operate. To turn the TV on or off, press - Sony STR-DN1010 | Operating Instructions - Page 16
operation guide to perform a selected operation. G GUI MODE Displays the GUI menu on the TV screen. H TOOLS/OPTIONSa) Displays and selects items from the option menus. To display the options of Sony TV, press TV (W) and then press TOOLS/OPTIONS. I MENU, HOMEa) Displays the menu to operate the audio - Sony STR-DN1010 | Operating Instructions - Page 17
program guide. T DISPLAYa) Views information on the display. DISPLAYa) (RM-AAP051 only) Press TV (W), then press DISPLAY to display information of TV. , (Info, Text reveal) (RM-AAP052 only) Press TV (W), then press to display information such as current channel number and screen mode. In text mode - Sony STR-DN1010 | Operating Instructions - Page 18
To control other Sony components Name B AV ?/1 D Numeric buttons TV VCR DVD Blu-ray HDD PSX Video Digital DSS*1 Digital Tape DAT CD DIGITAL player, disc Recorder DVD/ player VCR CD CATV player, terminal*1 LD satellite/ deck deck player, MEDIA terrestrial A/B receiver*2 MD PORT deck device - Sony STR-DN1010 | Operating Instructions - Page 19
1: Installing the speakers This receiver allows you to use a 7.1 channel system (7 speakers and one subwoofer). To fully enjoy theater-like multi channel surround sound requires five speakers (two front speakers, a center speaker, and two surround speakers) and a subwoofer (5.1 channel). You can - Sony STR-DN1010 | Operating Instructions - Page 20
- at an angle between 22° to 45°. - at least 3.3 feet (1 meter) directly above the front speakers. • When you connect a 6.1 channel speaker system, place the surround back speaker behind the listening position. • Since the subwoofer does not emit highly directional signals, you can place it wherever - Sony STR-DN1010 | Operating Instructions - Page 21
cord (mains lead). Center speaker Surround speaker Right Left B B A B B 13/32" (10 mm) Subwoofer b) Right Left Surround back/Front high/ Bi-amplifier/Front B speaker a) Right Left Front A speaker A Monaural audio cord (not supplied) B Speaker cord (not supplied) continued 21GB - Sony STR-DN1010 | Operating Instructions - Page 22
system to this terminals. Set "SB Assign" to "Speaker B" in the Speaker Settings menu (page 91). You can select the front speaker system you want using the SPEAKERS button on the receiver (page 37). - If you are not using surround back speaker or front high speakers, you can connect the front - Sony STR-DN1010 | Operating Instructions - Page 23
the selected input image when you connect the HDMI TV OUT or MONITOR OUT jack to a TV. You can operate this receiver using a GUI (Graphical User Interface) if you connect HDMI TV OUT jack to a TV. It is not necessary to connect all the cables. Connect audio and video cords according to the jacks of - Sony STR-DN1010 | Operating Instructions - Page 24
speakers connected to the receiver, set the sound output jack of the TV to "Fixed" if it can be switched between either "Fixed" or "Variable". 4a: Connecting the audio components The following illustration shows how to connect a Super Audio CD player, CD player, CD recorder and DIGITAL MEDIA PORT - Sony STR-DN1010 | Operating Instructions - Page 25
Connections Super Audio CD player, CD player, CD recorder A TV* B DIGITAL MEDIA PORT adapter A Audio cord (not supplied) B Video cord (not supplied) * You can enjoy the images from the components connected to the DIGITAL MEDIA PORT adapter when you connect the TV to the receiver. 25GB - Sony STR-DN1010 | Operating Instructions - Page 26
components. HDMI Digital COMPONENT VIDEO Y PB/CB PR/CR VIDEO Analog High quality image Converting video signals This receiver is via the receiver. If the power supply of the receiver is not turned on, neither video nor audio signals will be transmitted. • When connecting optical digital cords, - Sony STR-DN1010 | Operating Instructions - Page 27
" Sync Features" (page 70). HDMI features • A digital audio signals transmitted by HDMI can be output from the speakers connected to the receiver. This signal supports Dolby Digital, DTS, and Linear PCM. • The receiver can receive Multi Linear PCM (up to 8 channels) with a sampling frequency of 192 - Sony STR-DN1010 | Operating Instructions - Page 28
Blu-ray disc player Audio/video signals A A A Audio/video signals Audio/video signals ARC "PlayStation 3" TV, etc.* A HDMI cable (not supplied) Sony recommends that you use an HDMI-authorized cable or Sony HDMI cable. * For details on the audio connection of TV to the receiver, see page 23 - Sony STR-DN1010 | Operating Instructions - Page 29
the 3D image formats supported by the receiver (page 130). • Not every HDMI component supports all functions that are defined by the specified HDMI version. For example, components that support HDMI, version 1.4, may not support Audio Return Channel (ARC). • Refer to the operating instructions of - Sony STR-DN1010 | Operating Instructions - Page 30
COMPONENT VIDEO IN 2 or IN 3 jacks, set "Input Assign" in the Input Option menu (page 85). • To input multi channel digital audio from the Blu-ray disc player, set the digital audio output setting on the Blu-ray disc player. Refer to the operating instructions supplied with the Blu-ray disc player - Sony STR-DN1010 | Operating Instructions - Page 31
VIDEO IN 1 or IN 3 jacks, set "Input Assign" in the Input Option menu (page 85). • To input multi channel digital audio from the DVD player or DVD recorder, set the digital audio output setting on the DVD player or DVD recorder. Refer to the operating instructions supplied with the DVD player or DVD - Sony STR-DN1010 | Operating Instructions - Page 32
supplied) C Audio cord (not supplied) D Optical digital cord (not supplied) Note The initial setting of the COMPONENT VIDEO IN 3 jacks are satellite tuner or cable TV tuner. If you want to connect your satellite tuner or cable TV tuner to the COMPONENT VIDEO IN 1 or IN 2 jacks, set "Input Assign" in - Sony STR-DN1010 | Operating Instructions - Page 33
which has analog jacks such as a DVD recorder, VCR, etc. DVD recorder, VCR Audio signals Video signals A B (On the front panel) Camcorder, video game C A Audio cord (not supplied) B Video cord (not supplied) C Audio/video cord (not supplied) Notes • Be sure to change the initial setting of - Sony STR-DN1010 | Operating Instructions - Page 34
has no restriction on resolution. • Converted HDMI image output does not support x.v.Color (x.v.Colour), Deep Color (Deep Colour) and 3D image. To connect a recording component When recording, connect the recording component to the VIDEO OUT jacks of the receiver. Connect cords for input and output - Sony STR-DN1010 | Operating Instructions - Page 35
transmitter into the S-AIR main unit 1 Remove the screws. Notes • To prevent noise pickup, keep the AM loop antenna (aerial) away from the receiver and other components. • Be sure to fully extend the FM wire antenna (aerial). • After connecting the FM wire antenna (aerial), keep it as horizontal - Sony STR-DN1010 | Operating Instructions - Page 36
the SPEAKERS terminals. • Connect the AC power cord (mains lead) firmly. AC power cord (mains lead) Note Do not use other screws to fasten the wireless transmitter. To insert the wireless transceiver into the S-AIR sub unit Refer to the operating instructions supplied with the surround amplifier - Sony STR-DN1010 | Operating Instructions - Page 37
SP B* Both the SPEAKERS FRONT A and SPEAKERS SURROUND BACK/ FRONT HIGH/BI-AMP/FRONT B terminals (parallel connection) SP A B* * To select "SP B" or "SP A B", set "SB Assign" to "Speaker B" in the Speaker Settings menu (page 91). To turn off the speaker output Press SPEAKERS repeatedly until the - Sony STR-DN1010 | Operating Instructions - Page 38
use bi-amplifier connection (page 91). • Set "SB Assign" to "Speaker B" in the Speaker Settings menu if you use speakers front B connection (page 91). • Pair the surround amplifier to S-AIR main unit if you want to use surround amplifier. • Make sure the speaker output is not set to "SPK OFF" (page - Sony STR-DN1010 | Operating Instructions - Page 39
Preparing the Receiver 1: Setting up the Auto Calibration When using surround back speakers On setting up the active further away from the actual position. * Be sure to set the speaker pattern setting with front high speakers (page 91). 1 Connect the supplied optimizer microphone to the AUTO CAL - Sony STR-DN1010 | Operating Instructions - Page 40
Calibration ?/1 Input buttons GUI MODE V/v/b, MENU 4 Press V/v . Auto Calibration MUTING/ MASTER VOL +/-/ 2 +/- 1 Press GUI MODE. After "MENU ON" appears on the display for a while, or b. TONE T.S.P. WOOFER Tips • Operations other than turning the receiver on or off are deactivated during the - Sony STR-DN1010 | Operating Instructions - Page 41
. - Press SPEAKERS on the receiver. - Change the volume level. - Connect the headphones. - Press . 3: Confirming/saving the measurement results 1 Confirm the measurement result. When the measurement ends, a beep sounds. Auto Calibration Save Note If an error code appears on the screen, see "Message - Sony STR-DN1010 | Operating Instructions - Page 42
of the Sony listening room standard. Front Reference Adjusts the characteristics of all the speakers to match the characteristics of the front speaker. Off reposition your speaker, we recommend that you perform Auto Calibration again to enjoy the surround sound. Tip The size of a speaker ("Large"/" - Sony STR-DN1010 | Operating Instructions - Page 43
or improperly connected. Error Code 33 • None of the front speakers are connected or only one front speaker is connected. • The optimizer microphone is not connected. • Either the surround left or surround right speaker is not connected. • Surround back speakers or front high speakers are connected - Sony STR-DN1010 | Operating Instructions - Page 44
the receiver is in "GUI MODE" following the steps in "To turn "GUI MODE" on and off" (page 44). 2 Press V/v repeatedly to select a menu you want, then press . The menu item list appears on the TV screen. Example: When you select "Settings". Settings Auto Cal. Speaker Surround EQ Audio RETURN - Sony STR-DN1010 | Operating Instructions - Page 45
connected to the DIGITAL MEDIA PORT adapter (page 48). FM/AM/SR Selects the built-in FM/AM radio or satellite tuner connected (page 53, 57). Settings You can adjust the settings of the speakers, the surround effect, equalizer, audio, video and other inputs connected to the HDMI jacks (page 89 - Sony STR-DN1010 | Operating Instructions - Page 46
volume. You can also use MASTER VOLUME on the receiver. 6 Press SOUND FIELD +/- to enjoy the surround sound. You can also use 2CH/A.DIRECT, A.F.D., MOVIE, MUSIC button on the receiver. For details, see page 65. Tips • You . To make a fine adjustment: press the button and release it immediately. 46GB - Sony STR-DN1010 | Operating Instructions - Page 47
. • Turn off the receiver. • Perform Auto Calibration. To avoid damaging your speakers Before you turn off the receiver, be sure to turn down Service nameb) or preset station namea) t Frequency t Program Type indicationb) t Radio Text indicationb) t Current Time indication (in 24-hour system mode - Sony STR-DN1010 | Operating Instructions - Page 48
switch the display while "GUI" is shown on the display. Press GUI MODE repeatedly to select "MENU OFF". Enjoying sound/images from the components connected to the DIGITAL MEDIA PORT The DIGITAL MEDIA PORT (DMPORT) allows you to enjoy picture and sound from a network system such as a portable audio - Sony STR-DN1010 | Operating Instructions - Page 49
the screen, refer to the operating instructions of the connected component. When an adapter other than iPod is connected, a hierarchical menu does not appear. Operating the component connected to the DIGITAL MEDIA PORT adapter V/v/B/b, Basic Operations 1 Press GUI MODE. After "MENU ON" appears on - Sony STR-DN1010 | Operating Instructions - Page 50
for audio iPod depending on setting of "List Mode". Contents list for video iPod Movies operating the iPod, refer to the operating instructions supplied with the iPod. Playing the selected track During playback of the selected track, the displayed screen changes depending on the DIGITAL MEDIA PORT - Sony STR-DN1010 | Operating Instructions - Page 51
you want to listen to following the steps in "Operating the component connected to the DIGITAL MEDIA PORT adapter" (page 49). 2 Press TOOLS/OPTIONS. The option menu appears. 3 Press V/v repeatedly to select "Repeat", "Shuffle", "List Mode" or "Audiobook", then press or b. 4 Press V/v repeatedly to - Sony STR-DN1010 | Operating Instructions - Page 52
to turn off automatically at a specified time. AMP Recording using the receiver You can record from a video/audio component using the receiver. Refer to the operating instructions supplied with your recording component. SLEEP Press AMP, then press SLEEP repeatedly while the power is on. "SLEEP - Sony STR-DN1010 | Operating Instructions - Page 53
recording media 1 Press the input button of the playback component. You can also use INPUT SELECTOR +/- on the receiver. the analog output jack (for recording). • HDMI sound cannot be recorded. Tuner Operations Listening to FM/AM radio You can listen to FM MODE V/v/b, TOOLS/ OPTIONS MENU 53GB - Sony STR-DN1010 | Operating Instructions - Page 54
stops scanning whenever a station is received. In case of poor FM stereo reception 1 Tune in the station you want to listen to using Auto Tuning, Direct Tuning (page 54), or select the preset station you want (page 55). 2 Press TOOLS/OPTIONS. 3 Press V/v repeatedly to select "FM Mode", then press or - Sony STR-DN1010 | Operating Instructions - Page 55
change the AM tuning scale to either 9 kHz or 10 kHz on the receiver. ?/1 Presetting FM/AM radio stations (Preset Tuning) You can preset up to Direct Tuning (page 54). In case of poor FM stereo reception, switch the FM reception mode (page 54). 4 Press TOOLS/OPTIONS. The option menu appears. 5 - Sony STR-DN1010 | Operating Instructions - Page 56
only for FM stations. • Not all FM stations provide RDS service, nor do they provide the same type of services. If you are not familiar with the RDS services in your area, check with your local radio stations for details. Receiving RDS broadcasts Simply select a station on the FM band using Direct - Sony STR-DN1010 | Operating Instructions - Page 57
instructions are provided with the SIRIUS tuner. There are a variety of programming packages available, including the option of adding "The Best of XM" programming to the SIRIUS service. The "Best of XM" service is not available to SIRIUS Canada separately) to receive the SIRIUS service. All - Sony STR-DN1010 | Operating Instructions - Page 58
this receiver, be sure to connect the AC power adaptor supplied with the tuner to a wall outlet. SIRIUS jack Preparing to listen to the SIRIUS Satellite Radio V/v/b, GUI MODE TOOLS/ OPTIONS MENU Note Keep the SiriusConnect Home tuner, antenna, and AC power adaptor away from the speaker cords - Sony STR-DN1010 | Operating Instructions - Page 59
direction of the antenna to obtain the best reception. To exit the menu Press MENU. Selecting a channel of the SIRIUS Satellite Radio SHIFT Numeric buttons V/v/b, GUI MODE TOOLS/ OPTIONS MENU Selecting a channel by category (Category Mode) You can select a channel from one category or all the - Sony STR-DN1010 | Operating Instructions - Page 60
press V/v repeatedly to select "Category Mode". 4 Press V/v repeatedly to select the channel, then press . The selected channel is being received. The channel information is displayed on the TV screen. Note When you select a channel in the "Category Mode", the channel you selected may not be the - Sony STR-DN1010 | Operating Instructions - Page 61
Tuner Operations Presetting SIRIUS Satellite Radio channels You can select the channels you want directly by presetting them using the preset numbers. You can preset up to 30 SIRIUS Satellite Radio channels. V/v/b, GUI MODE TOOLS/ OPTIONS MENU Presetting channels using the preset numbers 1 Press - Sony STR-DN1010 | Operating Instructions - Page 62
buttons RETURN/ EXIT O V/v/b, TOOLS/ OPTIONS 1 Select a channel you want to lock using Category Mode (page 59) or Direct Tuning (page 60). 2 Press "Enter your 4-digit lock code." appears. 5 Press SHIFT, then press the numeric buttons to enter your 4-digit lock code. "The channel has been locked." - Sony STR-DN1010 | Operating Instructions - Page 63
SHIFT, then press the numeric buttons to enter your 4-digit lock code. "The channel has been unlocked." appears and the channel is unlocked. Notes • When you select a channel using Category Mode, locked channels are skipped. • When the receiver is reset to the initial settings, the lock code returns - Sony STR-DN1010 | Operating Instructions - Page 64
due to the change by the broadcast service, or the receiving condition is not good. The selected channel is locked. - The subscription information has - been updated. Channel information is being - updated. The SiriusConnect Home tuner - firmware is being updated. There is no text information - Sony STR-DN1010 | Operating Instructions - Page 65
receiver outputs the sound from the front left/right speakers only. There is no sound from the subwoofer. Standard 2 channel stereo sources completely bypass the sound field processing and multi channel surround formats are downmixed to 2 channel. x A. DIRECT (Analog Direct) You can switch the audio - Sony STR-DN1010 | Operating Instructions - Page 66
decoding. A source recorded in 2 channel format is decoded into 7 channels. Music mode You can take advantage of surround sound simply by selecting one of the receiver's preprogrammed sound fields. They bring the exciting and powerful sound of concert halls into your home. x HALL (Hall) Reproduces - Sony STR-DN1010 | Operating Instructions - Page 67
will be output from the subwoofer if - the digital input signal contains LFE signals. - the front or surround speakers are set to "Small". - the sound field for movie is selected. - "Portable Audio" is selected. • The effects provided by the virtual speakers may cause increased noise in the playback - Sony STR-DN1010 | Operating Instructions - Page 68
of channels COAXIAL/OPTICAL HDMI 5.1 a a 6.1 a a 7.1 × a 7.1 × a 5.1 a a 6.1 a a 5.1 a a 7.1 × a 7.1 × a 7.1 × a a)Audio signals are output in another format if the playback component does not correspond to the format. For details, refer to the operating instructions - Sony STR-DN1010 | Operating Instructions - Page 69
Enjoying the surround effect at low volume levels (NIGHT MODE) This function allows you to retain a theater like environment at low settings Be sure to use the buttons on the receiver for this operation. ?/1 MUSIC 1 Press ?/1 to turn off the receiver. 2 While holding down MUSIC, press ?/1. "S.F. - Sony STR-DN1010 | Operating Instructions - Page 70
By connecting Sony components that are compatible with the "BRAVIA" Sync with an HDMI cable (not supplied), operation is simplified as follows: • One-Touch Play (page 72) • System Audio Control (page 72) • System Power Off (page 73) • Theater/Theatre Mode Sync (page 73) • Audio Return Channel (page - Sony STR-DN1010 | Operating Instructions - Page 71
If your TV is not compatible with the "Control for HDMI-Easy Setting" function GUI MODE V/v/b, MENU Notes • Before you do the "Control for HDMI-Easy Setting" from the TV, be sure to turn on the TV, connected components and receiver. • If the playback components cannot function after you have made - Sony STR-DN1010 | Operating Instructions - Page 72
speakers connected to the receiver by a simple operation. You can operate System Audio Control function using the TV menu. For details, refer to the operating instructions of the TV. TV Sets System Audio Control to on Receiver • Turns on (if in standby mode) • Switches to appropriate HDMI input - Sony STR-DN1010 | Operating Instructions - Page 73
field (Theater/Theatre Mode Sync) THEATER/ THEATRE AV ?/1 TV Press TV, then press AV ?/1. The TV, receiver and the components connected via HDMI are turned off. Notes • Set the TV Standby Synchro to "ON" before using the System Power Off function. For details, refer to the operating instructions of - Sony STR-DN1010 | Operating Instructions - Page 74
Channel) The Audio Return Channel (ARC) function enables the TV outputs the audio signals to the receiver via an HDMI cable connected to the HDMI TV OUT jack. You can enjoy the TV sound from the speakers connected to the receiver without connecting the TV AUDIO IN or TV OPTICAL IN jack. GUI MODE - Sony STR-DN1010 | Operating Instructions - Page 75
(not supplied): The S-AIR sub unit is for receiving sound. - Surround amplifier: You can enjoy surround and surround back speakers sound wirelessly. For details, refer to the operating instructions supplied with the surround amplifier. - S-AIR receiver: You can enjoy system sound in another room - Sony STR-DN1010 | Operating Instructions - Page 76
(ID setting) (page 77). • Pairing the S-AIR main unit with a specific S-AIR sub unit (Pairing operation) (page 78). • Other factors The following may cause poor reception. - Materials or structures, such as walls or place where S-AIR reception is stable. RETURN/ EXIT O GUI MODE V/v/b, MENU 76GB - Sony STR-DN1010 | Operating Instructions - Page 77
the same as that of the main unit" appears. 6 Press . 7 Press GUI MODE. The GUI menu turns off. 8 Set the S-AIR sub unit to the same surround amplifier and S-AIR receiver, refer to the operating instructions supplied with the surround amplifier and S-AIR receiver. S-AIR Operations continued 77GB - Sony STR-DN1010 | Operating Instructions - Page 78
). Your room Neighbor S-AIR main unit (this receiver) ID A ID A ID A S-AIR sub unit S-AIR sub unit ID B S-AIR sub unit Notes • Sources with copyright protection may not be playable on S-AIR sub unit. • If you have connected surround amplifier, surround sound will not be output from S-AIR - Sony STR-DN1010 | Operating Instructions - Page 79
the ID of the S-AIR main unit" (page 77). • To set the ID of the S-AIR sub unit, refer to the operating instructions supplied with the S-AIR sub unit. 3 Press GUI MODE. After "MENU ON" appears on the display for a while, "GUI" appears and the GUI menu appears on the TV screen. Press - Sony STR-DN1010 | Operating Instructions - Page 80
AIR receiver, refer to the operating instructions supplied with the S-AIR receiver. GUI MODE V/v/b, MENU 1 Set the ID of the S-AIR receiver AIR receiver, refer to the operating instructions supplied with the S-AIR receiver. Notes • When you are using another S-AIR sub unit, such as a surround - Sony STR-DN1010 | Operating Instructions - Page 81
system For details, refer to the operating instructions of the S-AIR receiver. Changing the channel for better sound transmission If you transmission may be improved by changing the "RF Change" setting. GUI MODE V/v/b, MENU 1 Press GUI MODE. After "MENU ON" appears on the display for a while, "GUI - Sony STR-DN1010 | Operating Instructions - Page 82
channel for IEEE 802.11b/g channel 6 - S-AIR ID C: equivalent channel for IEEE 802.11b/g channel 11 • The transmission may be improved by changing the transmission channel (frequency) of the other wireless system(s). For details, refer to the operating instructions (mains lead), speaker cords, or - Sony STR-DN1010 | Operating Instructions - Page 83
by setting "S-AIR Stby" to "ON". - Place so that S-AIR products are separated from other wireless devices. GUI MODE V/v/b, MENU S-AIR Operations - Place so that S-AIR products are separated from metal doors or tables. If you still cannot improve S-AIR reception, change the "RF Change" setting - Sony STR-DN1010 | Operating Instructions - Page 84
if "S-AIR Stby" is set to "ON". Advanced Operations Switching between digital and analog audio (INPUT MODE) When you connect components to both digital and analog audio input jacks on the receiver, you can fix the audio input mode to either of them, or switch from one to the other, depending on the - Sony STR-DN1010 | Operating Instructions - Page 85
but cannot find an unused input: DVD player To OPTICAL BD IN jack (audio signal) To COMPONENT VIDEO IN 1 jacks (video signal) Receiver Assign to DVD input jack using "Input Assign" in the Input Option menu. 1 Press GUI MODE. After "MENU ON" appears on the display for a while, "GUI" appears and - Sony STR-DN1010 | Operating Instructions - Page 86
5 Press V/v repeatedly to select "Input Assign", then press or b. The "Input Assign" screen appears. 6 Select the audio and/or video signals you want to assign to the input which you selected in step 3 using V/v/B/b. Input Assign Select Video COMP.2 COMP.3 CVBS Select Audio SAT OPT DVD COAX ANALOG - Sony STR-DN1010 | Operating Instructions - Page 87
source to the optical input jacks on the receiver. • When you assign the digital audio input, the INPUT MODE setting may change automatically. • You cannot reassign more than one HDMI input to the same input. • You cannot reassign more than one digital audio input to the same input. • You cannot - Sony STR-DN1010 | Operating Instructions - Page 88
1 Press GUI MODE. After "MENU ON Assign" to "BI-AMP", the speaker level and distance settings of the surround back speakers and front high speakers become invalid, and those of the front speakers are used. • If you set "SP Pattern" to a setting with surround back speakers or front high speakers - Sony STR-DN1010 | Operating Instructions - Page 89
TV VIDEO 1 2 Press V/v repeatedly to select "Settings", then press or b to enter the menu mode. The Setting menu list appears on the TV screen. AM AM SR SR Settings Auto Cal. Speaker Surround EQ Audio 3 Press V/v repeatedly to select the menu item you want, then press or b. Example: When you - Sony STR-DN1010 | Operating Instructions - Page 90
Setting menu list Menu Auto Cal. Speaker Surround EQ Audio Video HDMI System S-AIR Description Sets the speaker level or distance and makes the measurement automatically (page 90). Sets the speaker position manually (page 91). Adjusts the sound field (surround effect) you choose (page 95). Adjusts - Sony STR-DN1010 | Operating Instructions - Page 91
O. SB Assign (Surround back speaker assign) You can make settings for the surround back speaker(s) or front high speaker(s). Before you change "SB Assign" to "BI-AMP" or "Speaker B", be sure you have set "SP Pattern" to a setting without surround back speakers or front high speakers. • Speaker B If - Sony STR-DN1010 | Operating Instructions - Page 92
If you do not use "Speaker B" or "BI-AMP", select "OFF". Note Set "SB Assign" to "OFF", then connect the surround back speakers to this receiver when you want to change the connection from a bi-amplifier connection or speakers front B connection to a surround back speakers connection. Re-set up the - Sony STR-DN1010 | Operating Instructions - Page 93
sound is distorted, or you feel a lack of surround effects when using multi channel surround sound, select "Small" to activate the bass redirection circuitry and output the bass frequencies of each channel from the subwoofer or other "Large" speakers. Note This function does not work when "Analog - Sony STR-DN1010 | Operating Instructions - Page 94
speakers. 1 Press B/b repeatedly to select "Phase Audio", then press . 2 Press V/v repeatedly to adjust the parameter, then press . • OFF • LH/FR, LH/RH, FL/RH, FL/SR, SL/FL, SB/SL, SBL/SL, SBR/SBL, SR/SB, SR/SBR, SR/SL, FR/SR, FR/SL, CNT/FR, FL/CNT Lets you output front 2 channel - Sony STR-DN1010 | Operating Instructions - Page 95
Digital in meters. Surround Settings menu You surround sound field and adjust the Surround Sound" (page 65). To select the surround sound field 1 Press V/v repeatedly to select "S.F. Select", then press or b. 2 Press V/v repeatedly to select surround V/v repeatedly to select surround sound you want, - Sony STR-DN1010 | Operating Instructions - Page 96
kHz are being received. Dual Mono (Digital broadcast language selection) Lets you select the language you want to listen to during digital broadcast. This feature only functions for Dolby Digital sources. x Main/Sub Sound of the main language will be output through the front left speaker and sound - Sony STR-DN1010 | Operating Instructions - Page 97
Dec. Priority (Digital audio input decoding priority) Lets you specify the input mode for the digital signal input to the DIGITAL IN jacks or HDMI IN jacks. x AUTO Automatically switches the input mode between DTS, Dolby Digital, or PCM. x PCM When signals from the DIGITAL IN jack are selected, PCM - Sony STR-DN1010 | Operating Instructions - Page 98
is in the standby mode, the receiver continuously outputs HDMI signals from the receiver's HDMI TV OUT jack. x AUTO When the TV is turned on while the receiver is in the standby mode, the receiver outputs HDMI signals from the receiver's HDMI TV OUT jack. Sony recommends this setting if you use - Sony STR-DN1010 | Operating Instructions - Page 99
detected. Audio Out (Setting HDMI audio input) Lets you set the audio output for HDMI from the playback component connected to the receiver via an HDMI connection. x AMP The HDMI audio signals from the playback component is only output to the speakers connected to the receiver. Multi channel sound - Sony STR-DN1010 | Operating Instructions - Page 100
(Audio Return Channel) Lets you enjoy the TV sound from the speakers connected to the receiver via an HDMI cable. For details, see "Enjoying the TV sound via an HDMI cable" (page 74). x ON Audio signal is input to the HDMI TV OUT jack. x OFF Audio signal is input to the TV OPTICAL IN or TV AUDIO IN - Sony STR-DN1010 | Operating Instructions - Page 101
can operate this receiver using the display even if you do not use a GUI when a TV is not connected. AMP RETURN/ EXIT O GUI MODE V/v/B/b, unavailable or fixed and unchangeable. Using the menu in the display Press GUI MODE repeatedly to select "MENU OFF". When "GUI" is displayed on the display - Sony STR-DN1010 | Operating Instructions - Page 102
AUDIO] Front left speaker levela) [FL LEVEL] Front right speaker levela) [FR LEVEL] Center speaker levela) [CNT LEVEL] Surround left speaker levela) [SL LEVEL] Surround right speaker levela) [SR LEVEL] Surround back speaker levela) [SB LEVEL] Surround back left speaker levela) [SBL LEVEL] Surround - Sony STR-DN1010 | Operating Instructions - Page 103
Speaker settings [] Speaker pattern [SP PATTERN] Front speakers sizea) [FRT SIZE] Center speaker sizea) [CNT SIZE] Surround speakers sizea) [SUR SIZE] Front high speakers sizea) [FH SIZE] Surround back speaker assignc) [SB ASSIGN] Front left speaker Operations Surround back left speaker - Sony STR-DN1010 | Operating Instructions - Page 104
frequencye) [FH CROSS] Surround settings Sound field selection [] [S.F. SELECT] Effect levelf) [EFFECT] EQ settings [] Front speakers bass level [BASS] Front speakers treble level [TREBLE] Tuner settings FM station receiving mode [] [FM MODE] Naming preset stations [NAME - Sony STR-DN1010 | Operating Instructions - Page 105
decoding priority [DEC. PRIO.] Digital audio input assignment [A. ASSIGN] Resolution [RESOLUTION] Video input assignment [V. ASSIGN] Switching component signals [COMP. DEC.] Control for HDMI [CTRL:HDMI] HDMI Signal Pass Through [PASS THRU] Setting HDMI audio input [AUDIO OUT] Subwoofer level for - Sony STR-DN1010 | Operating Instructions - Page 106
if your speaker is set to "SMALL". f) You can only select this parameter if you select Cinema Studio A/B/C as sound field. g)This parameter is only available if the SiriusConnect Home tuner is connected to the SIRIUS jack on the receiver. h)This parameter is only available when HDMI input is - Sony STR-DN1010 | Operating Instructions - Page 107
operate on the receiver 1 Press GUI MODE repeatedly to select "MENU OFF". 2 Press AMP. Receiver operation speaker channel. F Front S Surround SB Surround back FH Front high Depending on the error code, the speaker channel may not appears. b)xx represent an error code. Advanced Operations - Sony STR-DN1010 | Operating Instructions - Page 108
' specifications. In this case, you can continue to use the receiver. * xxx represent a speaker channel. FL Front left FR Front right CNT Center SL Surround left SR Surround right SBL Surround back left SBR Surround back right LH Front left high RH Front right high SW Subwoofer - Sony STR-DN1010 | Operating Instructions - Page 109
, the measurement results for polarity may vary. However, there will be no problems even if you continue to use the receiver with that value. Selecting a sound field type For details on each sound field type, see "Enjoying Surround Sound" (page 65). Listening to the FM/AM radio For details on - Sony STR-DN1010 | Operating Instructions - Page 110
on SIRIUS Radio service, see "Listening to Satellite Radio" (page 57) in "Tuner Operations". Aiming the aim your antenna to where the best reception will be received. For details on the parameter, the receiver. 2 Press CATEGORY MODE repeatedly to select "ONE CAT". • ALL CAT: You can select a channel - Sony STR-DN1010 | Operating Instructions - Page 111
(Models of area code U2, CA2 only) 1 Select a channel you want to preset. For details on this operation, see "Selecting channels from a category (CATEGORY TUNING)" (page 110). 2 Press SHIFT, then press MEMORY. "MEM" lights up on the display. 3 Press PRESET + or PRESET - to select a preset number - Sony STR-DN1010 | Operating Instructions - Page 112
receiver. You can even program the remote to control nonSony components and also Sony receiver and point the remote towards the receiver when performing the following procedure. RM SET UP SHIFT AV flashes twice and the remote automatically exits the programming mode. 5 Repeat steps 1 to 4 to control - Sony STR-DN1010 | Operating Instructions - Page 113
times in quick succession while entering the numeric code, an error has occurred. Start again from step 1. The numeric codes 110 111, 116 116 112, 113, 114 115 116 117 115, 118, 119 120, 121, 122 To control a DAT deck Maker SONY PIONEER Code(s) 203 219 To control a tape deck Maker SONY - Sony STR-DN1010 | Operating Instructions - Page 114
PANASONIC SAMSUNG LG Code(s) 310, 311, 312 335 336 337 To control a PSX Maker SONY Code(s) 313, 314, 315 To control a DVD player Maker SONY BROKSONIC DENON HITACHI JVC MITSUBISHI ORITRON PANASONIC PHILIPS PIONEER RCA SAMSUNG TOSHIBA ZENITH Code(s) 401, 402, 403 424 405 416 415, 423 419 417 - Sony STR-DN1010 | Operating Instructions - Page 115
543, 567 503, 509, 510, 544 515, 534, 556 To control an LD player Maker SONY PIONEER Code(s) 601, 602, 603 606 To control a Video CD player Maker SONY Code(s) 605 To control a VCR Maker SONY AIWA* AKAI BLAUPUNKT EMERSON FISHER GENERAL ELECTRIC (GE) GOLDSTAR/LG HITACHI ITT/NOKIA JVC MAGNAVOX - Sony STR-DN1010 | Operating Instructions - Page 116
864 866, 871 868 867 873 872 875 869, 870 To control a cable box Maker Code(s) SONY 821, 822, 823 HAMLIN/REGAL 836, 837, 838, 839, 840 JERROLD/G.I./ MOTOROLA only), press and hold ?/1, then press AV ?/1. The RM SET UP indicator flashes 3 times. 2 Release all buttons. All the contents of the - Sony STR-DN1010 | Operating Instructions - Page 117
intended by filmmakers can be experienced at home. x Dolby Digital Digital audio encoding/decoding technology developed by Dolby Laboratories, Inc. It consists of front (left/right), center, surround (left/right) and subwoofer channels. It is a designated audio standard for DVD video and also known - Sony STR-DN1010 | Operating Instructions - Page 118
home theater experience. x DTS 96/24 A high sound quality digital signal format. It records audio at a sampling frequency and bit rate of 96 kHz/24bit which is the highest possible for DVD video. The number of playback channels varies depending on the software. x DTS Digital Surround Digital audio - Sony STR-DN1010 | Operating Instructions - Page 119
the odd and then all the even lines are drawn. "p" of "480p" stands for "Progressive". x S-AIR (Sony Audio Interactive Radio frequency) Recent times have seen the rapid spread of DVD media, Digital Broadcasting, and other high quality media. To ensure that the subtle nuances of these high quality - Sony STR-DN1010 | Operating Instructions - Page 120
x Sampling frequency To convert analog audio to digital, analog data should be quantified. This be changed only at a qualified service shop. On heat buildup Although the receiver heats up during operation, this is not a malfunction. If you continuously use this receiver at a large volume, the cabinet - Sony STR-DN1010 | Operating Instructions - Page 121
by changing the transmission channel (frequency) of the other wireless system(s). For details, refer to the operating instructions of the other wireless (s). If you have any questions or problems concerning your receiver, please consult your nearest Sony dealer. Additional Information 121GB - Sony STR-DN1010 | Operating Instructions - Page 122
while using the receiver, use this troubleshooting guide to help you remedy the problem. Should any problem persist, consult your nearest Sony dealer. Audio There is no sound, no matter which component is selected, or only a very low-level sound is heard. • Check that the speakers and components are - Sony STR-DN1010 | Operating Instructions - Page 123
(from COAXIAL or OPTICAL input jack). • Check that the INPUT MODE is set to "AUTO" (page 84). • Check that the "Analog Direct" is not being used. • Check that the selected digital audio input jack is not assigned to other inputs in "Input Assign" in the Input Option menu (page 85). • Set "ARC" to - Sony STR-DN1010 | Operating Instructions - Page 124
channel sound. • Check to make sure the selected digital audio input jack is not assigned to other inputs in "Input Assign" in the Input Option menu (page 85). There is no sound from the component connected to the DIGITAL MEDIA PORT adapter. • Adjust the volume of this receiver. • The DIGITAL MEDIA - Sony STR-DN1010 | Operating Instructions - Page 125
, press MENU. • Check that the TV is connected correctly. HDMI The source sound input from the HDMI jack on the receiver is not output from the speakers connected to the receiver or TV speaker. • Check the setting of "Audio Out" in the HDMI Settings menu (page 98). • Check that the component is - Sony STR-DN1010 | Operating Instructions - Page 126
TV, you may need to set up the component and TV. Refer to the operating instructions supplied with each component and TV. • Change the input of the receiver to the HDMI input connected to the component. When the receiver is in standby mode, there is no image or sound output from the TV. • When the - Sony STR-DN1010 | Operating Instructions - Page 127
feet (8 meters) away from this S-AIR main unit. • Sources with copyright protection may not be playable on S-AIR sub unit. • Place the S-AIR main display and the volume of the receiver becomes minimum. • Volume becomes minimum when you turn off the surround amplifier with headphones connected or if - Sony STR-DN1010 | Operating Instructions - Page 128
the message. See the following table to solve the problem. If any problem persists, consult your nearest Sony dealer. PROTECTOR Irregular current is output to the speakers, or upper panel of the receiver is covered with something. The receiver will automatically turn off after a few seconds. Check - Sony STR-DN1010 | Operating Instructions - Page 129
Auto Calibration measurement" (page 43), "DIGITAL MEDIA PORT message list" (page 51) and "SIRIUS Satellite Radio message list" (page 64). If you are unable to remedy the problem using the troubleshooting guide Clearing the receiver's memory may remedy the problem (page 37). However, note that all - Sony STR-DN1010 | Operating Instructions - Page 130
110 V AC, 60 Hz 2)Reference power output for front, center, surround, surround back and front high speakers Digital (Coaxial) Impedance: 75 ohms S/N: 100 dB (A, 20 kHz LPF) Digital (Optical) S/N: 100 dB (A, 20 kHz LPF) Output (Analog) AUDIO Hz HDMI Video (3D) Input/Output (HDMI Repeater block - Sony STR-DN1010 | Operating Instructions - Page 131
, 50/60 Hz AU1 230 V AC, 50 Hz TW2 110 V AC, 60 Hz Power output (DIGITAL MEDIA PORT) DC OUT: 5V, 0.7A MAX Power consumption Area code Power consumption U2, CA2, CEK, ECE, AU1, TW2 250 W Power consumption (during standby mode) 0.9 W (When "Ctrl for HDMI" and "S-AIR Stby" are set to "OFF - Sony STR-DN1010 | Operating Instructions - Page 132
43 DIGITAL MEDIA PORT 51 Error 128 SIRIUS 64 Movie mode 65 Music mode 66 Muting 47 N Name Input 47, 56 NIGHT MODE 69 O One-Touch Play 72 Option menu 45 P PAIRING 78 Parental Lock 62, 104 Party Mode 80 Phase Audio 94, 102 Phase Noise 94, 102 "PlayStation 3" 28 Position 90, 102 Preset channels 61, 110 - Sony STR-DN1010 | Operating Instructions - Page 133
menu 89 SIRIUS Satellite Radio 57, 110 Sleep Timer 52 Sound Field 65, 95 Speaker settings 91, 103 Subwoofer Level 99, 105 Super Audio CD player 24 Surround settings 95, 104 System Audio Control 72 System Power Off 73 System settings 105 T Test Tone 93, 102 Theater/Theatre Mode Sync 73 Tuner 53 Tuner - Sony STR-DN1010 | Operating Instructions - Page 134
- Sony STR-DN1010 | Operating Instructions - Page 135
- Sony STR-DN1010 | Operating Instructions - Page 136
Sony Corporation Printed in Malaysia
-
 1
1 -
 2
2 -
 3
3 -
 4
4 -
 5
5 -
 6
6 -
 7
7 -
8
-
9
-
10
-
11
-
12
-
13
-
14
-
15
-
16
-
17
-
18
-
19
-
20
-
21
-
22
-
23
-
24
-
25
-
26
-
27
-
28
-
29
-
30
-
31
-
32
-
33
-
34
-
35
-
36
-
37
-
38
-
39
-
40
-
41
-
42
-
43
-
44
-
45
-
46
-
47
-
48
-
49
-
50
-
51
-
52
-
53
-
54
-
55
-
56
-
57
-
58
-
59
-
60
-
61
-
62
-
63
-
64
-
65
-
66
-
67
-
68
-
69
-
70
-
71
-
72
-
73
-
74
-
75
-
76
-
77
-
78
-
79
-
80
-
81
-
82
-
83
-
84
-
85
-
86
-
87
-
88
-
89
-
90
-
91
-
92
-
93
-
94
-
95
-
96
-
97
-
98
-
99
-
100
-
101
-
102
-
103
-
104
-
105
-
106
-
107
-
108
-
109
-
110
-
111
-
112
-
113
-
114
-
115
-
116
-
117
-
118
-
119
-
120
-
121
-
122
-
123
-
124
-
125
-
126
-
127
-
128
-
129
-
130
-
131
-
132
-
133
-
134
-
135
-
136
 |
 |

©2010 Sony Corporation
4-174-068-
12
(1)
Multi Channel AV
Receiver
Operating Instructions
STR-DN1010