Sony STR-DN1010 Operating Instructions - Page 82
Stabilizing S-AIR reception, When S-AIR reception is poor
 |
UPC - 027242779945
View all Sony STR-DN1010 manuals
Add to My Manuals
Save this manual to your list of manuals |
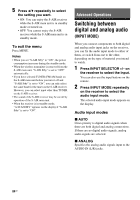
Page 82 highlights
4 Press V/v repeatedly to select "RF Change", then press or b. 5 Press V/v repeatedly to select the setting you want, then press . • AUTO: Normally select this. The system changes "RF Change" to "ON" or "OFF" automatically. • ON: The system transmits sound by searching for a better channel for transmitting. • OFF: The system transmits sound by fixing the channel for transmitting. 6 Press GUI MODE. The GUI menu turns off. 7 When you set "RF Change" to "OFF", select the ID so that sound transmission is most stable. Notes • In most cases, you will not need to change this setting. • If "RF Change" is set to "OFF", transmission between the S-AIR main unit and S-AIR sub unit can be performed using one of the following channels. - S-AIR ID A: equivalent channel for IEEE 802.11b/g channel 1 - S-AIR ID B: equivalent channel for IEEE 802.11b/g channel 6 - S-AIR ID C: equivalent channel for IEEE 802.11b/g channel 11 • The transmission may be improved by changing the transmission channel (frequency) of the other wireless system(s). For details, refer to the operating instructions of the other wireless system(s). Stabilizing S-AIR reception Check the following when S-AIR reception is poor or unstable. - Confirm the wireless adapters are inserted correctly (page 35). - Confirm that the S-AIR IDs of the S-AIR main unit and sub unit are the same (page 77). When S-AIR reception is poor Check the following. • Keep cords that are connected to the S-AIR product (AC power cord (mains lead), speaker cords, or other cords) away from the wireless adapter and slot. • Keep as much space as possible around S-AIR products. - Avoid placing S-AIR products on top of or directly below other electronic equipment. - Avoid placing S-AIR products in a closed rack, metal rack or under a table. 82GB
-
 1
1 -
2
-
3
-
4
-
5
-
6
-
7
-
8
-
9
-
10
-
11
-
12
-
13
-
14
-
15
-
16
-
17
-
18
-
19
-
20
-
21
-
22
-
23
-
24
-
25
-
26
-
27
-
28
-
29
-
30
-
31
-
32
-
33
-
34
-
35
-
36
-
37
-
38
-
39
-
40
-
41
-
42
-
43
-
44
-
45
-
46
-
47
-
48
-
49
-
50
-
51
-
52
-
53
-
54
-
55
-
56
-
57
-
58
-
59
-
60
-
61
-
62
-
63
-
64
-
65
-
66
-
67
-
68
-
69
-
70
-
71
-
72
-
73
-
74
-
75
-
76
-
 77
77 -
 78
78 -
 79
79 -
 80
80 -
 81
81 -
 82
82 -
 83
83 -
 84
84 -
 85
85 -
 86
86 -
 87
87 -
88
-
89
-
90
-
91
-
92
-
93
-
94
-
95
-
96
-
97
-
98
-
99
-
100
-
101
-
102
-
103
-
104
-
105
-
106
-
107
-
108
-
109
-
110
-
111
-
112
-
113
-
114
-
115
-
116
-
117
-
118
-
119
-
120
-
121
-
122
-
123
-
124
-
125
-
126
-
127
-
128
-
129
-
130
-
131
-
132
-
133
-
134
-
135
-
136
 |
 |
