Sony STR-DN1010 Operating Instructions - Page 79
To perform pairing, If pairing fails, To quit pairing during setting, To cancel pairing
 |
UPC - 027242779945
View all Sony STR-DN1010 manuals
Add to My Manuals
Save this manual to your list of manuals |
Page 79 highlights
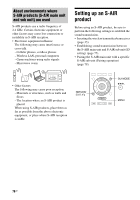
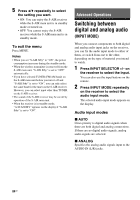
To perform pairing 1 Place the S-AIR sub unit that you want to pair near the S-AIR main unit. 2 Match the IDs of the S-AIR main unit and the S-AIR sub unit. • To set the ID of the S-AIR main unit, see "To set the ID of the S-AIR main unit" (page 77). • To set the ID of the S-AIR sub unit, refer to the operating instructions supplied with the S-AIR sub unit. 3 Press GUI MODE. After "MENU ON" appears on the display for a while, "GUI" appears and the GUI menu appears on the TV screen. Press MENU if the GUI menu does not appear on the TV screen. 4 Press V/v repeatedly to select "Settings", then press or b. The Settings menu list appears on the TV screen. 5 Press V/v repeatedly to select "S-AIR", then press or b. Note When the S-AIR transmitter (not supplied) is not inserted into the S-AIR main unit, "S-AIR" cannot be selected. 6 Press V/v repeatedly to select "Pairing", then press or b. "Put the S-AIR sub unit near the S-AIR main unit. Turn on power and start pairing." appears on the TV screen. The S-AIR main unit is ready to start pairing. 7 Press B/b repeatedly to select "Yes", then press . The S-AIR main unit starts pairing. "Pairing. Do the pairing operation with the S-AIR sub unit." appears. 8 Start pairing of the S-AIR sub unit. Refer to the operating instructions of the S-AIR sub unit. Notes • Perform pairing within 5 minutes in step 7. If you do not, pairing is recognized as failed, and the screen changes accordingly. In this case, see "If pairing fails" (page 79). • When sound transmission is established, "Pairing complete. To do the pairing another one, select "Continue"." appears. 9 Press B/b repeatedly to select "Finish" or "Continue", then press . • "Finish": Finishes pairing. • "Continue": Continues to perform pairing to another S-AIR sub unit. Tip You can confirm the pairing completion or the current ID by checking the "S-AIR Settings" screen. "Pairing" appears beside the current S-AIR ID. 10 Press GUI MODE. The GUI menu turns off. Note After you have performed pairing, if you select the "S-AIR ID" menu, the ID setting ("A", "B" or "C") that you last used is displayed. If pairing fails "Pairing failed. Retry?" appears. To perform pairing again, select "Yes". To finish pairing, select "No". To quit pairing during setting Press RETURN/EXIT O. To cancel pairing Perform the ID setting of the main unit according to the procedure of "To set the ID of the S-AIR main unit" (page 77). If you reset the ID (even the same ID again), pairing is canceled. 79GB S-AIR Operations
-
 1
1 -
2
-
3
-
4
-
5
-
6
-
7
-
8
-
9
-
10
-
11
-
12
-
13
-
14
-
15
-
16
-
17
-
18
-
19
-
20
-
21
-
22
-
23
-
24
-
25
-
26
-
27
-
28
-
29
-
30
-
31
-
32
-
33
-
34
-
35
-
36
-
37
-
38
-
39
-
40
-
41
-
42
-
43
-
44
-
45
-
46
-
47
-
48
-
49
-
50
-
51
-
52
-
53
-
54
-
55
-
56
-
57
-
58
-
59
-
60
-
61
-
62
-
63
-
64
-
65
-
66
-
67
-
68
-
69
-
70
-
71
-
72
-
73
-
 74
74 -
 75
75 -
 76
76 -
 77
77 -
 78
78 -
 79
79 -
 80
80 -
 81
81 -
 82
82 -
 83
83 -
 84
84 -
85
-
86
-
87
-
88
-
89
-
90
-
91
-
92
-
93
-
94
-
95
-
96
-
97
-
98
-
99
-
100
-
101
-
102
-
103
-
104
-
105
-
106
-
107
-
108
-
109
-
110
-
111
-
112
-
113
-
114
-
115
-
116
-
117
-
118
-
119
-
120
-
121
-
122
-
123
-
124
-
125
-
126
-
127
-
128
-
129
-
130
-
131
-
132
-
133
-
134
-
135
-
136
 |
 |
