Sony STR-DN1010 Operating Instructions - Page 84
Advanced Operations, Switching between digital and analog audio (INPUT MODE), INPUT MODE
 |
UPC - 027242779945
View all Sony STR-DN1010 manuals
Add to My Manuals
Save this manual to your list of manuals |
Page 84 highlights
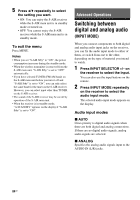
5 Press V/v repeatedly to select the setting you want. • ON: You can enjoy the S-AIR receiver while the S-AIR main unit is in standby mode or turned on. • OFF: You cannot enjoy the S-AIR receiver while the S-AIR main unit is in standby mode. To exit the menu Press MENU. Notes • When you set "S-AIR Stby" to "ON", the power consumption increases during the standby mode. • When the wireless transmitter is removed from the S-AIR main unit, "S-AIR Stby" is set to "OFF" automatically. • If you have selected TUNER (FM/AM band) on the S-AIR main unit before you turn it off and "S-AIR Stby" is set to "ON", you can only select the same band for the tuner on the S-AIR receiver. However, you can select input other than TUNER on the S-AIR receiver. • The sound of the S-AIR receiver may be cut off by operation of the S-AIR main unit. • When the receiver is in standby mode, "A.STANDBY" appears on the display if "S-AIR Stby" is set to "ON". Advanced Operations Switching between digital and analog audio (INPUT MODE) When you connect components to both digital and analog audio input jacks on the receiver, you can fix the audio input mode to either of them, or switch from one to the other, depending on the type of material you intend to watch. 1 Press INPUT SELECTOR +/- on the receiver to select the input. You can also use the input buttons on the remote. 2 Press INPUT MODE repeatedly on the receiver to select the audio input mode. The selected audio input mode appears on the display. Audio input modes x AUTO Gives priority to digital audio signals when there are both digital and analog connections. If there are no digital audio signals, analog audio signals are selected. x ANALOG Specifies the analog audio signals input to the AUDIO IN (L/R) jacks. 84GB
-
 1
1 -
2
-
3
-
4
-
5
-
6
-
7
-
8
-
9
-
10
-
11
-
12
-
13
-
14
-
15
-
16
-
17
-
18
-
19
-
20
-
21
-
22
-
23
-
24
-
25
-
26
-
27
-
28
-
29
-
30
-
31
-
32
-
33
-
34
-
35
-
36
-
37
-
38
-
39
-
40
-
41
-
42
-
43
-
44
-
45
-
46
-
47
-
48
-
49
-
50
-
51
-
52
-
53
-
54
-
55
-
56
-
57
-
58
-
59
-
60
-
61
-
62
-
63
-
64
-
65
-
66
-
67
-
68
-
69
-
70
-
71
-
72
-
73
-
74
-
75
-
76
-
77
-
78
-
 79
79 -
 80
80 -
 81
81 -
 82
82 -
 83
83 -
 84
84 -
 85
85 -
 86
86 -
 87
87 -
 88
88 -
 89
89 -
90
-
91
-
92
-
93
-
94
-
95
-
96
-
97
-
98
-
99
-
100
-
101
-
102
-
103
-
104
-
105
-
106
-
107
-
108
-
109
-
110
-
111
-
112
-
113
-
114
-
115
-
116
-
117
-
118
-
119
-
120
-
121
-
122
-
123
-
124
-
125
-
126
-
127
-
128
-
129
-
130
-
131
-
132
-
133
-
134
-
135
-
136
 |
 |
